How to Remove Hard Drive From Laptop – There are a lot of reasons for you to remove a hard drive from a laptop. For example, when the computer is crashed, you can remove the hard drive from laptop and use it as an external hard drive. Or when you want to upgrade hard drive of the laptop, you can remove it from the laptop and replace it with a new and larger one.
Of course, there are also some other reasons that may require you to remove hard drive from laptop. So, in this post, we will show you how to remove hard drive from laptop with the detailed instructions.
Table of Contents
Step 1: Tools Needed
Jeweler’s screwdriver, laptop with hard drive.Add TipAsk QuestionCommentDownload
Step 2: Safety Considerations
Warning-do not work on your laptop while it has a source of power, you will get shocked. Before beginning any work on your laptop ensure that the power cord is unplugged and the battery is removed. Depressing the power button for a couple of seconds after taking out the battery is also a good idea; it reassures you that there is no more electricity in the laptop.
As for the safety of your hard drive, it is a well-known fact that magnets can erase information stored electronically. This is true; however the magnets have to be fairly powerful to do this. I do recommend keeping any magnets away from your work area (better safe than sorry); however I would not worry too much if a refrigerator magnet accidently comes into contact with your laptop.Add TipAsk QuestionCommentDownload
Step 3: Remove All Power Sources
Make sure the laptop is unplugged and remove the battery. To do so simply slide both tabs (blue arrows) to the outside and push the battery away from the computer (red arrow). After the battery has been removed, depress the power button for three seconds to remove any residual charge.
Step 4: Remove Screws
Once you are confident all power has been drained from the laptop you can begin to take it apart. Begin by removing the screws circled in red. Do not remove the screws that are circled in blue just yet, they are the ones that secure the hard drive. Once the screws circled in red have been removed, remove the cover outlined in red.Add TipAsk QuestionCommentDownload
Step 5: Remove More Screws
Remove the screws circled in red.Add TipAsk QuestionCommentDownload
Step 6: Remove CD/DVD Reader
Remove the CD/DVD (outlined in yellow) reader by simply pulling the entire unit out.Add TipAsk QuestionCommentDownload
Step 7: Remove the Keyboard
To remove the keyboard you will have to depress the four tabs at the top of the keyboard (outlined in red) and lift up on the keyboard. You will have to use the jeweler’s screwdriver to reach the tabs. It is easiest to depress one tab at a time, starting at one of the corners, and lift up on that piece of the keyboard.
The tabs are not a part of the keyboard, rather they are a part of the surrounding case and they protrude out onto the keyboard, keeping the keyboard in place.
Once the keyboard is freed do not pull it up with force! See the next step.Add TipAsk QuestionCommentDownload
Step 8: Remove Keyboard Cable
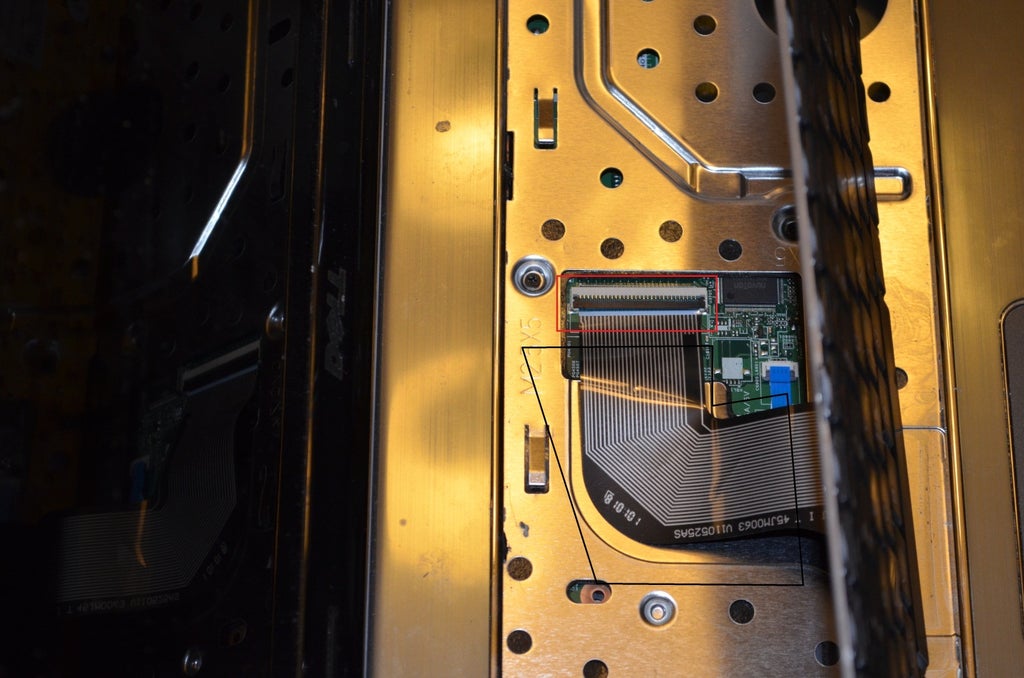
Once the keyboard is freed from all 4 tabs, lift up on the keyboard to reveal the keyboard cable (outlined in black). The cable is very thin so be careful and do not try to yank it out (unless you don’t plan on re-using the keyboard). Lift up on the black connector tab (outlined in red) to remove the cable.Add TipAsk QuestionCommentDownload
Step 9: Remove Strips
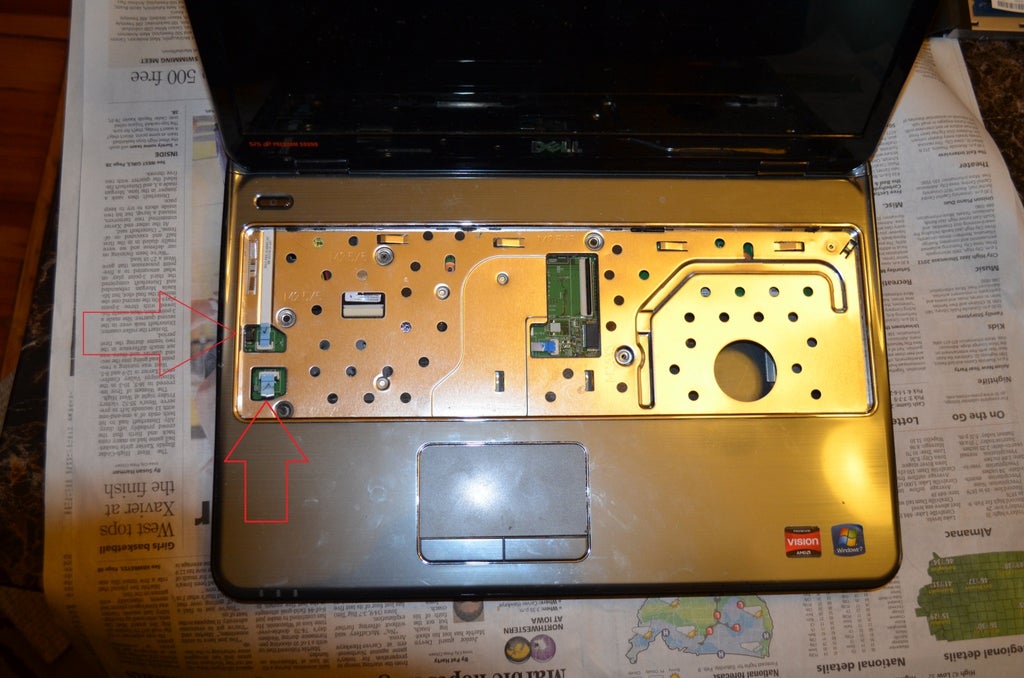
You will need to remove the plate seen here to gain access to the hard drive. First, unhook the strips indicated by the red arrows (see the next step.)Add TipAsk QuestionCommentDownload
Step 10: Remove Strips (Continued)
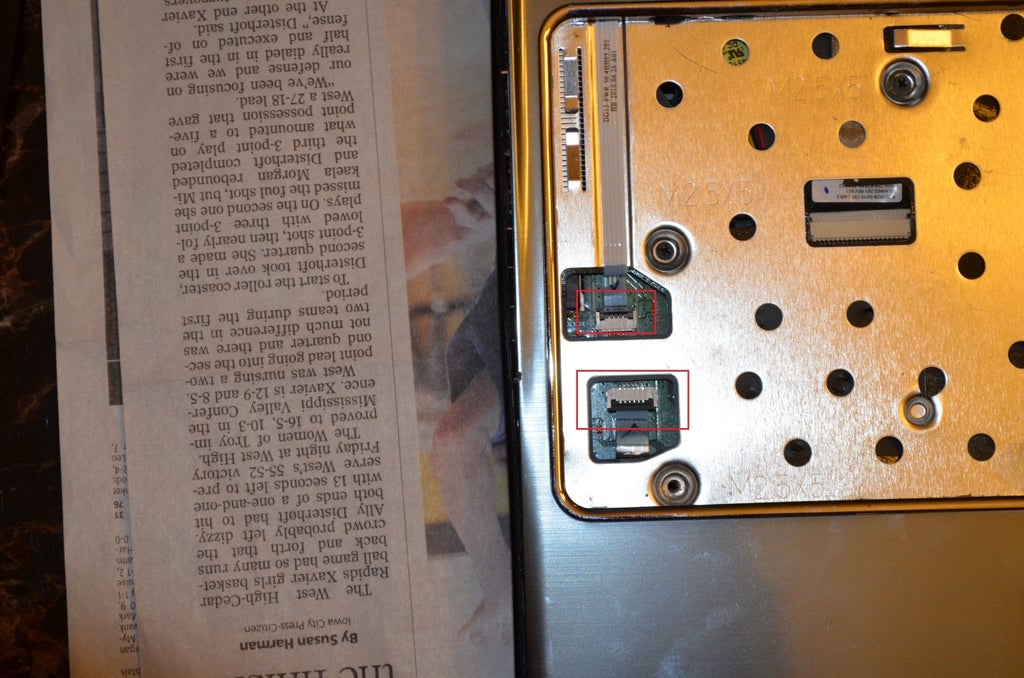
In the same way you removed the keyboard cable, lift up on the black connector tabs (outlined in red) to free the strips.Add TipAsk QuestionCommentDownload
Step 11: Remove More Screws

Next remove the screws securing the plate (circled in red.) Then simply lift the plate up and set aside.Add TipAsk QuestionCommentDownload
Step 12: Locate Hard Drive
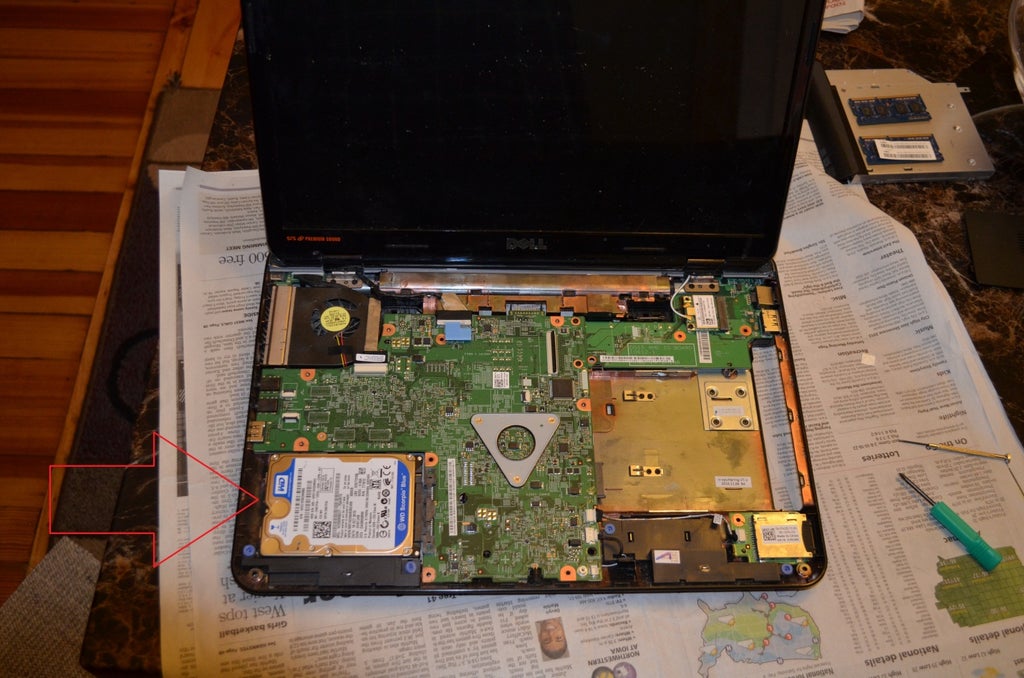
Almost done! The hard drive is indicated by the red arrow. To remove it you need to unscrew the screws securing it to the laptop (see the next step.)Add TipAsk QuestionCommentDownload
Step 13: Remove Hard Drive Screws

Now is the time to remove the screws circled in blue (the ones we left alone in step #4.) Once removed the hard drive will be free to be pulled out.Add TipAsk QuestionCommentDownload
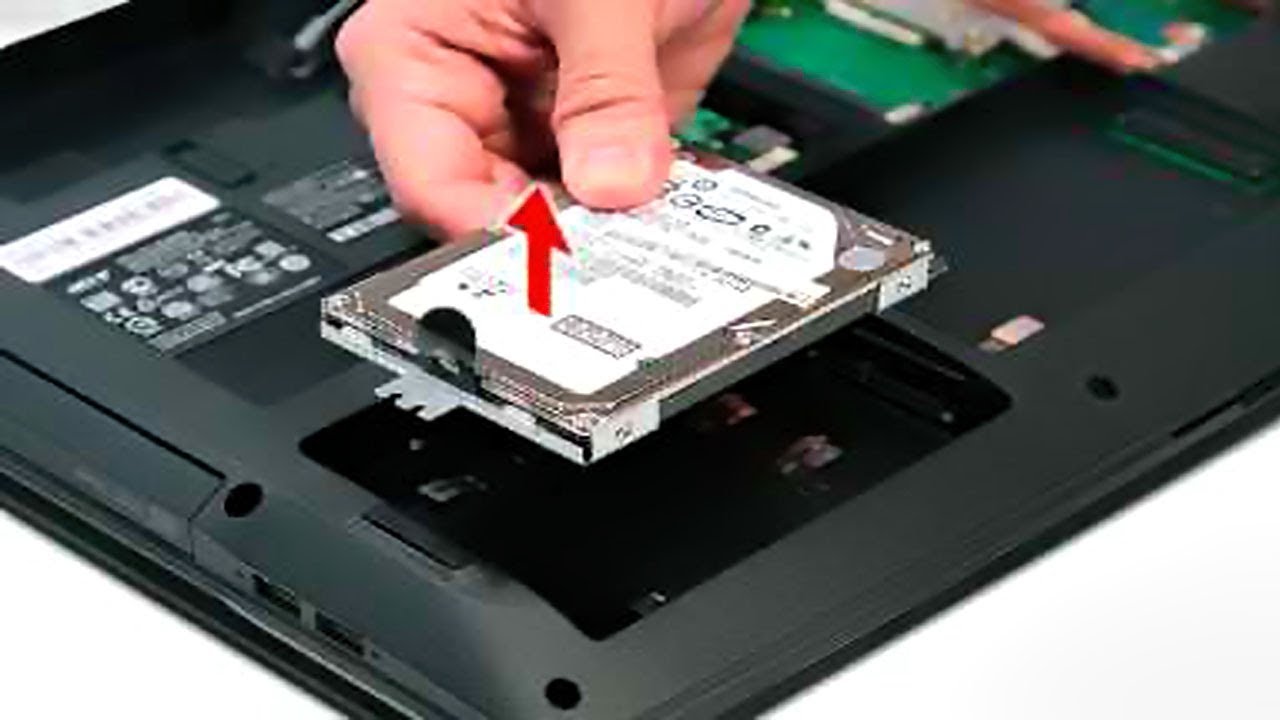
Step 14: Pull Out Hard Drive

Lastly, slide the hard drive in the direction of the red arrow to remove it from its connection to the laptop, lift it out and you’re done!
Conclusion
The way you remove a hard drive from a laptop varies from one laptop from another. Generally, you can access the hard drive through the access panel, or a side panel. Disconnect the power cable and the battery before beginning. You will need a screwdriver.