How to Create Query in Access – A database query lets you enter search terms to only return certain entries. Here’s how to make a sample query using the Query Wizard and the Northwind sample database in Access 2010.
Table of Contents
What are queries?
Queries are a way of searching for and compiling data from one or more tables. Running a query is like asking a detailed question of your database. When you build a query in Access, you are defining specific search conditions to find exactly the data you want.
How are queries used?
Queries are far more powerful than the simple searches or filters you might use to find data within a table. This is because queries can draw their information from multiple tables. For example, while you could use a search in the customers table to find the name of one customer at your business or a filter on the orders table to view only orders placed within the past week, neither would let you view both customers and orders at once. However, you could easily run a query to find the name and phone number of every customer who’s made a purchase within the past week. A well-designed query can give information you might not be able to find out just by examining the data in your tables.
When you run a query, the results are presented to you in a table, but when you design one you use a different view. This is called Query Design view, and it lets you see how your query is put together.
View Options
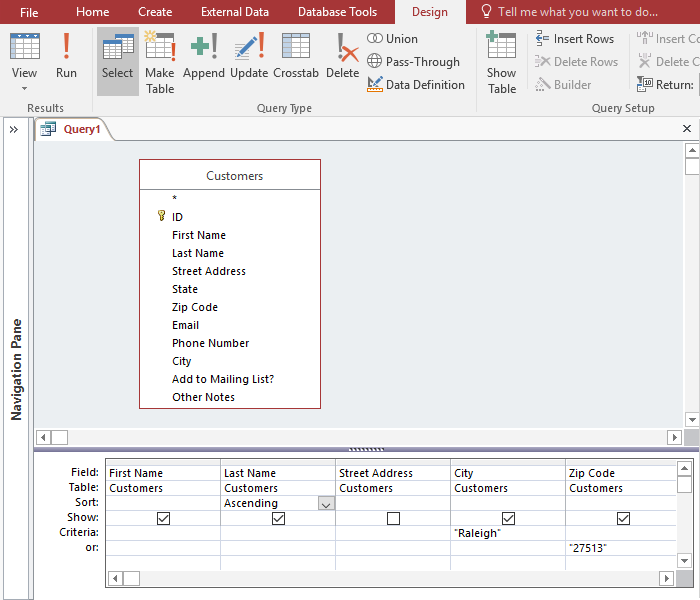
Click the View drop-down arrow to switch to another view of your query. In most cases, you will only need to use two main views: Datasheet view and Design view. Datasheet view lets you view your query results in the form of a table. Design view, featured here, allows you to view and modify the design of your query.

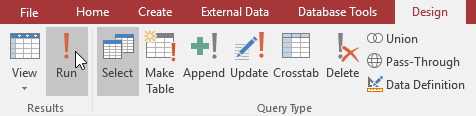
Run Query Command
After you have designed your query, click the Run command to view the results of the query in a table.
Object Relationship Pane
All of the tables you choose to include in your query will appear as small windows in the Object Relationship pane. Each window contains a list of every available field within that table.
The Design Grid
The bottom part of Query Design view is called the design grid. It contains a table that lists all of the fields included in the query. Within this table, you can set criteria to specify which information the query should retrieve.
Fields and Table Names
The first row of the design grid contains the names of the fields included in the query. Directly beneath each field name is the name of the table that field belongs to.
Sorting
You can sort the data retrieved by a query. Simply click in the Sort: row of the field you want to sort, and select either an Ascending or Descending sort. By default, query results are not sorted.
Showing and Hiding Fields
You may want to include fields in the design of your query but hide them in the query results. To hide a field, uncheck the checkbox in the Show: row of that field.
Query Criteria
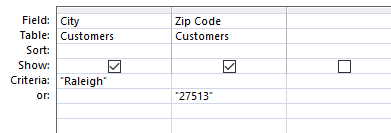
Entering query criteria lets you specify exactly what type of information you want your query to retrieve. Simply type the desired criteria in the Criteria: row of the field you want to search. Here, the criteria has been set so the query will search for records with Raleigh in the City field or zip code 27513.
One-table queries
Let’s familiarize ourselves with the query-building process by building the simplest query possible: a one-table query.
We will run a query on the Customers table of our bakery database. Let’s say our bakery is having a special event, and we want to invite our customers who live nearby because they are the most likely to come. This means we need to see a list of all customers who live close by, and only those customers.
We want to find our customers who live in the city of Raleigh, so we’ll search for “Raleigh” in the City field. Some customers who live in the suburbs live fairly close by, and we’d like to invite them as well. We’ll add their zip code, 27513, as another criteria.
If you think this sounds a little like applying a filter, you’re right. A one-table query is actually just an advanced filter applied to a table.
To create a simple one-table query:
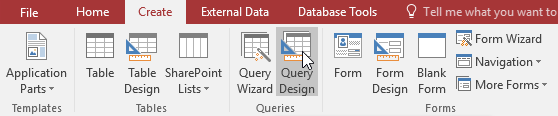
- Select the Create tab on the Ribbon, and locate the Queries group.
- Click the Query Design command.
- Access will switch to Query Design view. In the Show Table dialog box that appears, select the table you want to run a query on. We are running a query on our customers, so we’ll select the Customers table.
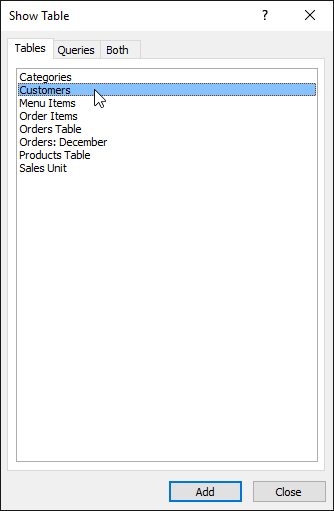
- Click Add, then click Close.
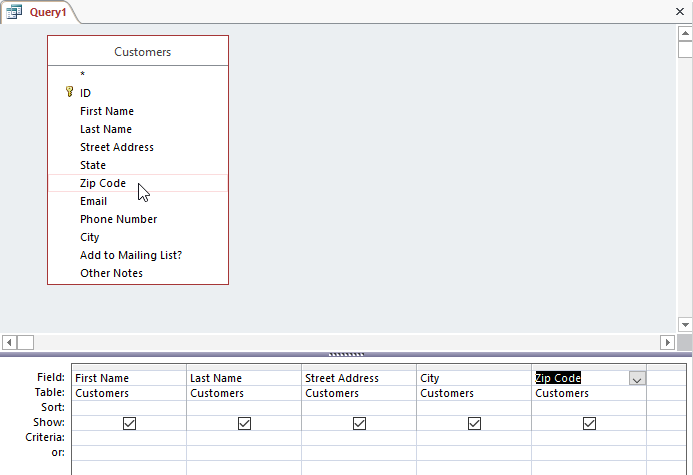
- The selected table will appear as a small window in the Object Relationship pane. In the table window, double-click the field names you want to include in your query. They will be added to the design grid in the bottom part of the screen. In our example, we want to mail invitations to customers who live in a certain area, so we’ll include the First Name, Last Name, Street Address, City, and Zip Code fields.
- Set the search criteria by clicking the cell in the Criteria: row of each field you want to filter. Typing criteria into more than one field in the Criteria: row will set your query to include only results that meet all criteria. If you want to set multiple criteria but don’t need the records shown in your results to meet all of them, type the first criteria in the Criteria: row and additional criteria in the or: row and the rows beneath it. Because we want to find customers who either live in Raleigh or in the 27513 zip code, we’ll type “Raleigh” in the City field and “27513” into the or: row of the Zip Code field. The quotation marks will search these fields for an exact match.
- After you have set your criteria, run the query by clicking the Run command on the Design tab.
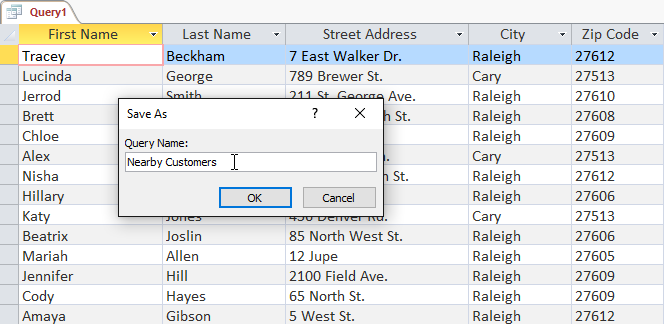
- The query results will be displayed in the query’s Datasheet view, which looks like a table. If you want, save your query by clicking the Save command in the Quick Access Toolbar. When prompted to name it, type the desired name, then click OK.
Now you know how to create the simplest type of query with only one table. In the next lesson, you’ll learn how to create a query that uses multiple tables.
Conclusion
If you’re new to writing queries, the Query Wizard is a fast, easy way to get started. It walks you through the process of selecting tables and fields for your query — and can even add some summary calculations (such as counting records) to your query.