When you are facing issues about convert picture to pdf iphone, then don’t have to worry about that. We are here to provide you with creative techniques that will help you resolve this issue.
It is very easy to create pdf on iphone. There are many software available to help you in this; some of them are paid for. This article will explain how to create pdf on iphone without spending money.
Table of Contents
Create PDF On iPhone/iPad For Free
How many times do we use our iPhone’s Camera and capture photos of documents like medical bills, invoices, etc? Now if you want to share these documents with others it’s best to share a PDF instead of Photos.
PDF(Portable Document Format) is a powerful format and this cannot be denied because of its compatibility across different operating systems. There is no need for software to open PDF files and you can even open PDF files without PDF reader. All in all, PDF is a quick and reliable way to share documents with anyone.
Keeping this in mind, I will let you know how to convert Photos to PDF on iPhone apart from creating a PDF for almost anything like web pages, Notes, and more without using any app.
You will be happy and surprised at the same time to know that the functionality to create PDF is built right into your iOS device. But not many are aware of it. So, let’s see how to make use of the feature.
Method 1: Save Website As PDF On iPhone/iPad
1. Open the desired web page or website on Safari browser.
2. I would highly recommend you to enable Readers Mode by tapping on the icon at the left corner in the address bar. Activating Readers mode in a web page will clear all the mess like ads, social sharing icons, etc. which will improve readability and decrease the pages in the PDF document.
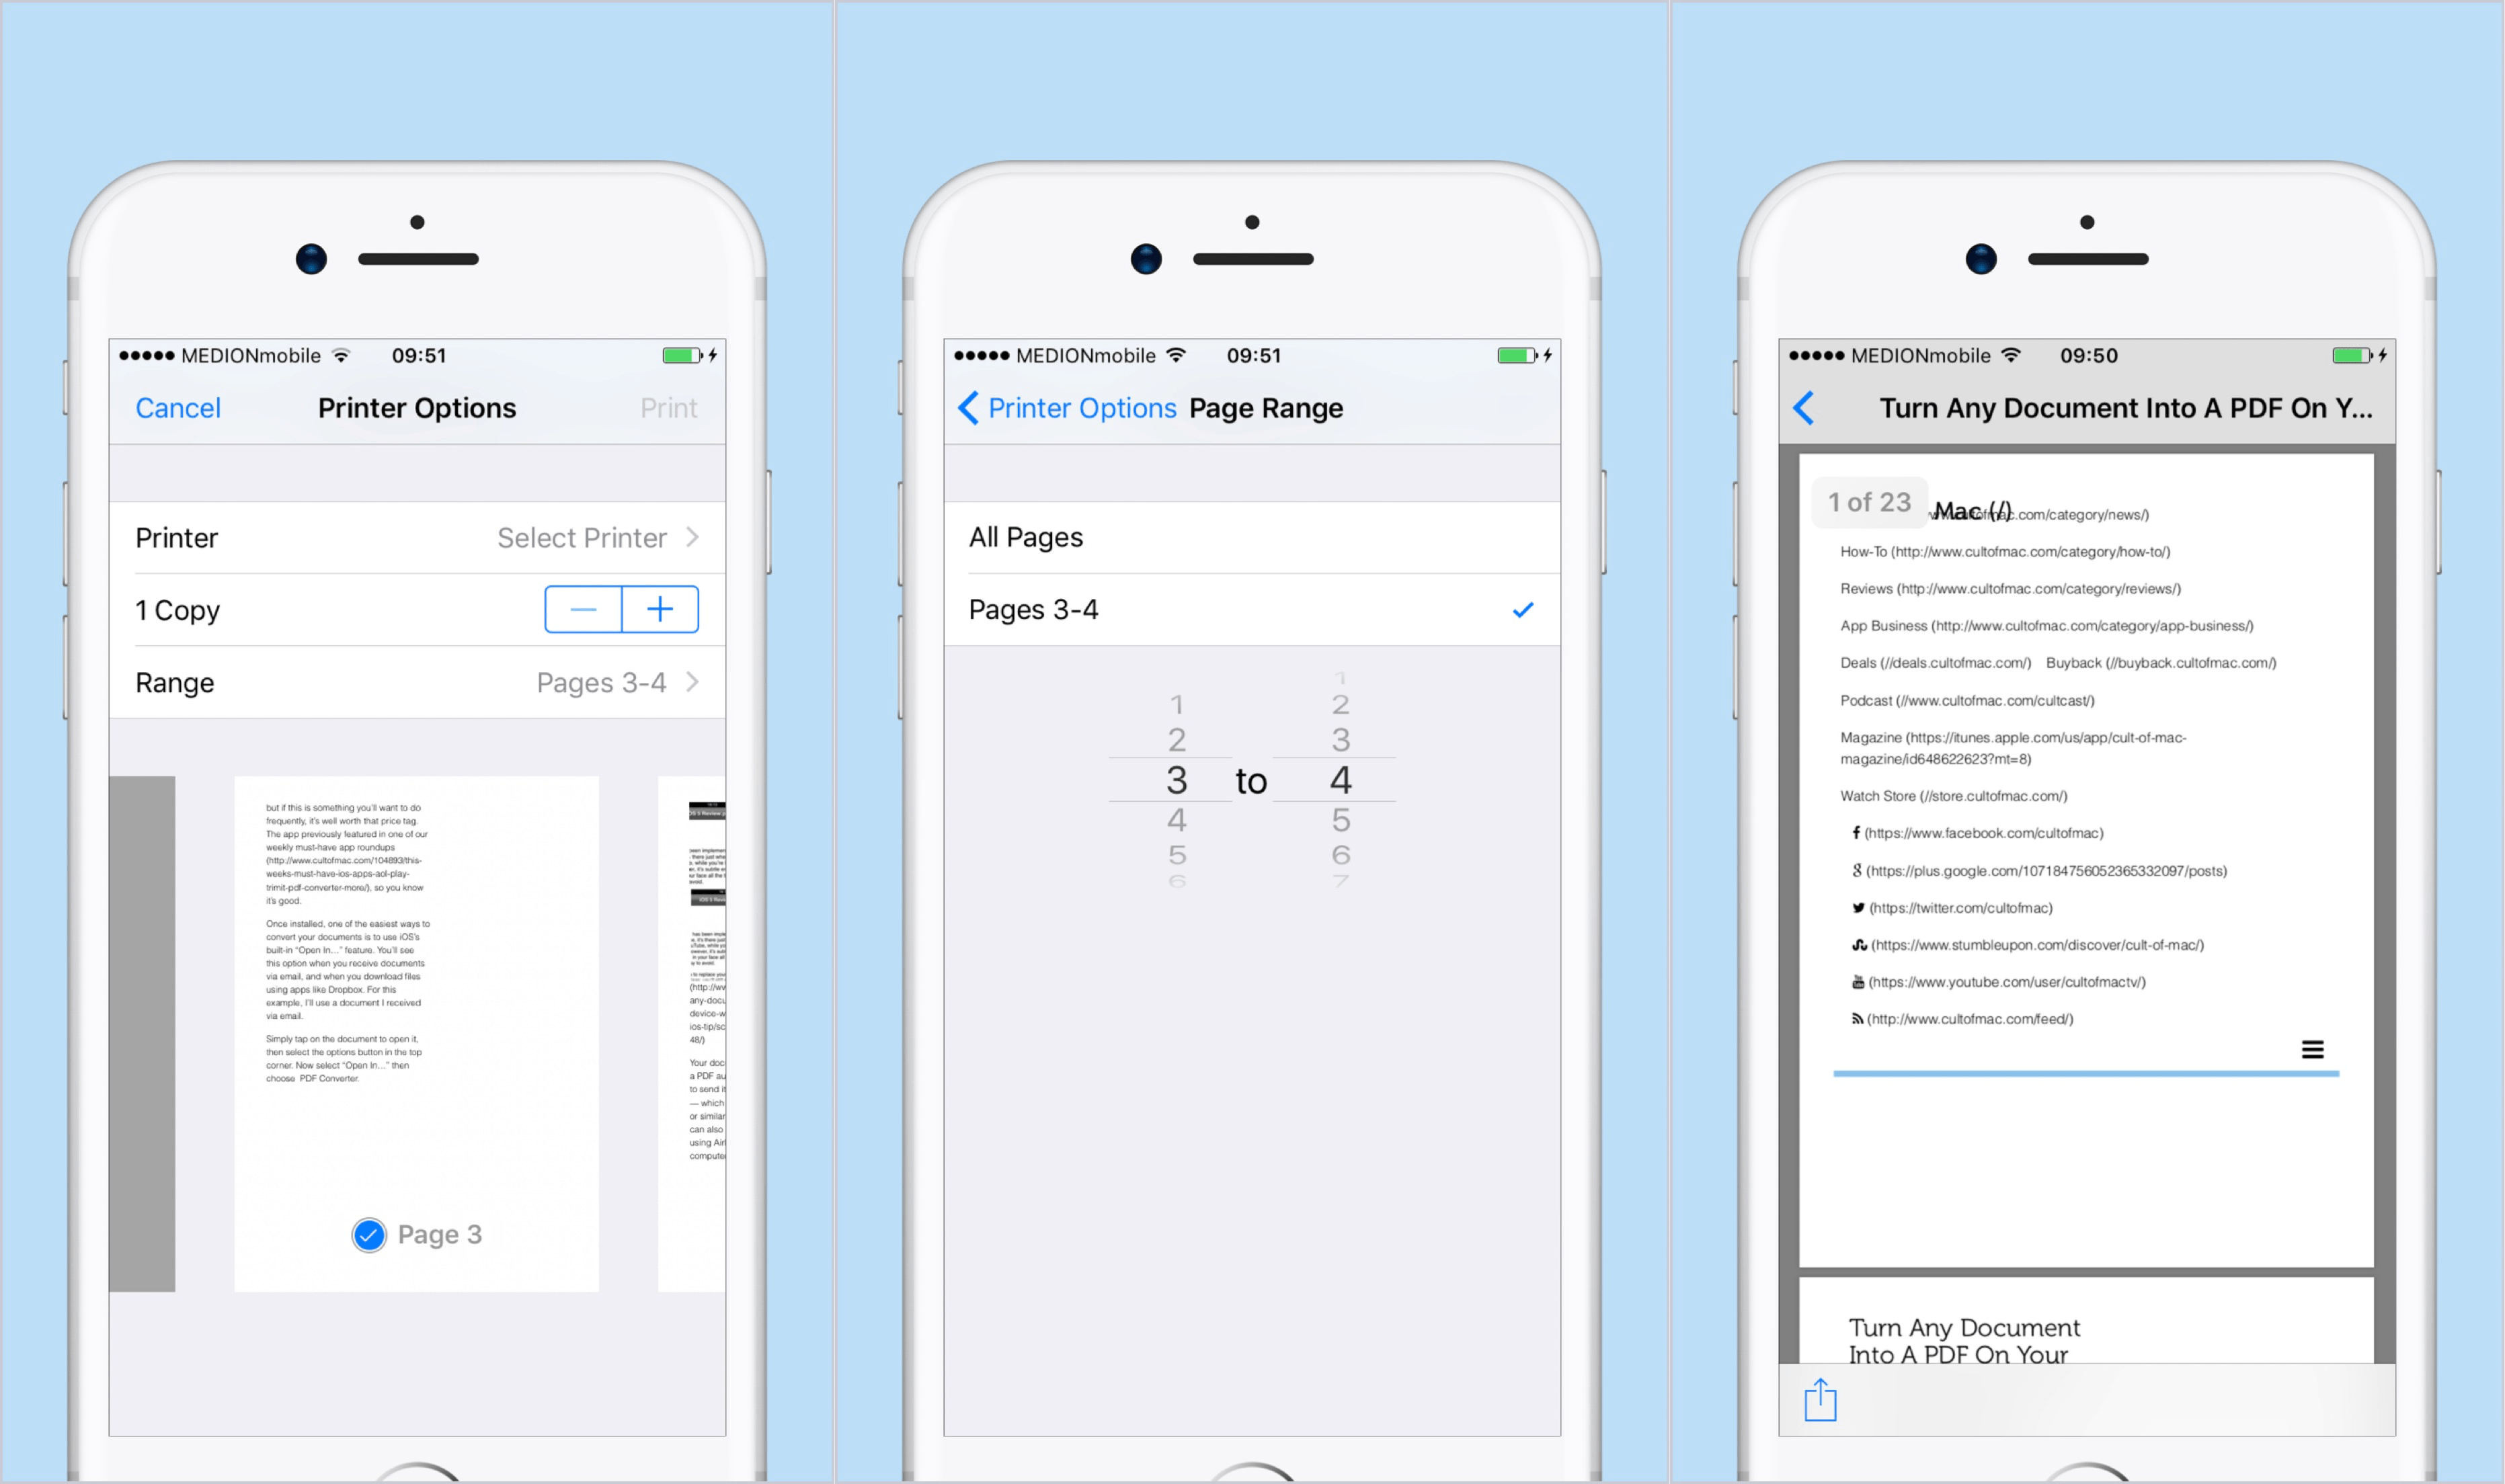
3. Now, tap on the share icon at the bottom and select Print. You should find it somewhere in the bottom row. Don’t panic there is no need of a printer.
4. On the next screen, Printer Options will appear.
The web page will be listed as pages. Select the desired pages you want in the PDF document. By default, all the pages will be selected. Swipe towards the left to navigate to the other pages and remove them by tapping if desired.
5. After making the selection of pages, pinch and zoom near the area where you see the pages as if you are zooming into a photo.
6. The PDF is created, you can now share it with anyone by tapping on the Share icon at the bottom left. Select the desired medium. You have a choice to share it on WhatsApp as well.
You can send it to yourself via Email if need be.
As I stated earlier, this method is not only limited to web pages but you can also create PDF from iPhone/iPad images or Notes.
Method 2: Convert Photos To PDF On iPhone/iPad
Steps
- Open the iPhone Photos app. This icon looks like a multicolored flower. You can find this app on your home screen or by searching.
- This method also works for iPads and the iPod Touch.
- Tap a photo. If you don’t see the picture you want to make a PDF, you can also narrow the pictures down by selecting an album at the bottom of your screen.
- If you want to select multiple pictures, you can long-tap on one until it gets a blue checkmark in the upper left corner of the picture thumbnail, then tap more to add them to your selection.
- Tap the share icon . You’ll see this in the bottom-left corner of your screen.
- Tap Print next to the icon of a printer. This is usually in the bottom row of the “share” menu, but if you don’t see this printer icon, tap More and you should find it in there.
- Zoom in on the photo. If you “zoom” on the photo (the reverse of the “pinch” gesture), you’ll be able to save the photo as a PDF.
- This opens it in a PDF viewer.
- Tap the share icon . You’ll see this in the upper right corner of your screen.
- Tap Save to Files. You’ll find this folder-shaped icon in the bottom menu, next to the page icons for “Copy.”
- Tap to select a save location. You can choose if you want to save the PDF in a cloud service or on your iPhone directly.
- If you opt to save the photo to your phone, you’ll most likely be able to select a folder to save it in, like Word.[1]
- Tap Save. You’ll see this in the upper right corner of your screen. The PDF of your photo will be added to the save location once you tap this.
Method 3: Create PDF From Web Pages On iPhone/iPad
Here’s how you can make use of the option that was introduced in iOS 11.
1. Open Safari browser and navigate to the desired website.
2. Once you are there, tap on the 4 lines icon on the left of the address bar. Doing this will clear all the clutter from the webpage like ads etc.
3. Now, tap on the share icon at the bottom tab. Swipe left on the bottom row until you find Create PDF. Tap on it.
4. With this, the web page is converted to PDF. Next, tap on Done at the top left and select Save File To…
5. Select the location in the iCloud drive you would like to save the PDF and tap on Add at the top right.
You can also share the PDF directly without saving it if desired. To do that, tap on the Share icon at the bottom left when the PDF is created and select the sharing app like Mail, WhatsApp, Messenger, etc.https://ce679d8c74b6ac32313bb6cb2955a7fd.safeframe.googlesyndication.com/safeframe/1-0-38/html/container.html
Here are a few iOS 11 tutorials recommended for you.
1. How to Add or Delete Email Accounts on iOS 11 From Mail App
2. How To Turn Off Screenshot Preview In iPhone
This feature not only helps you share web pages as PDF files but also allows you to save the web pages for offline viewing. We hope that you will find this feature useful.
Method 4: Convert Webpage to PDF In iPhone And Save Webpage To iBooks
Learn how to change a webpage into a PDF in Safari by going through the steps given below :
- Open Safari browser on your iPhone/iPad
- Go to the desired webpage for which you want to create a PDF and add it to iBooks
- Tap on Share icon at the bottom as shown below(marked in red)
- Swipe towards left in the list of options shown, Select Save PDF to iBooks as shown below
- With this, your iPhone/iPad will create PDF from the webpage
- As soon as the PDF is created, it will be added/saved to iBooks
- iBooks app will open with your webpage saved as PDF in iBook
With this simple method you can convert a webpage to PDF on iPad/iPhone and at the same time add a webpage to iBooks. Personally, I like this feature a lot as I can view a webpage later whenever desired. Most importantly I won’t need an internet connection once the webpage is saved as PDF to iBooks.
Conclusion
Documenting your business or personal travel is one of the most important things you can do. The same rule applies to school and college students (and anyone who has to take notes and study). Pdf files are easy to store and carry, can be opened on your Android or iOS device, and come in handy at the right time.