Apple Inc. is a multinational company that designs and develops various products related to consumer electronics that includes MP3 player, iPad tablet, Mac personal computers, iPod portable players and many more. This article gives you an insight into creating Apple ID for your Apple product; the procedure you need to follow, the activation steps etc. Keep reading to learn How to Create Apple Id.
The Apple ID is the foundational account that powers all of Apple’s digital services. It provides you with a digital identity to access Apple’s online services across multiple iOS devices, such as your iPhone, iPad, and your Mac. The Apple ID allows you to sync your data such as Contacts, Calendars, Bookmarks, Reminders, etc. through iCloud, download apps like
or games from the iOS and Mac App Stores, music and media from the iTunes Store, and even to buy products from the Apple Online Store. Your Apple ID is the single account that works as the key to all these services.
When you buy a new iPhone or iPad and set it up, you will be prompted to create a new Apple ID if you don’t have one. That step is optional though, and if you have skipped that step or want to create a fresh Apple ID on your iPhone or iPad device, follow these simple steps to get Apple ID.
1 Open Settings. It’s a gray app that contains gears (⚙️) and is typically located on your home screen. 2 Tap Sign in to your iPhone. It’s at the top of the menu.[1]
- If another Apple ID is currently signed in and you wish to create a different one, tap that user’s Apple ID and then tap Sign Out at the bottom of the Apple ID menu. Follow the prompts to sign out.
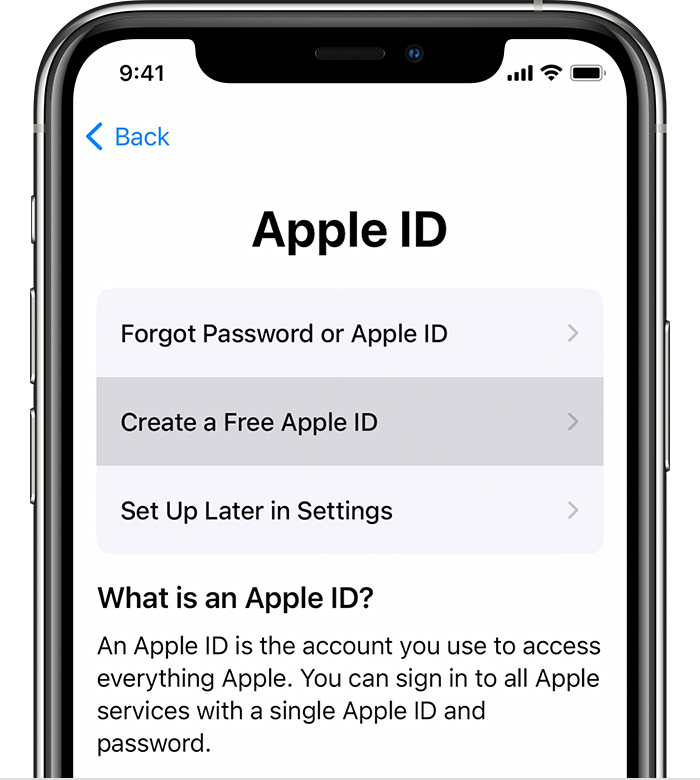
- If you are running an older version of iOS, instead tap iCloud and then tap Create a new Apple ID.
3 Tap Don’t have an Apple ID or forgot it?. It’s below the password field.
5 Enter your birthday. Scroll the month, day, and year fields at the bottom of the screen to enter your birthday.
6 Tap Next. It’s in the upper-right corner of the screen.
7 Enter your first and last name. Type them in their respective fields.
8 Tap Next. It’s in the upper-right corner of the screen.
9 Select an email address to use.
- To use an existing email address, tap Use your current email address.
- To create a new iCloud email address, tap Get a free iCloud email address and follow the on-screen prompts.
10 Enter your email address. This will be your Apple ID.
11 Tap Next. It’s in the upper-right corner of the screen.
12 Enter and verify a password. Type it into the labeled fields.
- Your password must have at least 8 characters (including a number and an uppercase and lowercase letter) with no spaces. It also shouldn’t have three consecutive characters (ggg), be your Apple ID, or a previous password you’ve used in the last year.
13 Tap Next. It’s in the upper-right corner of the screen.
14 Select your country. If it’s not auto-filled for you, tap on the field next to “Country” and tap the country associated with your phone number.
15 Enter your phone number. If it’s not auto-filled, tap the field next to “Number” and type in your phone number.
16 Select a verification method. Tap either Text Message or Phone Call to indicate how you’d like Apple to verify your phone number.
17 Tap Next. It’s in the upper-right corner of the screen.
- A verification code will be sent to you by text message or via phone call.
18 Enter the verification code. Enter the six-digit verification code you received and tap Next.
- If you received the code via text, your iPhone may recognize it and autofill it for you.
19 Review the terms and conditions. If you prefer to have them sent to you by email, tap Send by Email at the top of the screen.
20 Tap Agree. It’s in the lower-right corner of the screen.
21 Tap Agree. If you’re not automatically signed into iCloud, enter the email you used to create your Apple ID and password into the labeled fields.
22 Tap Sign In. It’s in the upper-right corner of the screen.
- The screen will intermittently display the message “Signing into iCloud” as it accesses your data during the sign-in process.
23 Enter your iPhone’s passcode. This is the unlock code you established for your device when you set it up.
24 Merge your data. If you’d like any calendars, reminders, contacts, notes, or other data already stored on your iPhone to be merged with your iCloud account, tap Merge; if not, tap Don’t Merge.
- You’ve now created an Apple ID and signed into your iPhone with it.
Table of Contents
How to Create an Apple ID Without a Credit Card
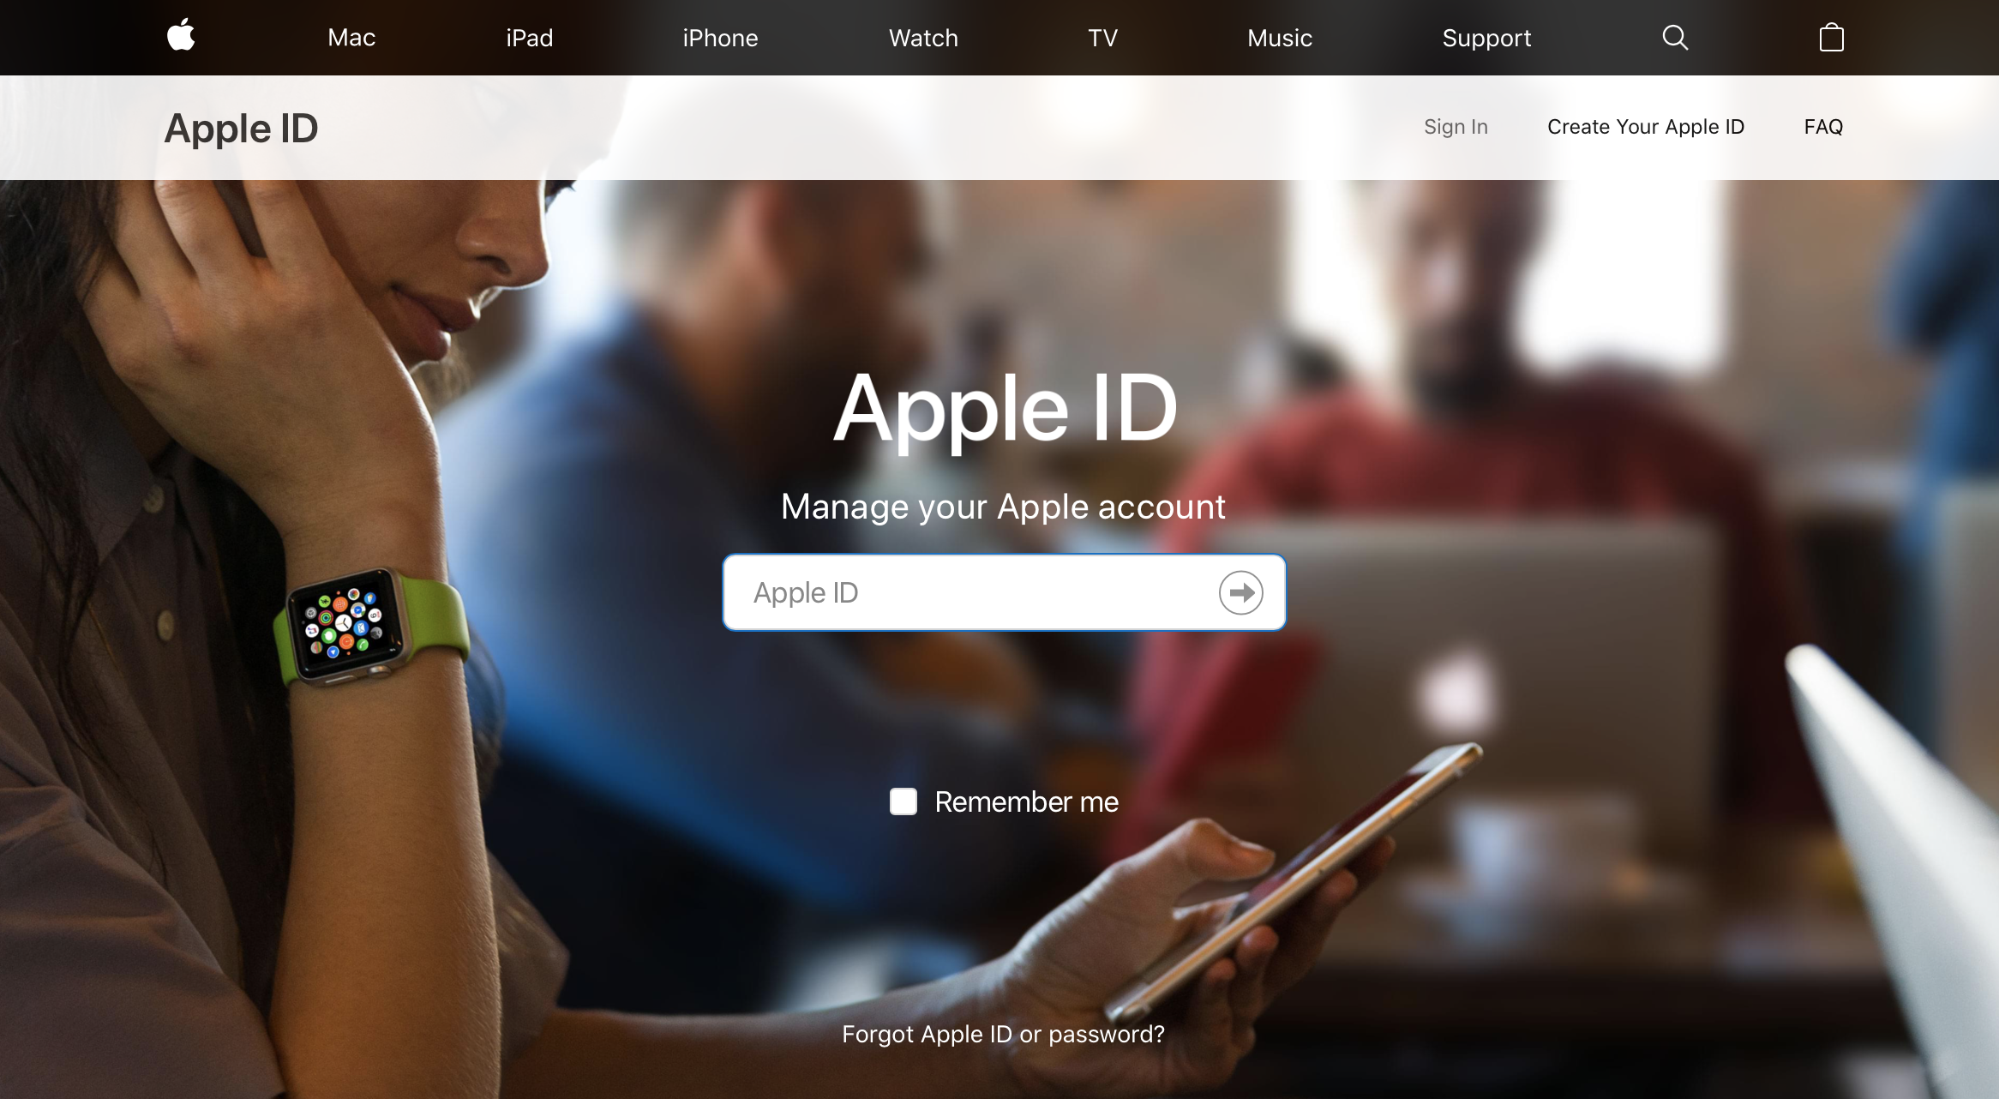
- Open the Apple ID site. Go to https://appleid.apple.com/. This will open the login page.
- If this opens a current Apple ID page, log out before continuing.
- Click Create Your Apple ID. It’s a link in the upper-right corner of the page. Doing so will open the Apple ID creation form.
- Enter your Apple ID information. Fill out the following fields:
- first name and last name – Enter your first and last name.
- birthday – Enter your birthday in “mm/dd/yyyy” format.
- [email protected] – Type in the email address that you want to use for your Apple ID. You can’t use an email address that’s already being used as an Apple ID.
- password and confirm password – Enter the password that you want to use for your Apple ID.
- Select security questions and answers. Click a Security Question drop-down box, click a question in the drop-down menu, and then type an answer into the “answer” text field below the box.
- You’ll need to do this for the remaining two security questions as well.
- Scroll down and enter the security code. Type the characters displayed in the grey box into the text field to the right of the box.
- You can click New Code to generate a different security code if you can’t read the first one.
- Click Continue. It’s at the bottom of the page.
- Retrieve your email address verification code. Open the email address that you set as your Apple ID, open the “Verify your Apple ID email address” email from Apple, and note the six-digit code in the middle of the email.
- Enter the verification code. Type the six-digit code into the verification window on the Apple ID website.
- Make sure that you don’t include any spaces.
- Click Continue. It’s in the bottom-right corner of the verification window. As long as the code that you enter matches the one sent to your email address, doing so will create your Apple ID account.
Method 2 Using an iPhone Download Article
- Sign out of the current Apple ID. If you aren’t signed into an Apple ID at all, skip this step. To sign out:
- Open the App Store. It’s the blue app with a white “A” on it. You’ll be able to create a brand-new Apple ID from here.[1]
- Tap Apps. This tab is at the bottom of the screen.
- Tap GET next to a free app. Doing so will prompt a pop-up window.
- Tap Create New Apple ID. It’s in the pop-up window. The Apple ID creation form will open.
- Enter your Apple ID’s information. Fill out the following fields:
- Enter your personal information. Fill out the following fields:
- Title – Your title (e.g., “Mr.” or “Ms.”).
- First Name – Your first name.
- Last Name – Your last name.
- Birthday – Your date of birth in “mm/dd/yyyy” format.
- Select security questions and answers. Tap a Question box, tap a question to use, and then tap the “Answer” box and enter your answer.
- You’ll need to do this for all three security questions.
- Tap Next. It’s in the top-right corner of the screen.
- Tap None. This option is in the “PAYMENT METHOD” group of options. Selecting it will negate the need for a payment method.
- Enter your billing information. This will include your first and last name, your address, your country, and your phone number.
- Tap Next.
- Retrieve your email address verification code. Open the email address that you set as your Apple ID, open the “Verify your Apple ID email address” email from Apple, and note the five-digit code in the middle of the email.
- Enter your code. Tap the “Code” text field, then type in the five-digit code from your email.
- Tap Verify. It’s in the top-right corner of the screen.
- Tap Continue when prompted. As long as the code you entered matches the code that you received in your email, this will sign you into your new Apple ID on your iPhone or iPad.
Method 3 Using iTunes Download Article
- Open iTunes on a computer. This is the white icon with a multicolored musical note on it.
- If prompted to update, click Download iTunes, wait for the installation to complete, and restart your computer if prompted before continuing.
- Sign out of your current Apple ID. Skip this step if you’re not signed into an Apple ID on your iTunes program. To sign out:
- Click Account at the top of the screen (Mac) or page (Windows).
- Click Sign Out… in the drop-down menu.
- Click the Store tab. It’s near the top of the iTunes window.
- Click the Music box. This drop-down box with a note on it is in the upper-left side of the iTunes window. Doing so prompts a drop-down menu.
- Click TV Shows. It’s in the Music drop-down menu. Clicking this will switch the store’s display over to movies and TV.
- Click the Free TV Episodes link. It’s a grey link on the right-hand side of the iTunes page. Doing so opens a list of TV shows that have free episodes.
- Select a TV show. Click a show with a free episode. It doesn’t matter which show you choose here, since all of them have at least one free episode.
- Click Get. It’s on the far-right side of the free episode’s name. Doing so prompts a pop-up window.
- Click Create New Apple ID. You’ll see this option in the bottom-left corner of the pop-up window.
- Enter your Apple ID information. Fill out the following fields:
- Email – Type in the email address that you want to use for your Apple ID. You can’t use an existing Apple ID’s email address.
- Password – Enter the password that you want to use for your account.
- Verify – Re-enter the password that you entered above.
- Check the “By clicking Continue” box. It’s near the bottom of the page.
- Click Continue. You’ll find this button at the bottom of the page.
- Enter your personal information. This includes the following information:
- Title
- First name
- Last name
- Birthday
- Add security questions and answers. Click a Security Question drop-down box, click a question in the drop-down menu, and then type an answer into the text field below the box.
- You’ll need to fill out all three of these before proceeding.
- Click Continue. This option is at the bottom of the page.
- Click None. It’s on the far-right side of the list of payment options that’s near the top of the page. If you don’t see the None option, you may be unable to create an Apple ID without a payment method for one of the following reasons:[2]
- You’re not in the correct country – If your current country is different than the country to which your iTunes program is registered, you won’t see None.
- You didn’t sign out of iTunes – If you forgot to sign out of your Apple ID account, you won’t be able to select None.
- You have an unpaid balance on iTunes – You’ll need to enter a payment method to proceed if you have a purchased item pending on your iTunes program.
- Enter your billing information. This includes the following information:
- Name
- Address
- Phone number
- Click Continue. It’s at the bottom of the page.
- Retrieve your email address verification code. Open the email address that you set as your Apple ID, open the “Verify your Apple ID email address” email from Apple, and note the five-digit code in the middle of the email.
- Enter the email verification code. Type the five-digit code into the field in the middle of iTunes.
- Click Verify. It’s at the bottom of the page. A pop-up window will appear.
- Enter your Apple ID password when prompted. As long as the verification code was correct, you’ll be prompted to enter the password for your Apple ID, after which point you will be signed into your Apple ID account.
Conclusion
It’s experienced, often in frustration, that almost everyone who has an iPhone or iPad is having the same issue when it comes to Apple ID. They are unable to create Apple ID when they are using alternative email addresses not linked to their own Apple ID.