
Have you ever wondered what the best way to learn about How to Create an MFT? You were right if you did. Learn about How to Create an MFT Here.
Managed file transfer solutions are a type of software that use industry-standard network protocols and encryption methods to streamline the management of company data. The “managed” in MFT refers to how the solution can automate and transfer your data across your organization, network, systems, applications, trading partners, and cloud environments from a single, central interface.
Oracle MFT Provides the connectivity to end applications among FTP, sFTP, File and web services. It helps remove the need to maintain FTP and sFTP servers, as it comes with these embedded servers out-of-the-box. It allows to secure, SSH, SSL and PGP Encryption. One of the best features is that it provides high visibility and auditability. It is able to deal with many use cases, i.e. trickle feeds, scheduled loads, on demand, etc.
In order to illustrate a sensible scenario, in this blog I am going to simulate a hypothetical integration from Red Cross Blood Services moving invoices. My goal is to show how simple it is to build a Managed File Transfer using Oracle MFT technology. For this case, we are going to use the Oracle MFT embedded FTP Server as the source and File System as the target. Also we are going to illustrate how to use the pre-processing and post-processing actions either at the source or target endpoints. For any question or comment please contact the creators of this document.
CREATING AN MFT INTEGRATION
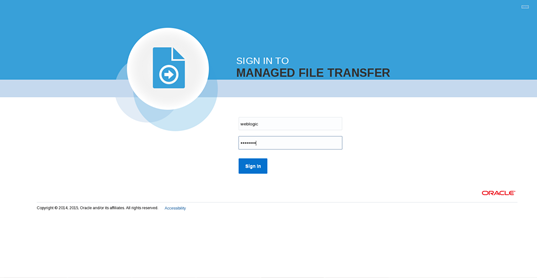
- Login to the MFT console, notice that this can be a local MFT installation or in the Oracle Public Cloud via MFT Cloud Service.
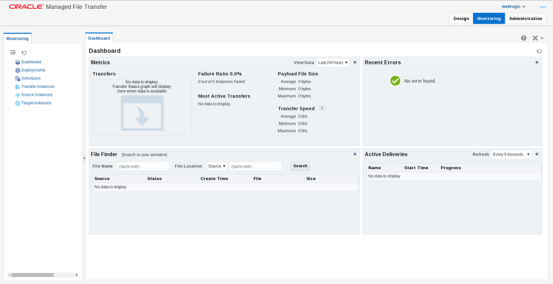
- The main dashboard is going to be presented. IN this case, select Design to start building the integration
- The Design mode is going to appear
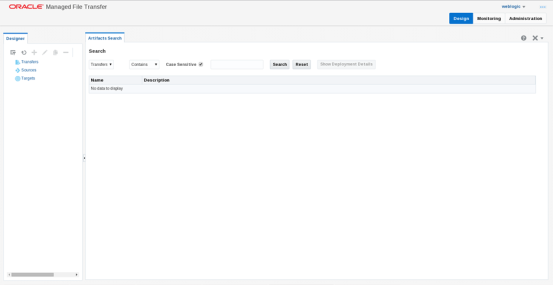
- In the left menu, click on “Transfers” to create a new Managed File Transfer integration
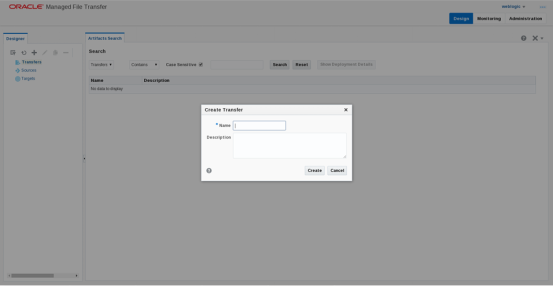
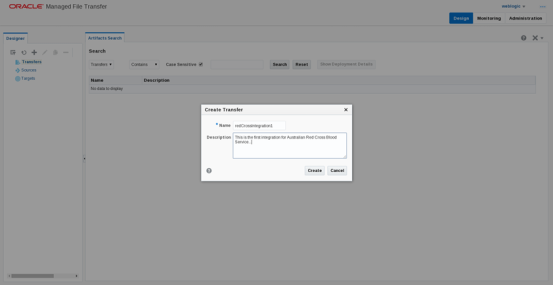
- Enter a Name and description. Then click on Create.
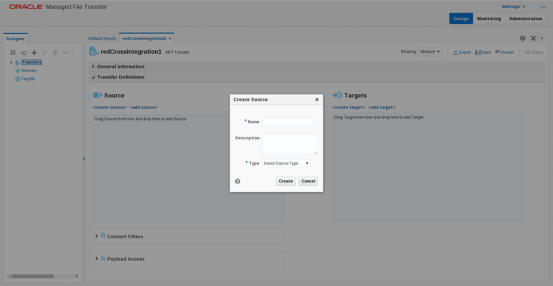
- A blank transfer will appear. In this case you will appreciate two main sections as part of the transfer, the source and the target.

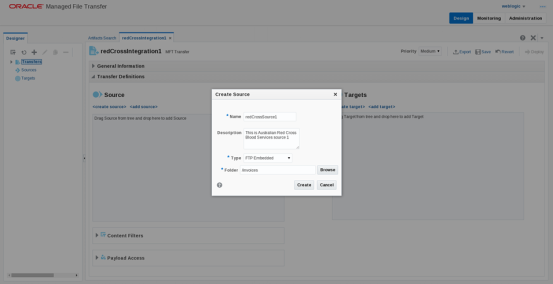
- Let’s create a new Source by clicking on the “” link. Notice that you could also reuse existing sources by clicking “”. This is an interesting feature, because you can build a catalog of sources and targets and simply use them as needed as part of new transfers
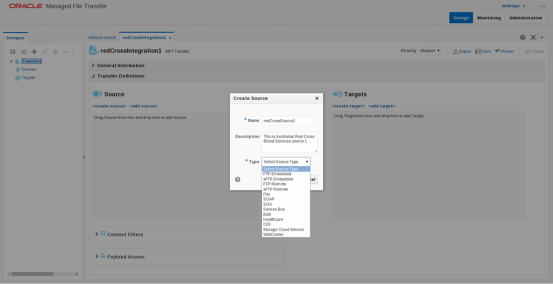
- In the new Source configuration enter a sensible name and Description. Also select the type of source that you require. This can be of multiple types including:
- FTP/sFTP embedded – Use this source type instead of having to maintain your own FTP/sFTP servers. This is a very important topic because it takes a lot of energy to maintain multiple servers. In this case if you are using Oracle MFT you can simply leverage the embedded ones.
- FTP/sFTP remote servers – Use these if you need to connect to an external server to trigger a file.
- File – Use this option if you want to configure the source on a file system. Notice that this can be a shared file system using SMB for example over Windows, etc.
- SOAP – Use this option if you want to trigger based on a SOAP endpoint
- SOA – Use this option if you want Oracle MFT to seamlessly integrate with Oracle SOA. This is great if you are an existing SOA user or if you want to leverage Oracle SOA in order to accomplish some extended tasks as part of your MFT transfers. For example, read and transforms the content of the files being transferred.
- Service Bus – Similarly, use this option if you want to seamlessly integrate to Oracle OSB.
- B2B – Use this option to seamlessly integrate with Oracle B2B as part of a triggering process.
- Healthcare – Use this option if you wish to integrate to Oracle Healthcare
- ODI – This option will allow you to seamlessly connect to Oracle Data Integration as part of a source
- Storage Cloud Service – This option will allow you to use Oracle Storage Cloud Service (block storage) as a triggering point.
- WebCenter – This will integrate with Oracle Webcenter as part of an extended portal scenario perhaps.
- In this case select FTP Embedded. Then click Create.
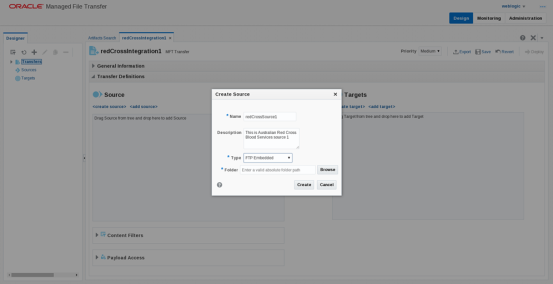
- Now you have to select the folder where MFT will listen for new files. Enter /invoices
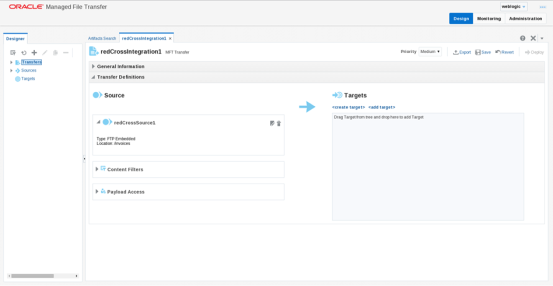
- The new source will be shown
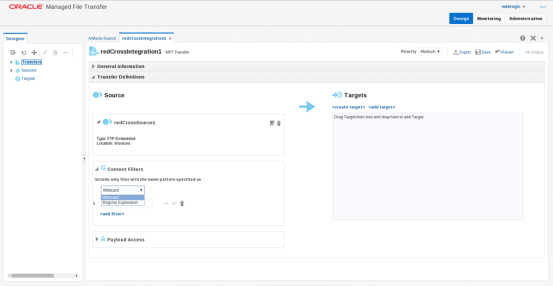
- You can further configure multiple things. For this example, we want to filter by only reading ZIP files. Expand “Content Filters” and Select Wildcard and then enter *.zipNotice that you can also enter more complex regular expressions if needed.
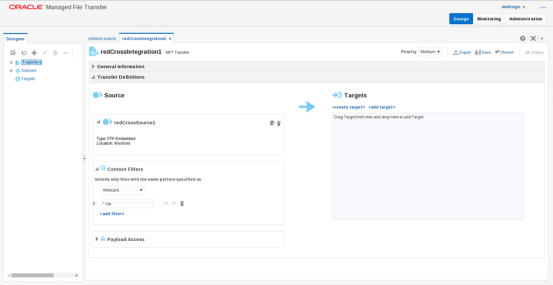
- Your source should look like this:
- You can configure Payload access, which makes sense in case of sensitive transfers. In this case, we are going to leave it like this. We are ready to move to the Targets.
- Similarly, as with Sources, you can create a new Target or choose from existing ones. In this case, click on “”
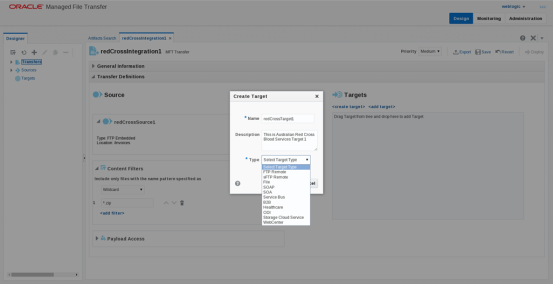
- Similarly, as with the Source, for the new Target enter a sensible name, description and select the type. In this example, I am choosing “File” (i.e. file system). Then Enter the full location of where you want to drop the transfer. Then click on Create.

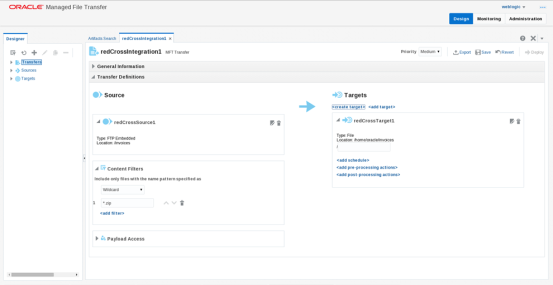
- Your new target should look like this:
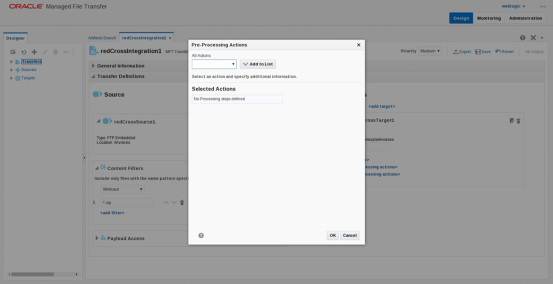
- For this demonstration, let’s assume that a couple of things are occurring:
- The invoices are considered very sensitive, so they come encrypted from the source. As part of the target we want to decrypt them.
- Also, as you remember we are filtering all zip files, which means that the invoices come compressed. We also want to decompress them.
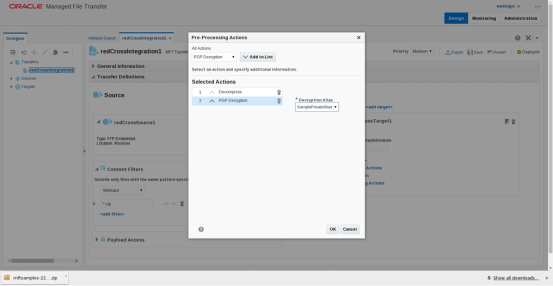
- Click on pre-processing action to ensure that the content we record in the target is both: decrypted and decompressed. A new wizard will open.
- Open up “All actions” and select “Decompress” action
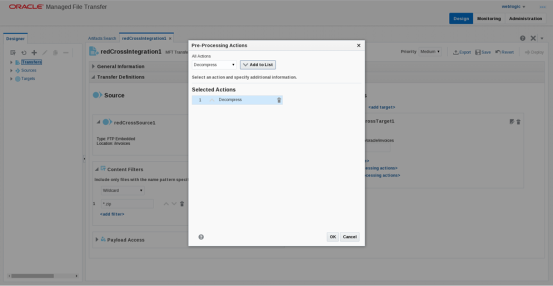
- Repeat the same steps and this time add “PGP Decryption” and then click on “Add to List” – You will also have to select the “Decryption Alias” that you must’ve configured previously.
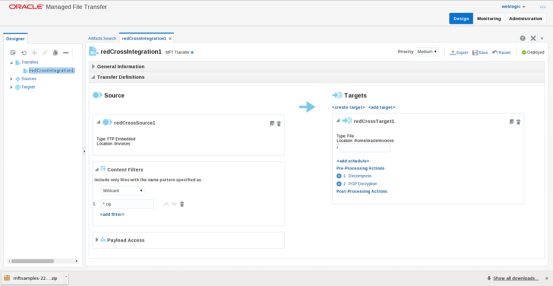
- Your new Target should look like this:
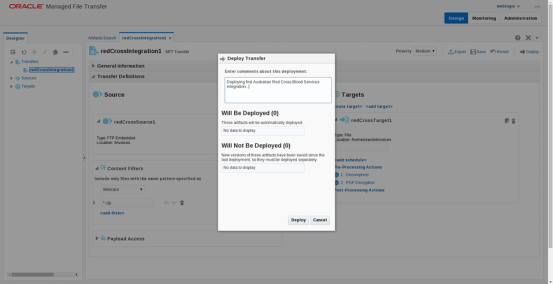
- That’s it. Your transfer is complete. It is time to save and deploy. When you click Deploy a configuration like the following will appear. Enter sensible comments and click on Deploy.
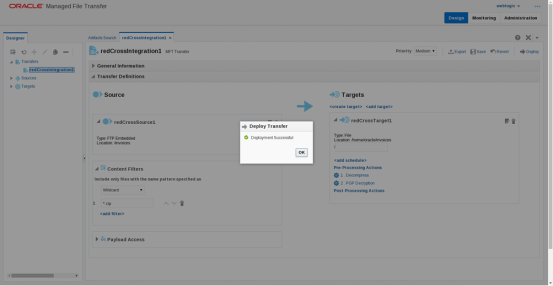
- You will get a successful message
CREATING THE “INVOICES” USER AND GRANTING ACCESS TO THE EMBEDDED FTP SERVER
Before we move to “Monitoring” tab and we test the MFT Transfer, let me just mention something important. If you remember, in this example we are assuming that a authorised user is able to connect to the MFT embedded FT server and drop a file under /invoices – As this is what we configured in the source. In order to do that I do recommend that to spend some time thinking who will have access to your embedded FTP/sFTP server and what type of access.
For this example, let’s create a user called “invoices” under our Identity directory. In my case I will use the directory that comes integrated with WebLogic, but it could’ve been a separate one that you use in your enterprise.
- Open and log into WebLogic console.
- In the left pane of the WebLogic Server Administration Console, expand Security —> Realms.
- Expand the security realm for which you are creating a user (for example, myrealm).
- Click “Users and Groups”.
- The Users page displays all the users currently defined in the WebLogic Authentication provider’s database.
- Click the “New” to create a new user.
- Enter the name of the user in the Name field. Invoices in this case or adapt accordingly.
- Do not use commas or any other characters in this comma-separated list: \t, < >, #, |, &, ?, ( ), { }. User names are case sensitive.
- Optionally, enter a description of the user (such as their full name) in the Description field.
- Enter a password for the user in the Password field.
- The default minimum password length for a user defined in the WebLogic Authentication provider is 8 characters. Do not use the user name/password combination weblogic/weblogic in a production environment.
- In the Common Criteria certified configuration, the password must contain at least 8 characters.
- Re-enter the password for the user in the Confirm Password field.
- Click Apply to save your changes.
- If you chose to create the user “invoices” – It will look in the list of users:

Great, now that we understand that there must be a “user” to access our MFT FTP/sFTP servers, we simply need to add the right privileges.
- Go back to MFT Console and go to the “Administration” tab, you will be able to do multiple configurations, like for example provide privileges to users in respect to your embedded servers.
- Expand “Embedded Servers” -> User Access and enter invoices in the search field followed by the search icon. This is the “invoices” user that we added previously.
- Once the “invoices” user appears, add privileges to Read, Write, Delete and List
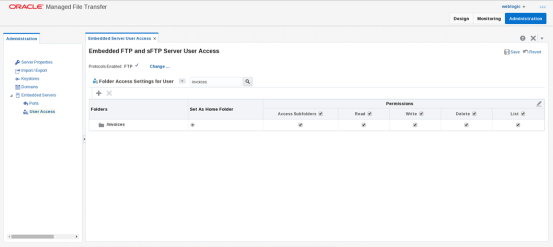
- Don’t forget to click on Save
TEST YOUR MFT TRANSFER
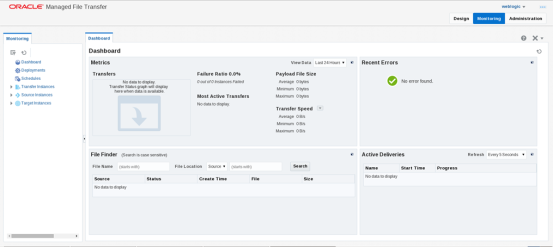
- We are ready to test our MFT Transfer. First go back to the “Monitoring” tab in your MFT console. Because this is a brand new environment, you will notice that there are no previous transfers.
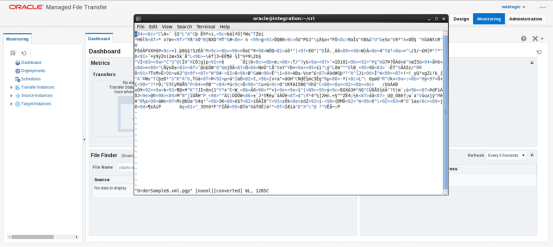
- Do you remember that I mentioned that our Invoices were PHGP encrypted by defaulkt. Well, let me show you an example of one of my invoices… It’s just hieroglyphics!
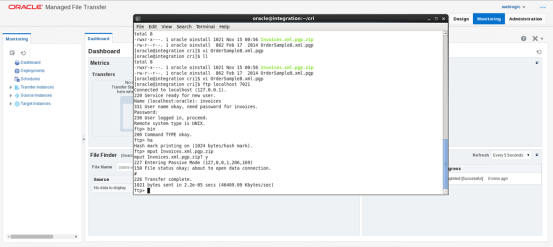
- Use your favourtie FTP client to drop the file. In my case, I am using FTP commands in Linux to do the following:
- ftp localhost 7021 – Where my MFT FTP Embedded server is running locally from where I am running this command. Also by default the MFT Embedded FTP Server runs on port 7021. You can change this in the Administration console if required.
- Login as invoices
- Set bin mode – This is to transfer in binary mode (it is a zip file)
- Set ha mode – To see a “#” mark every KB – this is useful if uploading huge files to see that your transfer is still going.
- Finally transfer my Invoices.zip file – You can find this sample file under the same “MFT-Sample.zip” file used previously to setup PGP keys under http://www.oracle.com/technetwork/middleware/mft/learnmore
- Almost instantaneously after uploading the “Invoices.zip” file, you will see back in the MFT “Monitoring” console that a new transaction has occurred
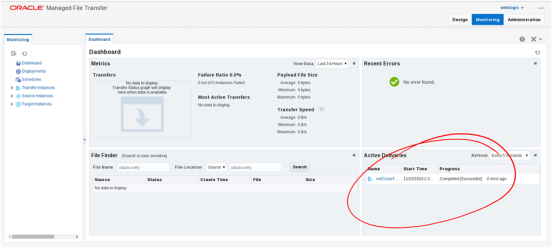
- If you click on it, you will be able to introspect into the stages of the transfer, being the source, integration and target.
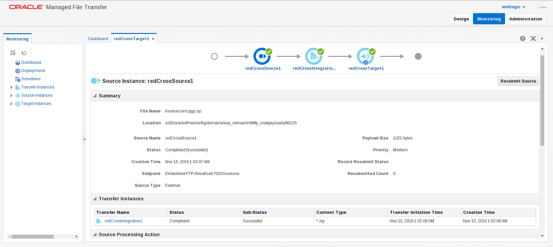
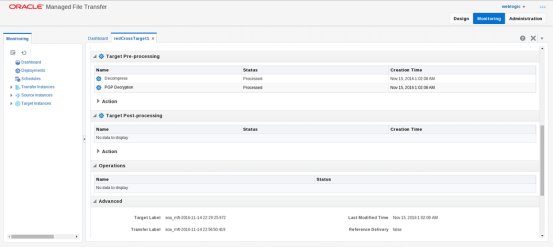
- Clicking on each stage, you will be able to see information about it. For example in the case of the Target, you can see not only how long it took, the target location in the file system, etc.

- Also you can see the actual pre-processing actions that we configured (Decompress and PGP Decryption)
- If we had configured multiple targets, it is possible to drill down into each one or even “resubmit” a faulted target, after having received a configurable warning via email, SMS, smoke signals, etc.
Congratulations, hopefully with this very simple exercise you managed to see how simple yet powerful is to use Oracle Managed File Transfer.