Are you looking for information on how to create a zoom meeting? Do you know about create a free zoom meeting? Check out this blog post, where you can find all of the information that you need.
Creating a Zoom meeting account is free for a comprehensive solution to video, audio and screen sharing solutions. Irrespective of your location, you will enjoy mobile and web availability for meetings invitations and schedules. Creating a zoom meeting is the definitely low cost yet utmost impressive video and web conference platform for you, your team and clients. Learn how to create a zoom meeting account and webinars using this simple guide.
Step 1. Download and launch zoom app for iPhone and Android or Zoom desktop client to create and conduct zoom meeting.
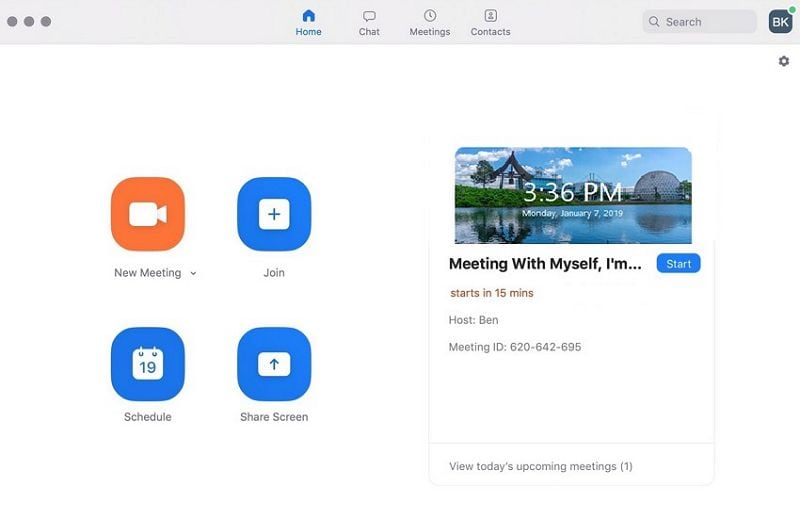
Step 2. The zoom application window will open. You can either select a new meeting, join, schedule or share screen. Click “New meeting” to invite.
Step 3. At the bottom of the window, click “Invite” to invite others to the meeting. Then you can share by copying and pasting URL invitation into an email message.
Alternatively, you can select the email service option to share a preformatted invitation.

Step 4. To schedule a meeting, select the “Schedule” option.
Step 5. Under zoom meeting settings, you will have to set the:
- Topic
Click the editable “Topic” field to enter the meeting title. - Start time and expected duration under
Under “When”, specify the meeting “Start time”, “Duration” and the “Time Zone” from which the meeting will be hosted. - Video options when joining
Mark either “On” or “Off” video for the host and participant when joining the meeting. - Audio options
Select either “Telephone”, “VoIP Only” or “Both” for the audio. - Meeting options
Mark the extra “meeting options” as desired. Opt for participants to use a password when joining, allow join before host or use personal meeting ID to join. - Calendar to use
Choose the calendar to create an invitation with. If you select other calendars, you will be able to copy invitation to share on other calendar programs.
Finally, select the “Schedule” button to proceed to copy the invitation to invite the participants.

Table of Contents
How to schedule a Zoom meeting
To help you schedule a meeting using any Zoom client or app, we’ve broken down the basic steps below. These apply across all versions, with some small differences in the way the buttons look and function. However, in general, follow the steps below to schedule a meeting.
We also have a more comprehensive article covering how to schedule a meeting for each specific app version.
IMPORTANT: To schedule a meeting, you will need to be signed in to your Zoom account on the client for your device.
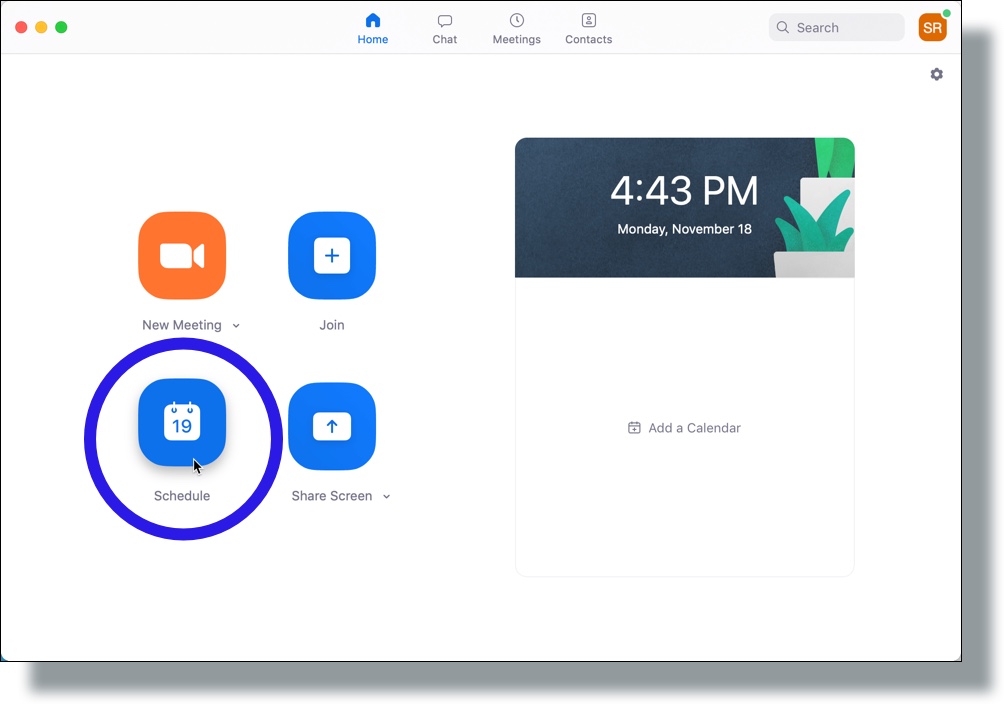
1. Start to schedule a new meeting
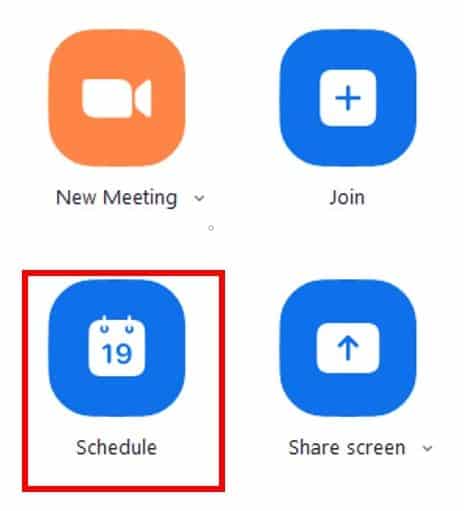
From the home screen of the Zoom desktop and mobile apps, click or tap Schedule.
Using the browser version, click Meetings on the left side menu to access the meetings menu. Then click Schedule a New Meeting.
2. Set the meeting options
This will open the “Schedule Meeting” options screen. Here, you will choose meeting settings and options, including the meeting topic, date and time, and more.
3. Set the meeting topic by naming the meeting

Name your meeting using the Topic form field. Click the form field and enter the Topic to set the name of your meeting. On the browser version, you can also add a Description.
4. Set the date, time, and duration of the meeting
Next, set the date and time of the meeting. On desktop, use the Start drop-down options to set the date and time the meeting will start. Use the Duration drop-down options to set the length of the meeting in hours and minutes.
Click the Recurring meeting checkbox to set this meeting to repeat.
Tap the Time Zone drop-down and select the time zone you want to use for this meeting.

IMPORTANT
Selecting the right time zone for your scheduled meeting is especially important when scheduling meetings with participants that are not in the same time zone as you.
On mobile, use the Date field to set the start date, use the From field to set the start time, and use the To field to set meeting end time. To make the meeting a recurring meeting, tap the Repeat field and select the frequency of the recurring meeting.
5. Choose between random meeting ID and your Personal Meeting ID
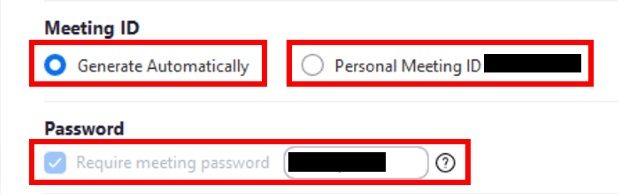
Choose to use an automatically generated meeting ID or your Personal Meeting ID. Use the radio buttons to toggle between Generate Automatically or Personal Meeting ID. Next, click the Require meeting password checkbox to require a password for participants to join the meeting. A password will automatically generate; you can also set your own by typing a unique password.
On mobile, tap the Use Personal Meeting ID (PMI) toggle to use your personal meeting ID for the meeting. Tap the Meeting Password toggle to require a meeting password. Tap the Password field and enter a password to set a unique password.
6. Set meeting options, settings, and preferences
Set the remaining video and advanced meeting options available using the options available. On desktop, use the on/off radio buttons for Host and Participants to enable or disable host and participant videos when joining the meeting.
On mobile, use the Host Video On and Participant Video On toggle buttons.

Tap Advanced Options to open up further meeting options on both desktop and mobile versions. Use the check boxes (toggles on mobile) to Enable Waiting Room, Enable join before host, Mute participants upon entry, and Automatically record meeting on the local computer. Phrasing is slightly different on the mobile version.
7. Choose to schedule your meeting to the calendar

Use the Calendar radio buttons to select the calendar you wish to schedule your meeting to. Choose between Outlook, Google Calendar, and Other Calendars on desktop.
On your mobile device, tap the Add to Calendar toggle to enable or disable scheduling your meeting via the default calendar you use on your mobile device.
8. Finish scheduling the meeting in Zoom

Once you’ve made all of the selections for the meeting you are scheduling, click Schedule to schedule your meeting.
On your mobile device, tap Done.
If you did not choose to add this meeting to a calendar, skip to step 11.
9. Sign into calendar scheduling app

Depending on the calendar option you chose, you will be prompted to sign into that calendar application. For our example, we scheduled using Google Calendar.
A browser will open that prompts you to sign into your Google account. Sign in via the correct Google account.
10. Schedule meeting via Google Calendar

For Google Calendar, you advance to the calendar event creation screen. Here, you create the calendar event for the Zoom meeting you are scheduling.
IMPORTANT
You are creating a Google Calendar event within the Google Calendar app. This is not being scheduled within the Zoom app. That means that adjustments made here do not actually affect the scheduled Zoom meeting, but how the event is scheduled in the calendar.
Use the calendar app event creation screen to set the event details. Set the date and time of the calendar event, add a notification and set how far in advance of the meeting the reminder is sent, and customize your meeting event invitation message. Add guests and modify the guest permissions for the event, and click Save when done.

You’ll see the meeting scheduled on your Google Calendar app.
11. Access and manage scheduled meeting
With your meeting now scheduled, you can access, view, and manage your meeting from the Zoom desktop client or mobile app. Click / tap Meetings menu button to access the menu settings. Click / tap the meeting to access and manage the meeting.

From here, click Start (tap Start Meeting on mobile) to initiate the meeting. Click Copy invitation to copy the invitation message. You can then paste this message into an instant messaging service or send directly to an attendee to invite them. Click / tap Edit to change the meeting settings. Click Delete (tap Delete Meeting on mobile) to delete the meeting and cancel it for all invitees.
To invite participants on mobile, tap Add Invitees. You can then select the method to add invitees, choosing from your device’s native messaging system, Gmail, Outlook, and more. You can then select invitees and send invitations.
12. Invite attendees to join your meeting
After you’ve created the meeting, there are a number of ways to invite attendees. We’ll cover each method below, with instructions and images of how to invite participants via desktop, mobile, and browser versions of Zoom.
- Invite attendees via Meeting ID and password
- Invite attendees using Copy Invitation button
- Invite attendees by sharing the Join Zoom Meeting URL link
- ‘Add Invitees’ using the mobile app
Invite attendees via Meeting ID and password

No matter what version of Zoom you are using (desktop, mobile, or browser), meetings are assigned a Meeting ID and password. You can share this Meeting ID and password with invitees, and they will be able to input these credentials on any version of the Zoom app to join the meeting.

The Copy Invitation button (available on the desktop and browser clients) copies an automated invitation message to your clipboard. You can then paste this invitation into an email, a text message, an instant messaging system, or virtually any other messaging software to quickly and conveniently send them a meeting invitation.
The automated invitation includes the meeting topic, the date and time of the meeting, a Join Zoom Meeting URL link, and the Meeting ID and password. You can often customize the message using the messaging service you use to send invitations.
PRO TIP
To invite attendees using this automated message via the mobile app, the process is slightly different. With the Meeting screen open, tap Add Invitees followed by Copy to Clipboard. With this copied, you can paste the message into any messaging app on your mobile device, and send it to invitees. You can also make adjustments to the message before sending it.

Invite attendees by sharing the Join Zoom Meeting URL link

You can highlight and copy the invitation link itself. You can send this to any invitee as you would any other message, via email, a text, an instant messaging system, or essentially any other means.
This invite link can be pasted in the address bar of a browser, and will lead users directly to the meeting room, where they will be prompted to join. On desktop, invitees will be able to join via the desktop or browser client by clicking the URL link. On mobile, they will be able to join via the mobile app by tapping the URL link.
‘Add Invitees’ using the mobile app

Tap the Meetings menu button to access your list of meetings. Tap the meeting from the list to view and manage the scheduled meeting. Tap Add Invitees, and then tap to choose the method to send invitations.
After selecting a method, you will be taken to that app on your mobile device to complete the message. An automated message will generate so that you can easily, quickly, and conveniently send invites. If you want, you can customize the message via the messaging tool you are using. Tap to send via the messaging app you are using.
If you want to send an invitation via a messaging app that isn’t coming up using this method, you can copy an invitation to your clipboard.
Conclusion
Get access to a free zoom meeting and learn how to create a zoom meeting. Zoom meeting is a free cloud HD video conferencing that can be used on an unlimited number of devices including smartphones and laptops