Facebook is a powerful social media resource to your business. It can build a platform for you to talk about your product or service, and gain followers or fans. However, creating a Facebook page can be a challenge for many people. If you have no idea how to create a Facebook business page, this article provides tips for you to create a successful page.
When deciding to create a Facebook business page, your main goal is visibility and branding of your small/medium/large business. Below you will learn How to Create Business Page on Facebook.
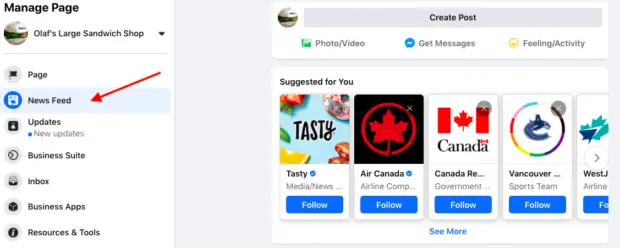
1. From your personal Facebook profile, click the Pages link in the left sidebar menu and open the menu on the right-hand side called Your Pages. 1_Facebook_left_sidebar
2. From the Your Pages menu, click the Create Page button. 2_Facebook_your_pages
3. Choose the Business or Brand page type. 3_Facebook_create_page
4. Enter your business or brand name and a business category. Please note, the Local Business category requires a physical address while other categories may not. Facebook_business_setup_2b_no_address
5. Click the Continue button to save your information.
6. Upload a page profile and cover images . You can choose to skip for now if you prefer to add them later. Facebook_business_setup_3_profile_photo
Congratulations, you’ve created a new Facebook page! Facebook_page_setup_4
Table of Contents
Additional set-up
Before you write your page’s first post, be sure to update your page with additional information for your business.
Call to action
Add a call-to-action button to your business page by clicking Add a Button. Choose an action from the available options. You can have visitors book appointments, contact you through Facebook Messenger, download your app, and more. Facebook_page_setup_5b_call to action
Page username
Choose a page username. This username will become the web address for your business page (e.g. facebook.com/businessinsider).
Enter upcoming events
From the Events section, add any upcoming public events. Make it easy for your future fans to find information about your business’s scheduled events. Fans of your page can show interest in your events by clicking a button to indicate their intention to attend. Facebook_page_add_events
Update the About section
From the About section, update all the content you would like to be public. Include your business website and operating hours if applicable. You can also give staff members access to edit your page from this menu.
Explore publishing tools
Facebook has built-in scheduling tools that allow you to plan and publish your posts according to a schedule of your choosing. These tools help you automate the process of posting updates. You can save draft versions of your posts here as well.
Converting a personal profile to a business page
If you have been using a personal Facebook profile for your business, you can convert it to a business page using Facebook’s conversion wizard . While the process is called a conversion, it actually copies your personal profile to a page. Your personal profile will remain intact and a new page based on that profile will be created. You can update the newly created page as you would a page created from scratch.
Page visibility
Facebook pages are published as soon as they are created. This means an incomplete page would be visible to the public as soon as it’s created. If you would prefer to work on your page in private before making it available to the public, you can update its visibility from the page settings menu. This will prevent the page from being available until you’re ready to publish it again. Remember to update the visibility setting when you are ready to publish it.
ANOTHER METHOD OF How to Create Business Page on Facebook
- Open Facebook. It’s the blue icon with a white “f” inside. This opens the app to your personal newsfeed.
- If you aren’t already logged into Facebook, enter your email address (or phone number) and password to continue.
- Tap the menu ☰. It’s the three horizontal lines in the bottom-right corner (iPhone) or the top-right corner (Android).
- Scroll down and tap Pages. This option is near the middle of the menu.
- If you already have a Page connected to your account, select Your (number of) pages instead.[1]
- Tap the blue Get Started button. It’s at the bottom of the screen.
- Tap + Create. It’s at the top-left corner of the screen.
- Select up to three categories and click Next. The categories you enter will help people find your page. Start typing a category, such as Blogger or Musician, and then tap one of the search results. You can also tap one or more of the “Popular Categories.”
- There’s a full category list at https://www.facebook.com/pages/category.
- Enter a Page name and tap Next. The name of your Page should be your business or brand’s official name. Choose something that you don’t think you’ll want to change later.
- Enter your address information and tap Next. If you’d rather not enter the exact address, entering a city and state is fine. If you don’t have a physical address for your business, tap the box next to “I don’t want to add an address.”
- Add images to your Page. To add a profile photo, tap Add profile picture inside the circle to select an image that represents your business, such as your logo or headshot. You can also tap Add cover photo near the top of the page to select an image to appear at the top of your Page.
- Tap the blue Done button. It’s at the bottom of the Page.
- Swipe left through the options to finish your Page setup. Tap Next at the bottom, and then swipe through the remaining screens. You’ll usually see the option to invite friends to like the Page, create a welcome post, connect to other apps, and/or add a Page button to the top of your Page that lets visitors interact with you. The options vary depending on the type of business and the information you’ve already entered.
- Fill out your Page info. This information will appear in your Page’s About section:
- Tap Get Started at the bottom.
- Enter a description and tap Save. This brief description of your business will appear in your Page’s “About” section. You can enter up to 255 characters.
- Enter a phone number and tap Save. If you don’t have a phone number, tap the circle next to “My Page doesn’t have a phone number” instead.
- Enter your website URL and tap Save. While optional, adding your website will help make your business appear more professional. It will also give customers a way of contacting you outside of Facebook. If you don’t have a website, tap the circle next to “My Page doesn’t have a website.”
- Enter your business’s email address and tap Save. When you connect an email address to your Page, it makes it easy for potential clients to get in touch with you via email. If you’d prefer not to add an email address, tap the circle next to “My Page doesn’t have email” instead.
- Select your business hours and tap Save. If this doesn’t apply to your business, select No Hours Available or Always Open. If you have operating hours, select Standard Hours, and then tap EDIT HOURS beneath to add the official hours.
- Visit your Page. Now that you’ve finished creating the Page, you can access it by tapping the three-line menu at the top-right or bottom-right area of Facebook and selecting the Page name at the top.
- To make changes or adjust your settings, tap the gear icon at the top-right.
Method 2 On a Computer Download Article
- 1 Go to https://www.facebook.com/pages/create in a web browser. This opens the “Create a Page” screen if you’re already signed in. If you’re not signed in, you can do so now.
- 2 Enter a name for your Page. Your Page’s name should be the official name of your brand or business. You’ll type this into the “Page name” field.
- 3 Select up to three categories. Categories can help people find your business when searching for other things. To select a category, start typing something into the “Category” field, like Sushi or Advertising. When the search results appear, click a category to add it.
- Visit https://www.facebook.com/pages/category to see a full list of categories.
- 4 Type a description. Use the “Description” field to describe your business to viewers. You can only enter 255 characters here, so be brief.
- 5 Click Create Page. It’s the gray button at the bottom-left corner of the page. This saves your progress and expands more options below.
- 6 Upload images for your Page. The images you select to represent your Page should be descriptive of your business and what you stand for.
- Click Add Profile Photo to select your business’s official logo or your official headshot. Choose something recognizable, as this image will appear next to your Page’s name in search results.
- Click Add a Cover Photo to add a wide image to the top of the Page. This makes the Page more welcoming to visitors.
- 7 Click Save. This saves your new Page and displays a preview.
- 8 Click Edit Page Info. It’s near the bottom of the left panel above “Settings.”
- 9 Edit your Page’s additional details. Now that your Page is created, here’s where you’ll enter the remaining information:
- Contact info, including your official phone number, email address, website URL, physical address, and service area. All of this information is optional, but it’s important to include some form of contact so people can get in touch with you.
- Business hours, if applicable. If you don’t have hours, select No Hours Available or Always Open.
- You can enter your official privacy policy, product list, impressum (required by law for some businesses in Austria, Germany, and Switzerland), and additional information in the “More” section. All of this info will appear in your Page’s About section.
- If you’re operating a restaurant or some other type of paid service, select an applicable price range.
- In the “Other Accounts” section, enter other online or social media services where people can find your business.
Conclusion
A lot of people want to learn how to create a Facebook business page. Creating a one is not difficult at all, but you need to understand what are you doing.