Have you ever imagined how to create your own gif? If yes then you will be curious that how to create a gif or just explore what are the methods that are required to create it. Here I have discussed steps that can help you learn about making gif online.
Gifs are so hot right now! Facebook, Twitter, Giphy, Reddit, Tumblr, Imgur…everyone is swapping gifs left and right. Wouldn’t you love to create your very own gif to be the next popular gif on social media networks? Great news! Here’s a free step by step tutorial on how to create a gif! Let’s get started!
Table of Contents
Method 1: Creating an Animated GIF from Images
- Gather a set of images. If you want to create an animated GIF from still images, make sure you have the images on your computer or mobile device. If the images are online, download them first to your PC or to your Mac.
- Choose an image-to-GIF converter. There are lots to choose from, such as GifCreator [4] and GIFMaker Video Maker.[5] Both of these apps, and many others, are accessible on the web—no downloads required.
- These converters generally have similar features, including the ability to modify the size of each frame and control animation speed. They can also be used on all mobile devices with web browsers.
- There are also apps available for download that allow you to create GIFs, but many of the free ones are bogged down with ads. If you want to download an app, make sure you read reviews of each product before downloading.
- Upload your first image to the converter. With the converter open in your browser, find the button that says something along the lines of “Upload Images” (depending on which converter you’re using). A browse box should appear, allowing you to select your first image. Double-click the image or select it and click “Open.” You should see a thumbnail appear in the converter.
- Adjust the size of the image. Most converters will also display some adjustable settings below the image, such as size or repeat times. You can move the sliders around to adjust these aspects now. You can also come back to them later by clicking the thumbnail of the image.
- Upload and adjust more images. Upload additional photos by clicking the “Upload Images” button. Most converters allow you to drag the images around to arrange them in different orders, so don’t worry if you upload them out of sequence. You can also adjust the size of each image. If your converter doesn’t already show a preview of the animation, look for a button that says “Preview” or “Play” to check your work.
- Create the GIF file. Once you’re done making adjustments to the order and size of your animation, click “Create GIF animation” or “Create GIF” to open the Save dialog. Select a memorable file name, as well as a folder on your device that you’ll remember. Click “Save” or “Download” to save your creation.Advertisement
Method 2: Creating an Animated GIF from a Video
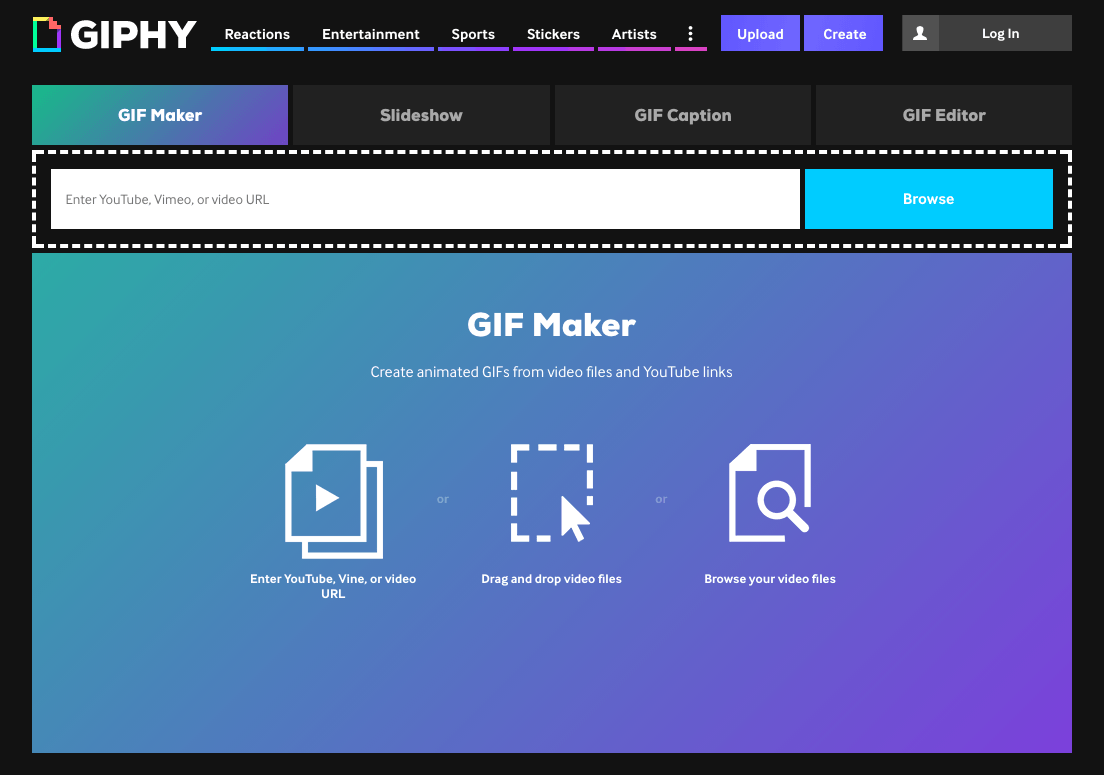
- Decide on a reputable video-to-GIF conversion app. There are many to choose from, such as Giphy GIF Maker[1] and IMGUR Video to GIF,[2] both of which can be used right in your web browser (no download necessary!)
- If you prefer to download an app, make sure to read lots of reviews in your device’s app store. Never download and run software from a site you don’t trust.
- The two apps mentioned can create GIFs from up to 15 seconds of online video. This is common.
- Most converters require that your video be uploaded to an website like YouTube or Vimeo that allows you to publicly share videos. Others, like Giphy, also allow you to upload your own video.
- Choose your source video. Find a video online (or on your device if using a site like Giphy) that has anywhere from 0.5 to 15 seconds of movement to turn into a GIF. If you’re using a video on the internet, open it in your browser.
- Load the video into the converter. This step will be different across different apps.
- If you’re using a video on a site like YouTube, open the video in your browser. Copy the entire URL of the video file from the address bar, then paste it into appropriate the box in the video-to-GIF converter app. The box should say something like “Paste URL here.” Press ↵ Enter or click OK.
- If you’re uploading video, find the button on the video-to-gif conversion tool (it should say something like “Browse Your Video Files”) and select the desired file.
- Define the length of your GIF.[3] Each site has different options for editing, but all will let you define a specific section of the video to convert to a GIF. In Imgur, for example, your video will appear with a slider beneath it that allows you to set a “start” and “end” point for your image.
- Add text to your GIF. Nearly every video-to-GIF maker allows you to add some text or other flair to your GIF. Look for a button that says something like “Add Text” or “Add Caption.”
- Create the file. When you’re done with the creative process, click “Create GIF” or “Save GIF” in your web app to launch the Save menu. Choose a name for your GIF and save it to your computer in a folder you’ll remember later.
- If your GIF is over 10MB, web app converters will create a file that ends with a “.GIFV” instead of ”.GIF”, though you will still be able to use it as you would a normal GIF.
- You can test your GIF out by opening it in your web browser. Navigate to the folder where you saved the GIF and drag it right into your browser window. Or, if you’re on a mobile device, browse to the file and tap it open. The animation will play instantly.Advertisement
Method 3: Creating an Animated GIF From Scratch in GIMP
- Open GIMP. If you’d like to create an animated GIF from scratch and are comfortable using GIMP, this method will work for you. Install GIMP if you’ve not yet done so, then launch the software.
- Create a new image. In the File menu, click “New.” A dialog will appear with options for your new image:
- You’ll see two boxes that say Width and Height, followed by “px,” which means “pixels.” Type your desired size (in pixels) in each box. If you are more comfortable visualizing inches, choose “in” from the list and type your desired image size.
- Next to “Fill with,” choose a color to use for the background of your GIF. There are two boxes beneath the side tool bar filled with colors—selecting “Foreground color” will use the color of the front square as the image color, and “Background color” will use the rear square color.
- Click “OK” to create your image.
- Make the Layers dock visible.[6] Open the “Windows” menu and select “Dockable Dialogs.” Select “Layers” from the list.
- Create a new layer for your first element.[7] Each piece of your animation must be on a separate layer. Click the small square piece of paper at the bottom left corner of the Layers box to open the New Layer dialog.
- Type a name for your layer next to “Layer name” so you can easily switch between layers later.
- To ensure a seamless animation, set the color to “Transparent,” then click “OK.”
- Add images or text to the layer. If you want to draw on this later, click the paintbrush icon in the sidebar, select a color, and draw your picture. To insert text, click the “A” on the sidebar, then click somewhere to begin typing.
- Anything you put in this layer will be animated together. In other words, if you type some text and draw an image on this layer, these two elements will be in the same frame of the animation.
- After you’re done putting images or text on this layer, look at the layers dialog and notice the “Opacity” option. To make a layer less opaque, slide the knob down until you see your desired results.
- Create another layer, if desired. This step can be repeated for as many different layers as you’d like in your animation. Give this new layer a name that’s unique from the last layer, then click “OK.”
- View a preview of your animation. Open the Filters menu and select “Animation,” then “Playback.” You will see a preview of your animation, which GIMP creates from each of your layers.
- Change animation options. Open the File menu and click “Export,” then select “GIF image.” Make sure the box is checked next to “As animation.”
- If you want the animation to loop continuously, put a check next to “Loop Forever.”
- Next to “Delay between frames where unspecified,” enter the time (in milliseconds) you’d like each frame to display. By default, it’s 100 (which is why your preview looked rather fast). Change it to something larger, like 300 or 600, then click “Export.”
- Fine-tune the delay. If you don’t want each of your layers to appear for the same amount of time, you can edit the duration of each layer independently.
- Right-click one of the layer names in the layers dialog and select “Edit layer attributes.”
- Next to the layer name, type the duration (in milliseconds) directly, without a space, like this:
LAYERNAME(200ms) - Click “OK to save that layer, and modify any additional layers in the same way.
- Preview and export your animation. In the Filters menu, click “Animation” and select “Playback” to see how your changes have modified the animation. When you’re ready to save the image, click “File” then “Export,” and choose “GIF image” once more. Give your animation a name and click “Save” to finish.Advertisement
Method 4: Creating an Animated GIF From Scratch in Photoshop
- Create a new image in Photoshop.[8] If you’d rather convert a video to an animated GIF format, see How to Make an Animated GIF from a Video in Photoshop CS5. A working knowledge of Photoshop tools will help you immensely with this method. See How To Use Adobe Photoshop Tools for general Photoshop tips.
- Open the “File” menu and click “New” to view options for your new file. Type a name for your animation in the box next to “Name.”
- In the “width” and “height” boxes, note the measurement types after the value boxes. It’s either set to inches or pixels, depending on what you’ve used in the past. If you feel comfortable specifying pixel size, change the measurement type to “Pixels.” If it’s easier for you to visualize inches, choose that option. Type your desired measurement in its corresponding box.
- Choose a background color for your animation. Click the menu next to “Background” or “Background contents” (depending on your version of Photoshop) and choose from the color options.
- Click “OK” to create your new image with these settings.
- Open the Layers and Animation panels.[9] Each frame of your animation needs to be in its own layer, so you’ll want the layers panel visible. Click the Window menu and check both Layers and Animations. The panels will then appear in your workspace.
- Create a new layer for your first frame. In the Layers panel, click the plus sign (+) to add a new layer. Next to “Name,” type a name for your layer, such as “Frame 1.” Set the Fill color either to Transparent or the color of your background. Click “OK” to create this new layer.
- Each element of your animation needs to be on a unique frame. Anything you put on this new layer will animate as one frame.
- Add your text or drawing to your new layer. If you want to draw on this layer, choose a color from the swatch panel (the panel with all of the colored squares) then click the paintbrush tool. If you want to add text, click the “T” to launch the text tool.
- Create your next frame. Create another layer and build the second frame of your animation.
- If the next frame of your animation will simply be a slight modification to the first frame, you may want to “Clone” your layer instead of creating a new one. To clone the layer, right-click on that layer in the Layers panel and select “Duplicate layer.”
- Continue creating or cloning layers until you have each individual frame of your animation on its own layer.
- Create new frames in the Animation panel. In the Animation panel at the bottom of the screen, click the icon that is a small rectangle with a smaller square on top of it (the New Frame button). This will create one new frame. Click this button as many times as there are layers in your animation. If your animation will have 7 layers, create 7 frames.
- Edit the contents of the first frame in the Animation panel. Click the first frame in the panel. As you can see from the thumbnail, this frame presently consists of every layer in your animation.
- Notice that each layer in your Layers panel has a small eyeball symbol next to it. This symbol tells you that the layer is currently visible. To make the first frame in the Animation panel display only the first layer, remove the eyeball symbol from each of the other layers.
- Change the duration for this frame by adjusting the time (in seconds) beneath the thumbnail, which currently reads “0 sec.”
- Edit subsequent frames. Click each additional frame and remove visibility from all layers other than the one you want to be visible in the frame. Remember to adjust the time at the bottom of each thumbnail.
- Press the Play button to test your animation. The Play button is located beneath the animation frames at the bottom of the screen.
- Save the animation as a GIF. Click “File,” then “Save for Web and Devices.” Make sure that GIF is selected in the top pulldown menu beneath the word “Preset” and click “Save.”Advertisement
How to Create a Gif With Canva
- Get started with CanvaCreate a GIF, even if you don’t have a Canva account by going straight into the GIF maker. You can still sign up for a free Canva account at any time using your email or Facebook account to save your GIFs to use multiple times or edit them in the future.
- Craft your designEasily make your GIF by designing from scratch to visualize your own content idea, or exploring Canva’s extensive library of pre-made templates to find one that you like. Narrow down your search by type, may it be for your card, presentation, or social media graphic. You can also look through themes, colors, and styles that capture your vision.
- Discover featuresGraze through millions of designer-made photos, videos, icons, illustrations, and other graphics. Play with different fonts and apply effects. Work on your design with others using the collaborate tool.
- Animate your designCheck if there are any grouped elements, select them, and click the “Ungroup” button. Click on a particular piece and select the “Animate” option to pick a motion style. You can add a variety of animations in exciting combinations to your design. Make individually distinct movements for each page, text, or element. Let it fade, pan, slide, and more as you like it.
- Download and shareHappy with how your layout turned out? Click the download button on the editor’s top right side and select GIF to save all or selected pages of your design. Share it with your friends and family online, or post it on your social media accounts.
Conclusion
GIF images are very popular as it is smGifs are digital files that usually consist of a sequence of images, which are compressed to reduce the file size. Gifs are pronounced using a hard “g” sound to differentiate them from JPEG.