Here I am going to tell you about how to create breakout rooms in zoom. I will also teach you some simple tips on how to make your breakout group awesome like mine. Before explaining how to run a breakout room the right way, let me explain what is a breakout room?
Zoom has become a household name lately, and it’s not hard to understand why it’s one of the best ways for professionals to meet with colleagues digitally.
A big part of this comes from how many features Zoom offers that allow you to recreate the experience of meeting with people in real life. From waiting rooms to raising hands , Zoom is designed to help your meetings run as smoothly as possible.
One of Zoom’s lesser known features is the breakout room. Breakout rooms let you separate people in a meeting into smaller groups, where they can have their own private conversations, and then come back to the larger meeting later.
To create a breakout room in Zoom , you’ll need to enable the setting. But once you do, you can create up to 50 breakout rooms in a single call.
However, note that you can only create breakout rooms if you’re using the desktop version of Zoom . Mobile users can still join the breakout rooms, but can’t create or manage them.
Here’s how to set up a breakout room, using the Zoom desktop app for Mac and PC.
Table of Contents
Check out the products mentioned in this article:
Lenovo IdeaPad 130 (From $469.99 at Walmart)
Apple Macbook Pro (From $1,299.00 at Apple)
How to enable breakout rooms in Zoom
First, you’ll need to log onto zoom.us ‘s website, not the app itself, to enable breakout room functionality.
1. Sign in with your username and password on zoom.us .
2. Go to your account by clicking “My Account” in the top-right corner.
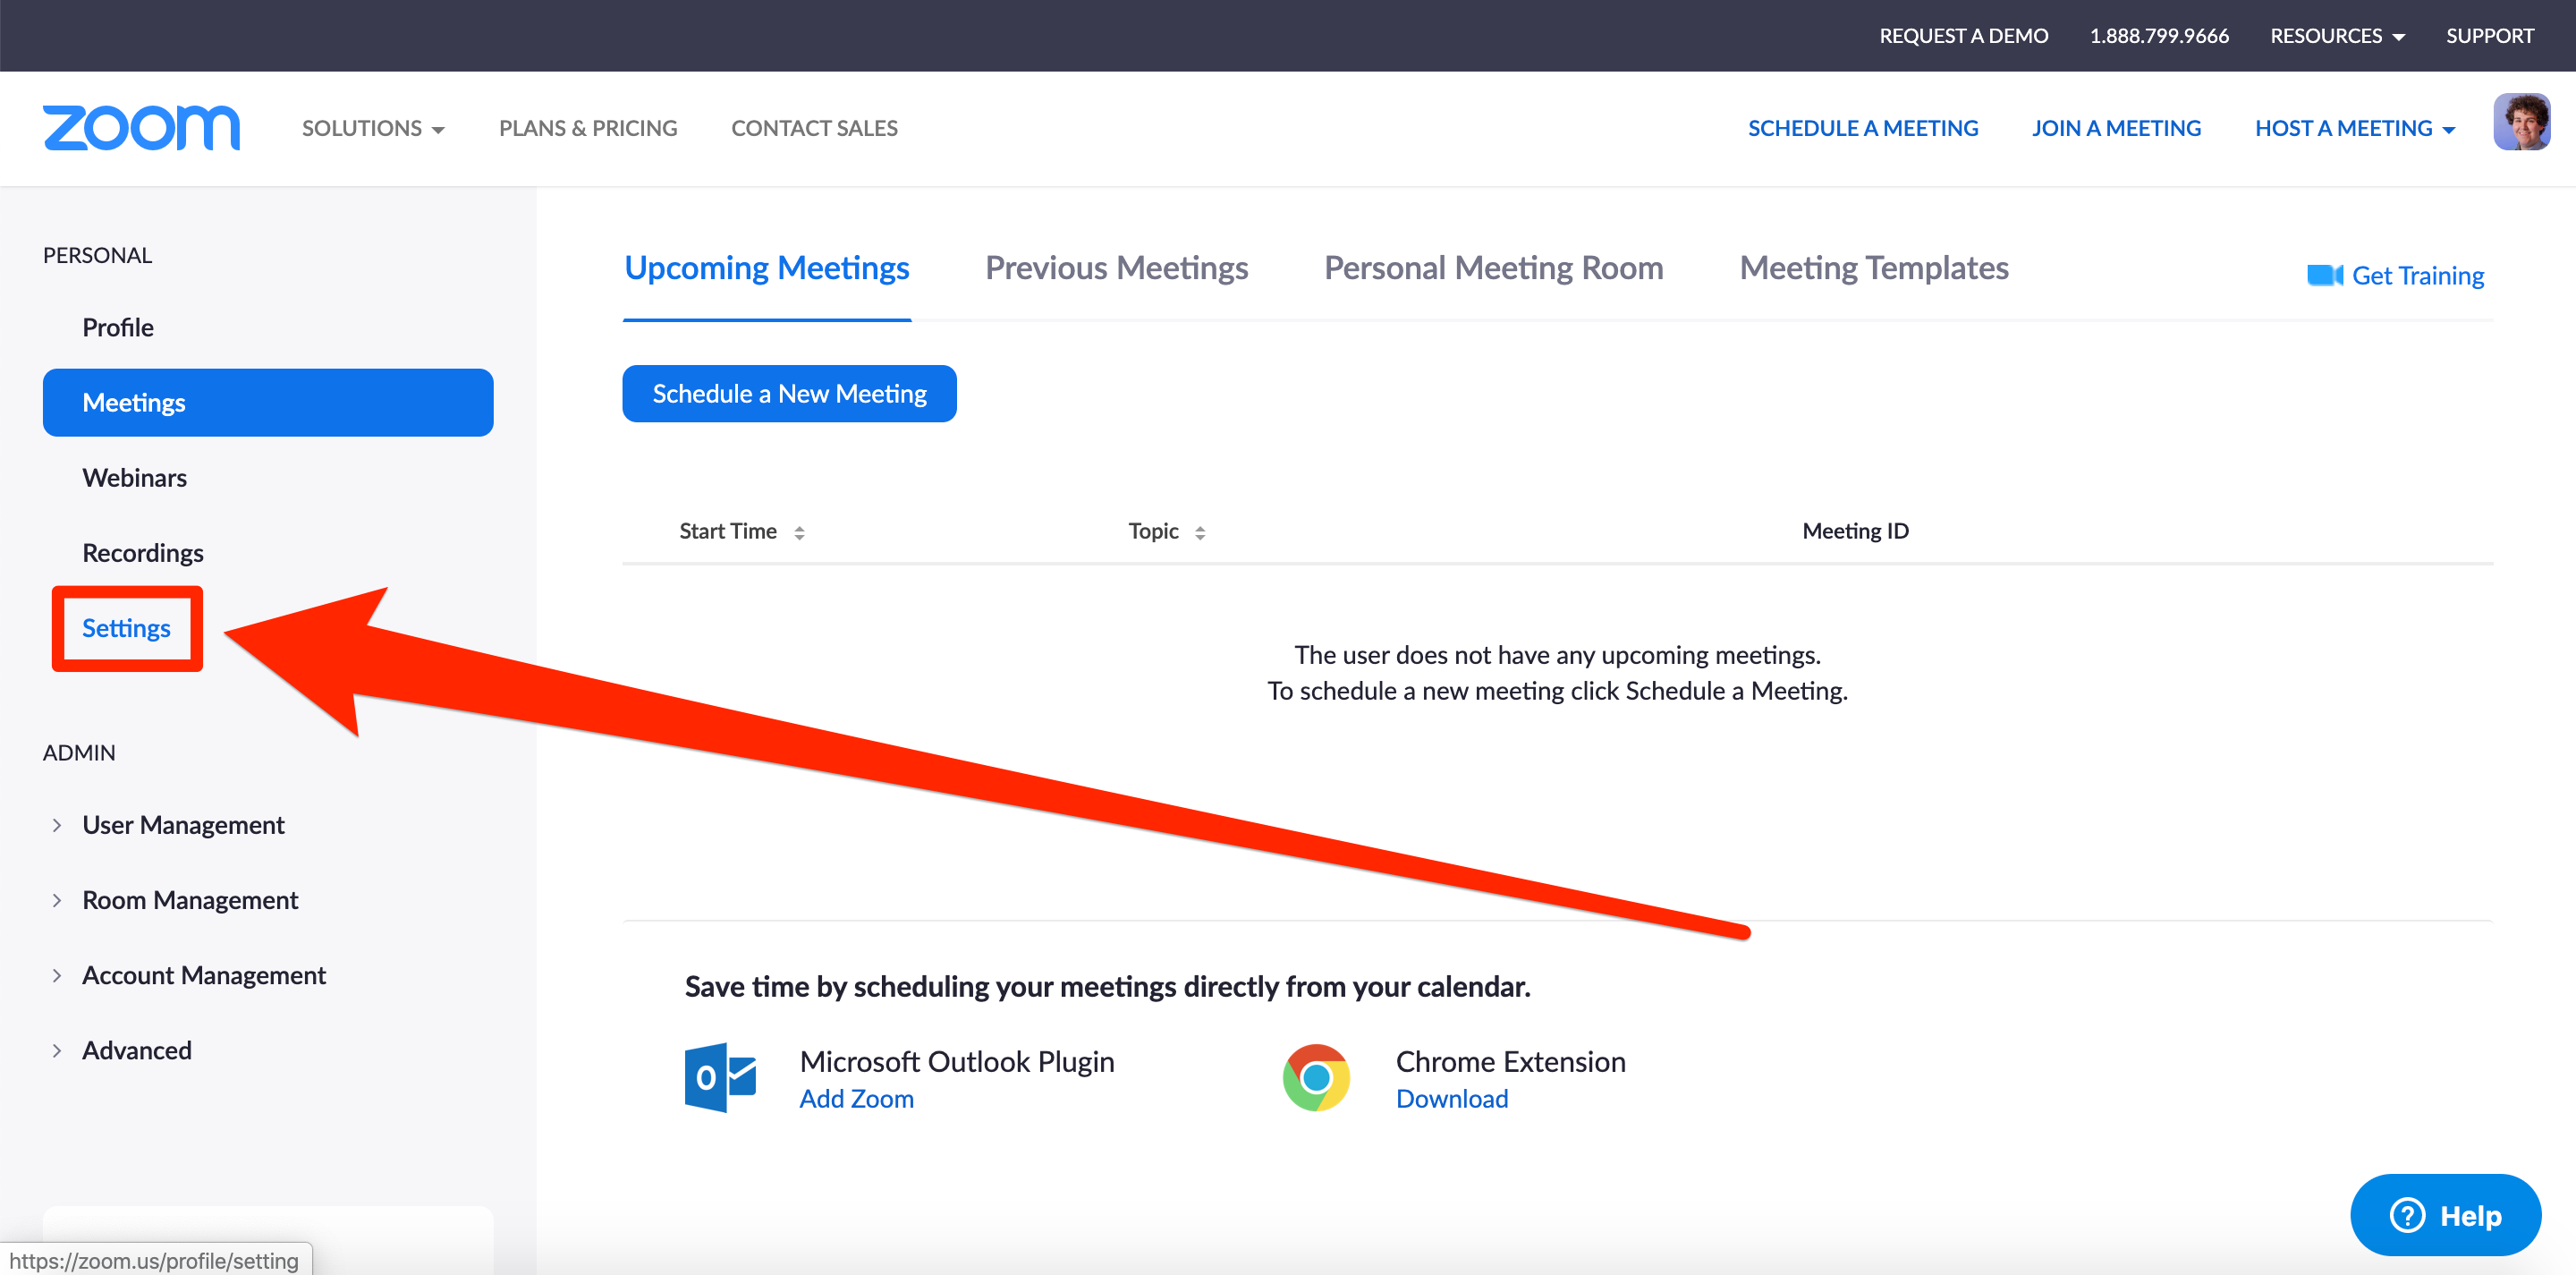
3. Under the “Personal” heading in the left sidebar, click “Settings.” Screen Shot 2020 04 01 at 2.21.23 PM
4. Under the Meetings tab (which is selected by default), scroll down to the “In Meeting (Advanced)” category.
5. From here, click the switch to enable breakout rooms. You can also pre-schedule breakout rooms by selecting the checkbox below this toggle this will let you manually assign who should go to what breakout room before the meeting starts. Screen Shot 2020 04 01 at 2.21.52 PM
How to create breakout rooms in your Zoom call
1. Open up the Zoom application on your Mac or PC and log in.
2. Select either “New Meeting” or “Schedule” to schedule an upcoming meeting. Either way, you must be the host to create breakout rooms.
3. When the meeting begins, in the bottom toolbar you’ll now see a “Breakout Rooms” icon that wasn’t there previously. Click it. Screen Shot 2020 04 01 at 2.28.22 PM
4. From here, you can either allow Zoom to automatically sort your participants into the number of rooms you select, or sort out each room manually.
5. Once you’ve decided on your setting, click the “Create Breakout Rooms” button. Screen Shot 2020 04 01 at 2.28.32 PM
How to manage a breakout room in Zoom
A dialogue box will show the rooms you’ve created.
1. Click a room to see who’s in it, or hover over to move, rename, delete, or reassign people from various rooms.
2. Select the “Options” button to enable your various breakout room settings. Breakout Rooms overview
3. Here you can set breakout rooms to close after a set amount of time, decide how much control you want participants to have over their time in these sessions, and set a countdown timer to let participants know how long they have left in a particular breakout session once time expires or the host decides to close it.
4. Select “Open All Rooms” to officially start your breakout sessions. Selecting “Recreate Rooms” will shuffle the participants in any order you choose for future breakouts.
How to Add Participants to the Breakout Room in Zoom
Part 1 Enabling Breakout Rooms Download Article
- Sign in. To use breakout rooms, you will first have to enable them. Go to https://zoom.us/signin and sign in to your account.
- Enable the breakout room setting. Go to settings – in meeting (advanced). If you scroll down, you’ll see an option called “Breakout room”. Enable it. Now you will be able to use breakout rooms.
Part 2 Using the Feature on Zoom Download Article
- Click on Breakout rooms. This will be near “Record” in your meeting.
- Decide whether the groups in each room should be chosen or randomized. For Zoom to assign the participants by itself, click on Assign automatically. If you want to assign the participants yourself, click on Assign manually. If you’d like the participants to choose the breakout room, click on Let participants choose room. Now your participants will be in the breakout room.
- You can also choose the amount of breakout rooms you wish to create.
- Broadcast a message. Click on Broadcast message to all and type your message if you want to broadcast a message to your participants.
- Join a breakout room if necessary. To join one of the breakout room, choose the particular breakout room you want to join. Click on Join, which will be next to the name of the room.
- Close the rooms once you’re done with them. If you’d like to close all the rooms, click on Close all rooms. This will return all the participants to the main room.
Conclusion
When it comes to web conferencing software, zoom is incredibly popular. Users can create video conferences, join online meetings, and use the “zoom breakout rooms” feature. But for those who are new to zoom, it can be challenging to find out how to set up your own breakout room in zooming.
