How to Write in Calligraphy – Writing is not just a way of presenting thoughts and ideas; your own handwriting can also become an important design tool. Just how, though, do you conjure up expressive, creative results simply by putting pen to paper?
If you find yourself asking that very question, you’ve come to the right place! Our aim is to show you how to lend more expression to your own handwriting and to show you both the theoretical and practical basics of calligraphy using edding calligraphy markers. Happy writing!
Table of Contents
Method 1: Learning the Basics
- Hold your pen diagonally at a 30 to 60 degree angle. A calligraphy pen isn’t used quite the same way as a regular pen. The tip, or nib, of the pen should point diagonally away from you, to the left, as you write.[1]
 Don’t twist the nib as you write. The tip of writing tool used to do calligraphy is called a nib. Regardless of the letters you are forming, the orientation of the nib should remain consistent. Whether you’re doing straight lines or loops, the tip of the nib should always point in the same direction.
 Lead the nib backwards or sideways across the paper. The nib should move backwards or sideways from the direction it’s pointing in. Pushing it forward away from your hand leads to blotting and uneven letter formation.
 Apply light pressure. Using too much pressure can make for messy letters or scratches in your paper. Pressing too hard can also damage the nib, so do your best to apply the pen to the paper with a light, consistent pressure. Try not to lean heavily on your hand or forearm, either, which creates stilted lettering.
 Keep your lines parallel. Vertical, horizontal, and diagonal lines in various letters should be parallel to corresponding lines in other letters. This will make your writing look more consistent and professional.
- For instance, try to make the vertical line the letter “d” parallel with the vertical line in the letter “b.”
Method 2: Practicing Letters and Words
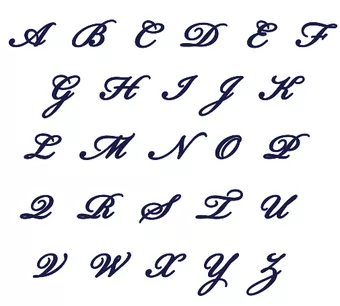
- Trace the alphabet numerous times. Select and print a sample calligraphy alphabet and cover it with a piece of tracing paper. Try to recreate the strokes of the alphabet letters until you can successfully write the letters on your own.
 Use the correct stroke order. Each letter or symbol will be made up of several different sections which are done in a single movement, called strokes. Practice upward and downward strokes until you can make them consistent. Keep in mind that when writing letters the stroke order is also important, and differs by style, so refer to a calligraphy guide to learn which strokes come first based on the letter.
- For instance, in Western calligraphy, write vertical lines first followed by horizontal lines, such as when writing the letter “t.”
- In Asian calligraphy, strokes begin at the top of the character and move downward to the to bottom of the character.
- For Islamic calligraphy, begin with the largest strokes of the letter and progress to the smallest strokes and dots.
 Try the grid method. Set up a grid to practice with by filling a piece of paper with 1 inch (2.5 cm) squares. Use pencil to make the grid, then fill in each row with repeated versions of whichever letter you wish to practice until your strokes are even and clean-looking.
- Use templates to perfect your spacing. Calligraphy templates will help you master letter formation and keep your spacing consistent. They also keep your letters and words from slanting up or down across the page. Do an Internet search for free guids or templates, or pick up a calligraphy guidebook to practice with.
 Practice freehand. Once you get the hang of how to form calligraphy letters, practice writing notes, messages, or journal entries in calligraphy. Anything you need to write down can be done so in calligraphy to get you used to connecting different letters.
Method 3: Selecting Your Supplies
- 1Choose smooth, acid-free, archival paper. Smooth paper will keep your writing utensil from catching or being redirected by the paper. Look for paper that’s labeled “acid-free” and “archival” to ensure that your image will age well. You will also want to look for paper which is labeled as “sized,” meaning it’s been treated to keep ink from bleeding.
- Avoid paper that’s greasy or waxy, which can keep the paper from absorbing the ink.
- Get a proper writing utensil. While you can create calligraphy with any writing utensil, there are certain writing instruments which are considered better than others. Which you use, however, will depend upon what type of calligraphy you are doing and what writing utensil feels best to you.
- Dip pens are pens which you dip in ink. They consist of a wood, plastic or bone handle and a metal nib (the pointed end which will make contact with the paper). The nib is dipped in the ink and stores it in the well of the nib. These are often used in Islamic calligraphy.
- Fountain pens are similar to dip pens but instead draw their ink from a container within the pen. While this ink will occasionally need to be replaced or refilled, it will save you the trouble of constantly needing to dip your pen. Fountain pens are commonly used for Western calligraphy.
- Brushes come in a variety of sizes but will usually all be roughly the same shape. These are dipped in ink and use the pressure and direction of the writer’s strokes to form the line variations. Brushes are often used for Asian calligraphy.
- Select the best ink for your style. There are many different types of ink and which one you choose will partially depend on what you are writing with. Inks will also come in a variety of colors but black is the most commonly used color in all styles of calligraphy.
- Pot ink is the most common ink used for calligraphy. This ink comes premixed in a small jar and your writing utensil will be dipped into it, such as for Islamic calligraphy. India ink is the most common type of pot ink used in calligraphy.
- Fountain pen ink is a special kind of dye-based ink which is used for fountain pens, typically for Western calligraphy. It is important to use only fountain pen ink in these types of pens as other ink types will clog the pen. Fountain pen ink will come in either pre-loaded barrels, which you place in your pen, or pots, in which case you fill the pen yourself.
- Ink sticks, which will also require an ink stone, are sticks of ink which must be ground and mixed with water in order to form the ink you will write with. They are an excellent option for calligraphers because they allow you to get many different tones from the same ink, depending on how it is mixed. These are often used in Asian calligraphy.
- Use rulers or other guide instruments for consistency. You may want rulers or T-guides to create guidelines for yourself and ensure that your writing is straight. Or perhaps you wish to write across a curved or circular line and need a reference. Even experts use rulers and other guide instruments to make their writing as beautiful and consistent as possible.
- Keep your paper in place with tape or weights. Use painter’s tape or weights to hold the paper in place while you are writing. This will keep you from skewing or bumping the paper and messing up your letters. You can also use clips or a drawing board.
Conclusion
Calligraphy means “beautiful writing” in Greek and spans thousands of years and countless cultures. There are several styles, including Western, Eastern Asian, Southern Asian, and Islamic. All calligraphy uses the same basic principals to create beautiful lettering. If you want to practice the art of decorative handwriting, all you need to do is follow a few simple steps.