
How to Create Video With Pictures – Pictures are captured memories. They’re snapshots of the best moments in your life. Just one picture can tell a million stories.
So imagine the power of an array of pictures in a video! It can bring out a rainbow of emotions which no words ever can.
This is why picture videos are both personal and exceptional. Be it a simple Christmas greeting to your teacher or even a romantic video slideshow to your girlfriend; Photo videos have everything needed to hit the right chord in one’s heart!
Now, creating such videos has always been a taxing affair. It either takes a lot of work or costs a lot of money!
Table of Contents
Solution 1. Google Photos Make Video from Pictures
Google Photos can make video from pictures. And, this tool can help you create video with pictures in computer, iPhone and Android. Now, how to make a video with pictures and a song by using this tool? Don’t worry if you don’t know! The following part will tell you the detailed steps.
Computer Users Make a Video with Pictures
If you want to make a photo slideshow on your computer, you can try the following steps.
Step 1. Visit photos.google.com.
Step 2. Sign in to your Google Account.
Step 3. Select the Assistant option, and then click the Movie option.
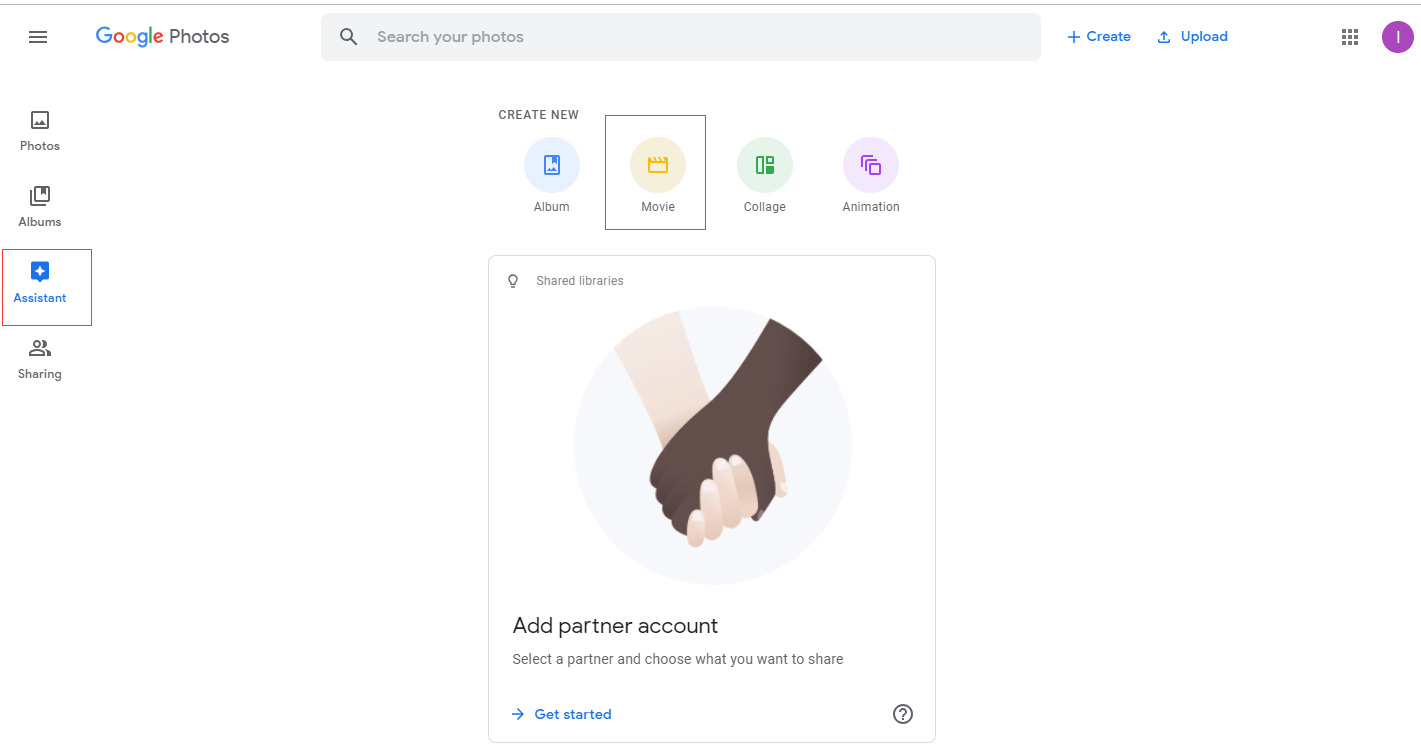
Step 4. Select a movie theme.
Step 5. Click Get started.
Step 6. Select the photos you need.
Step 7. Click Done.
Android Users Make a Video with Pictures
Android users also can use Google Photos app to create video with photos.
The steps are:
- Open the Google Photos app on your Android phone or tablet.
- Sign in to your Google Account.
- Select the Assistant option at the bottom.
- Select Movie at the top.
- Select photos that you want in the movie. (If you like, you also can select videos to create your own movie.)
- Now, press the Create button at the top-right.
- Then, type Play to watch your movie.
- Select the Untitled to add a title to your movie.
iPhone and iPad Users Make a Video with Pictures
iPhone or iPad users can try the following steps to convert image to video with music by using the Google Photos app.
- Open the Google Photos app.
- Sign in to Google Account.
- Select Assistant > Movie.
- Select the photos (or videos) that you want to use to create your cool video.
- Select Create and then click Save to save your created video.
Solution 2. Convert Photo to Video Online
Want to make video with pictures online? Photo to video online converters can help you. For instance, you can try the following steps to make video with pictures online.
Step 1. Visit ANIMOTO and select Make A Video.
Step 2. Sign into your account.
Step 3. Select a template to tell your story.
Step 4. Upload your pictures to convert photo to video online.
Step 5. Drag and drop these photos to replace all simple content.
Step 6. Edit your video if you like.
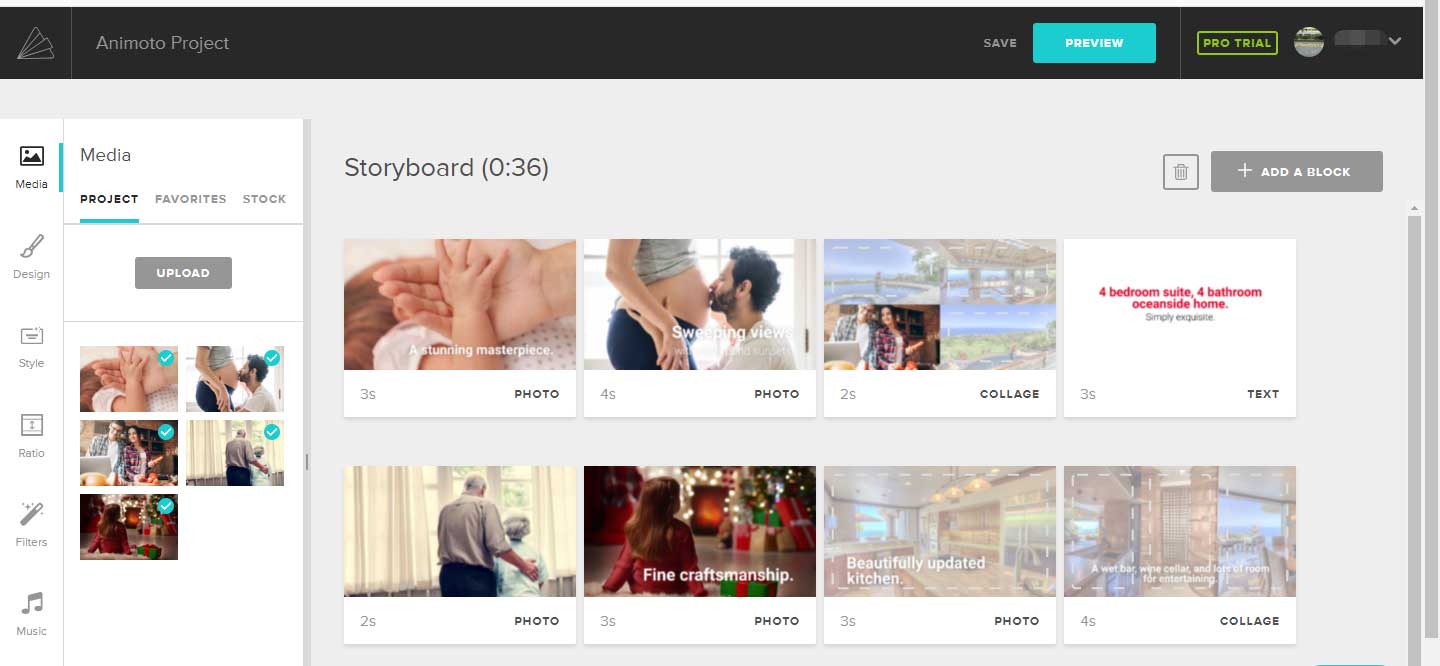
Step 7. Preview the video and then save this video.
Thus, you have finished converting photo to video online.
Solution 3. Slideshow Maker Make Video from Pictures
As we know, photo slideshow maker can help you create video from photos. There are a lot of photo slideshow makers in the market. What is the best free slideshow maker?
One. Windows Movie Maker (Windows users)
If you are a new user, you can try using Windows Movie Maker, a free and simple video editing tool, to make a video with photos and a song.
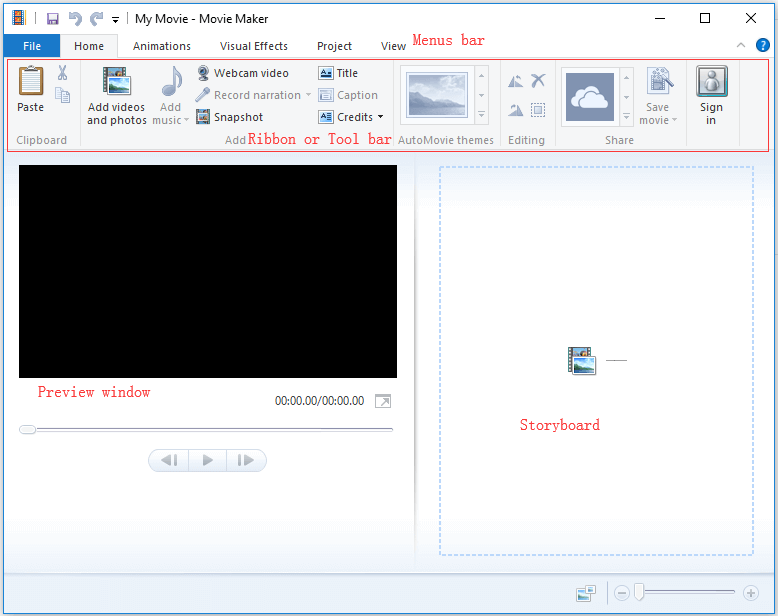
In the main interface of Windows Movie Maker, you only need to import your photos into the storyboard, and then add transitions, texts, and filters to this video. Finally, you can share your video with your friends. The detailed steps on how to make a video from photos and music can be found in this post “How to Use Movie Maker | Step-by-step Guide for Beginners”.
Microsoft Movie Maker is a good tool for most common users. However, Movie Maker was officially discontinued on January 10, 2017. It’s time to find a Windows Movie Maker alternative to convert photos into video.
Two. Adobe Premiere Pro (Windows and Mac users)
If you are a professional, you might need to turn to some professional photo video maker tools. A study shows that industry professionals always select Adobe Premiere Pro because of its great interface, learning resources, and high-power tools.
Adobe Premiere Pro is used by Hollywood filmmakers, TV editors, YouTubers, videographers and others.
The above window is the main interface of this professional photo slideshow maker. This tool indeed can help you create a wonderful video with pictures as its powerful functions.
However, you have to spend time learning this tool. And, you can’t purchase the software outright – you must subscribe to Creative Cloud.
Three. MiniTool Movie Maker (Windows users)
The Best Free Slideshow Maker – MiniTool Movie Maker is recommended here. This free and simple photo slideshow maker can help you quickly create video with photos. Let’s see how to make a video with pictures and music.
Step 1. Import photos.
- Download and install MiniTool Movie Maker.
- Launch this free photo slideshow maker.
- Click the Full Feature Mode option to enter the main interface of this tool. Here, if you like, you can choose a suitable video template, and then import your photos. After that, you get a cool video, and then you can directly share it with your friends.
- Then, import your photos by clicking the Import Media Files
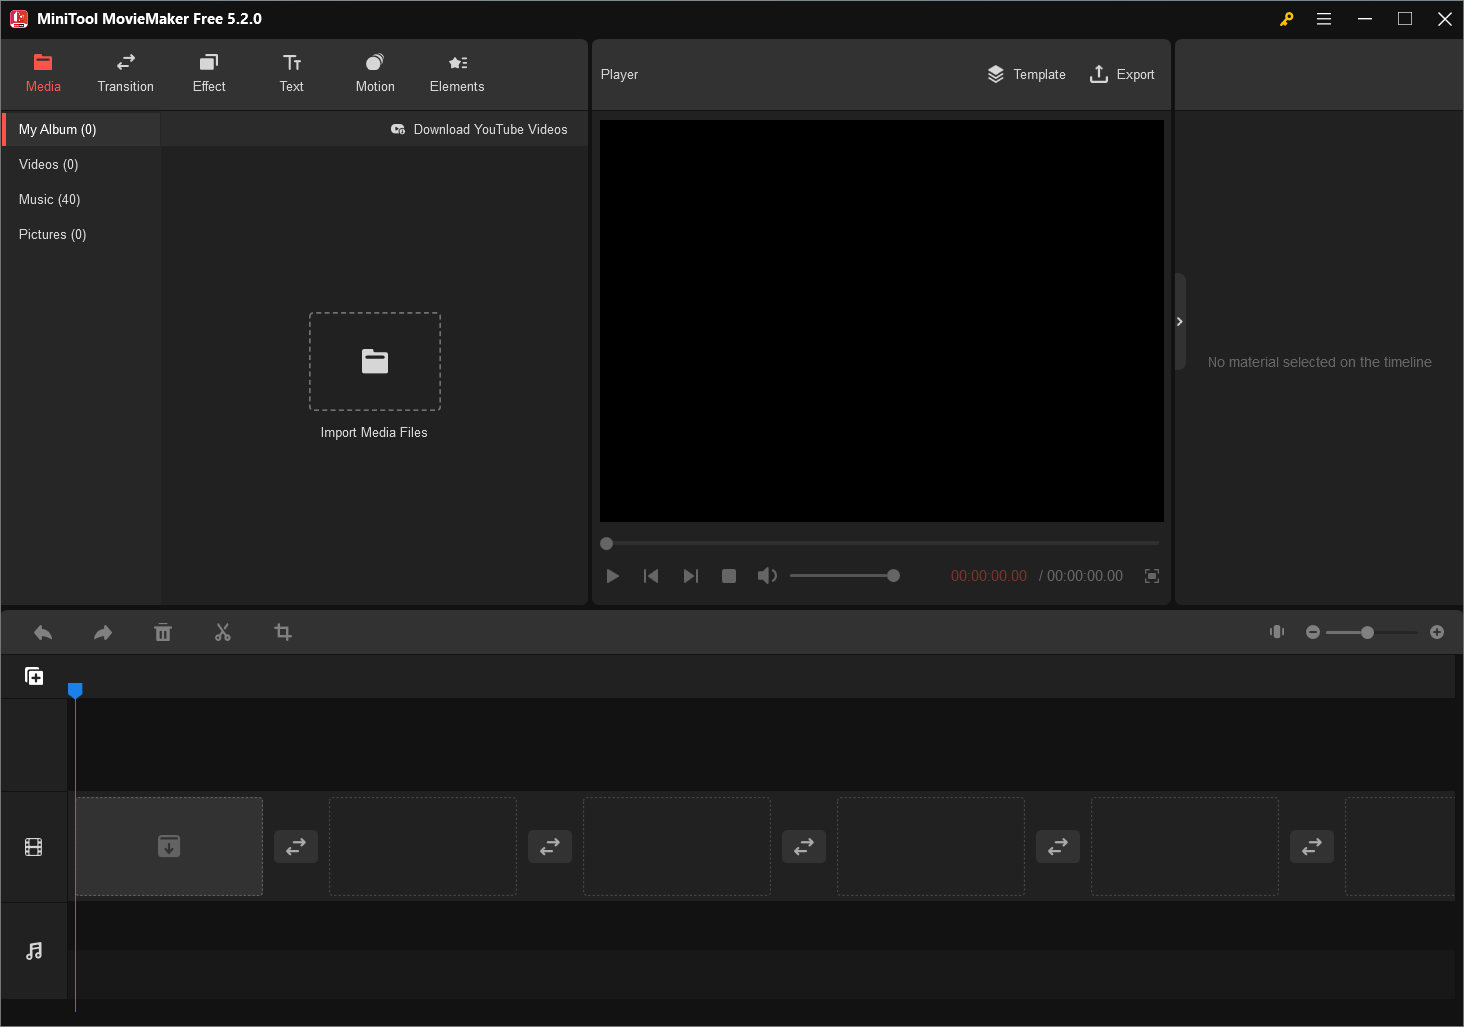
Step 2. Make video from pictures.
#1. Add photos to storyboard.
Drag and drop your pictures into the storyboard in the order you want them to appear in the finished video.
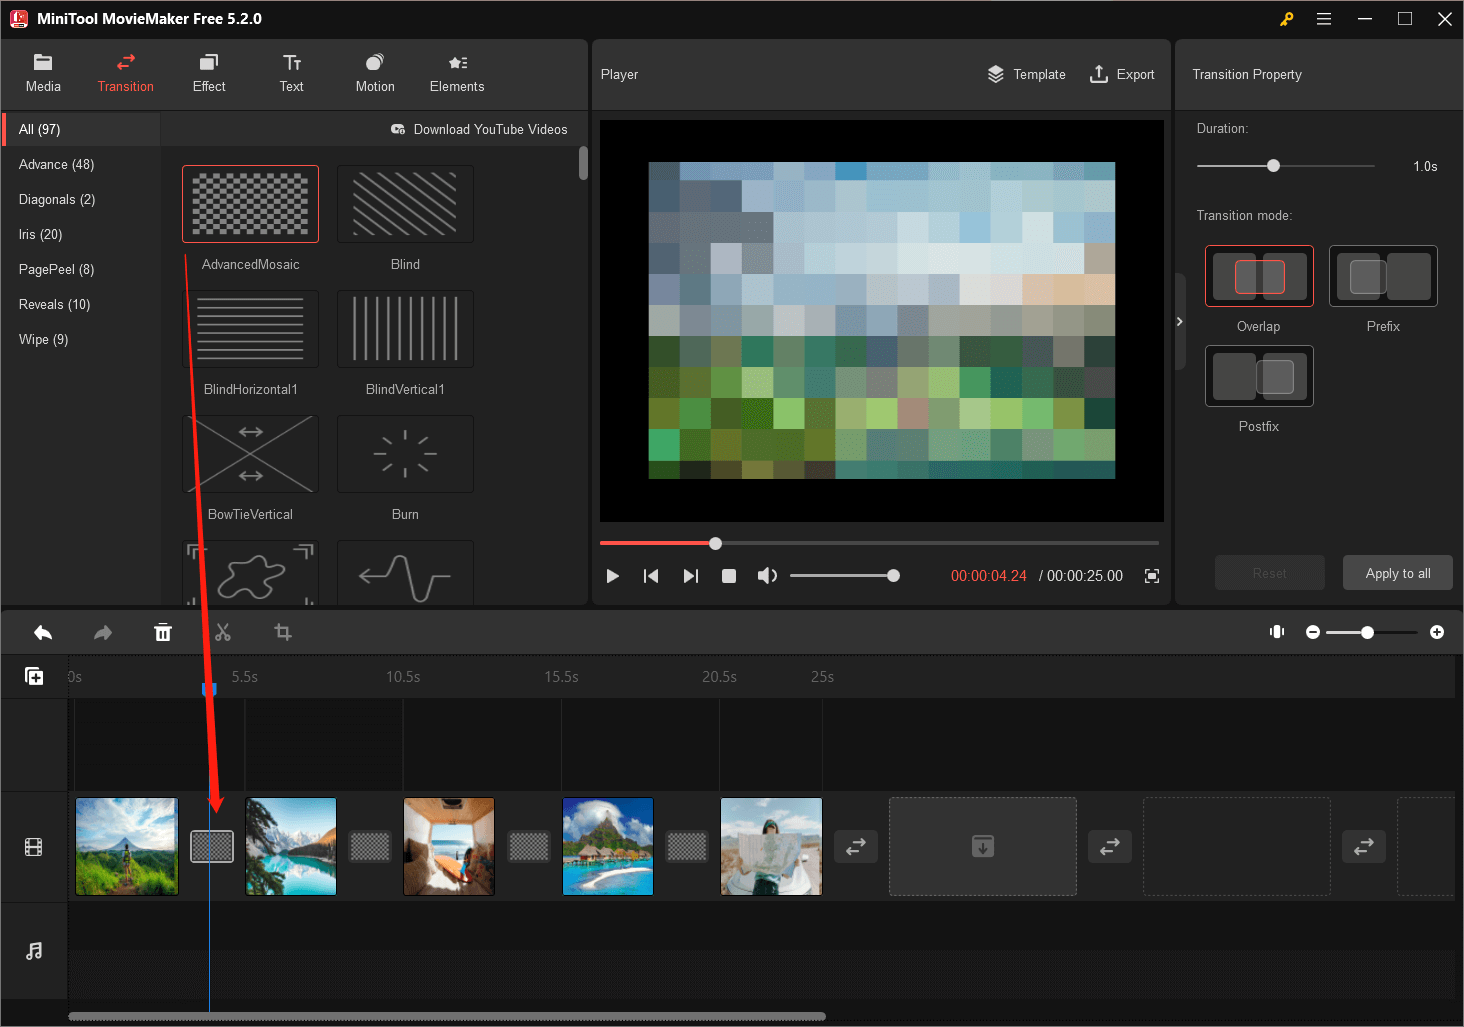
#2. Add transitions between photos.
Transitions create a switch between two clips smoother, making the photo slideshow good looking and impressive.
Click the Transition mode to open the transitions library and choose your video transition. Drag and drop it between two photos on your storyboard.
#3. Add text to photo.
To help people better enjoy your photo slideshow, you can add subtitles to video to give some context to the images and show why they’re special for you. Here, MiniTool Movie Maker offers a lot of different text format styles to help you add text to photo.
You need to click the Text button. Next, choose a suitable text mode you want to use and drag it to the storyboard. Finally, you should enter your own text, change the color and style, and more. For more information, check this post “Need to Add Subtitles to Video Free? Try The 2 Simple Ways!”

Step 3. Add music to video.
After you finished editing your video, you can go back to the Media library. Next, click the Import Media Files button again to import a suitable song or instrumental music for your movie. After that, drag this song to the music track. You can edit this music and then change its duration and other information.
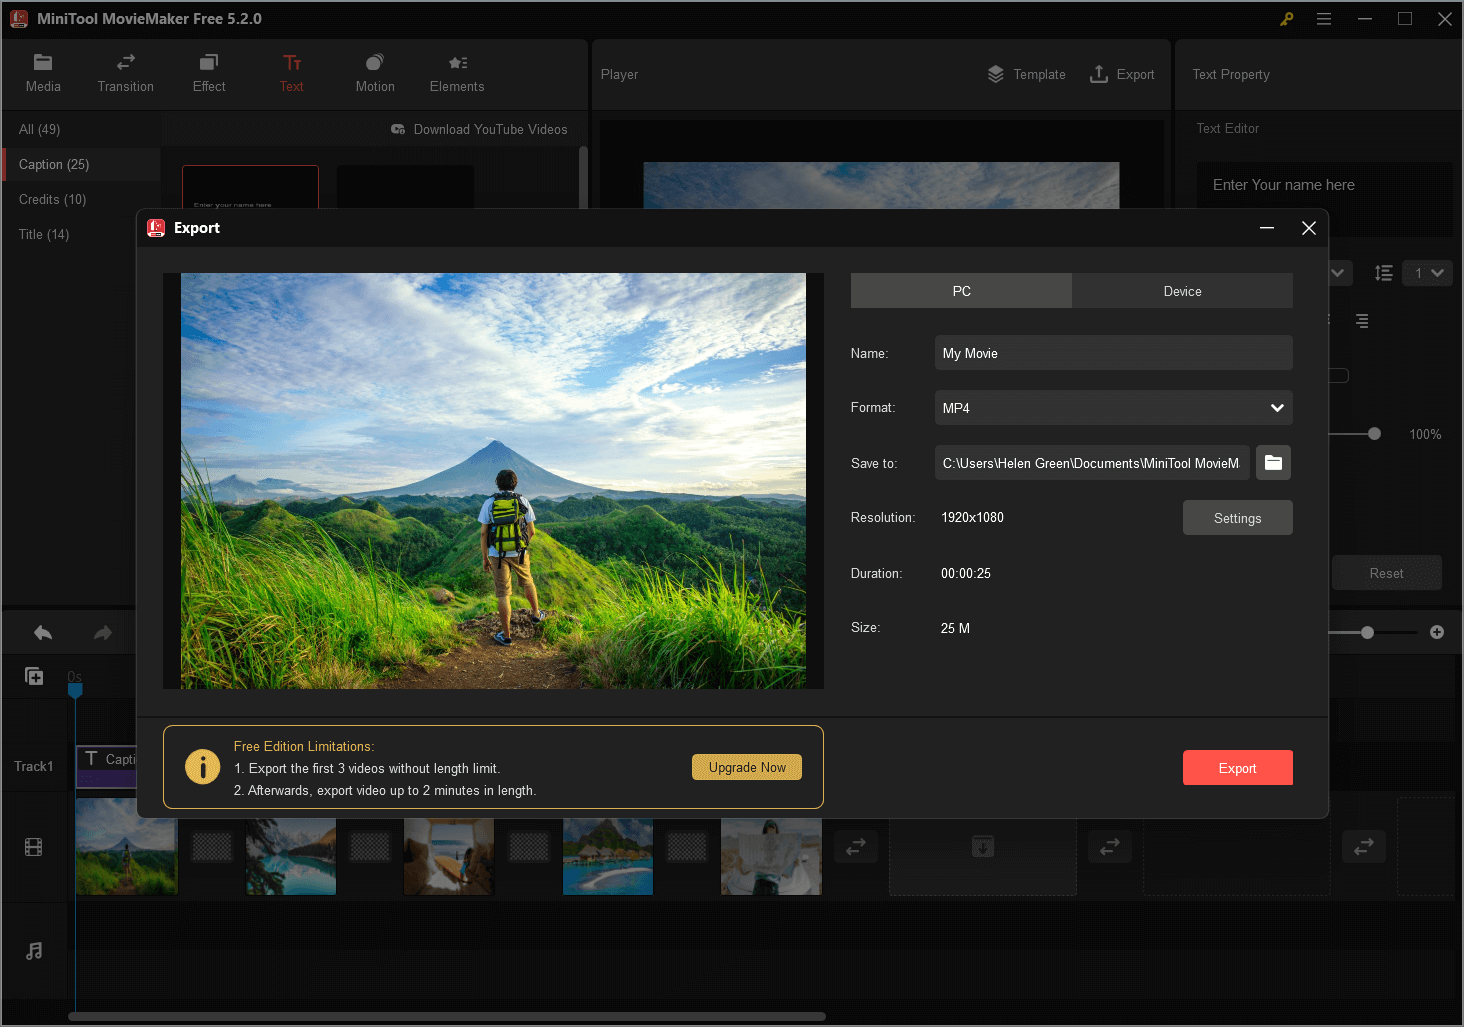
Step 4. Save your photo slideshow.
Now, you are supposed to store your video by clicking the Export button. Then, you can select the video format to save it on your PC. Here, this free photo slideshow maker offers common video formats including WMV, MP4, AVI, and more.
Solution 4. Apple Photos App Make Video from Pictures (Mac and iPhone users)
Mac users make video from pictures with Photos app
If you are running computer with Mac OS X, you don’t need to install any software because the Photos app can help you convert photos to video. Now, let’s see the detailed steps on how to make video with pictures and music in Mac OS X.
Step 1. Import the images to Photos program and select the photos to create your video.
Step 2. Select File, and then click Create Slideshow to continue.
Step 3. Then, customize the name of slideshow.
Step 4. Drag photos into the order you want in the bottom of the window.
Step 5. Click the Themes button, and then select a theme like Vintage Prints.
Step 6. Select the Music button, then click the down arrow next to Music Library, and select a song.
Step 7. Click the Play button to play the photo slideshow.
Step 8. Click the Export button to export your video.
iPhone Users make video from pictures with Memories
As one of the best-hidden tools on the iPhone and iPad, Memories will automatically take a collection of photos and videos and present you with a beautifully edited video montage.
The Photos app automatically makes a movie for each Memory on your iPhone, iPad, and iPod touch. When playing this movie, you can tap the screen to adjust the movie music, length, and content.
Photos automatically creates Memories. However, you are the best curator of your photos. You can make a Memory by yourself.
Tap the header of any Moment, Collection, Year, or Album on your iPhone, iPad, or iPod touch. Next, tap the blue circle with three dots, then tap Add to Memories.
Conclusion
When you are done, go to the export tab to upload online directly to your website, blog, Facebook, YouTube channel, or other social media sites, or export to your computer in popular formats. Make sure your video is formatted in the correct size for your needs. Now that you are done sit back and watch your new masterpiece.
If you wish to do more to your slideshow, consider using instant project video templates.