How to Create iPhone Ringtones – You are just getting started with your iOS device or even you are an experienced iOS user, it doesn’t matter. But you will be surprised to know how to set a song as a ringtone on iPhone 11.
If you’re an iPhone owner and want to change ringtones on your iPhone, you’re in the right place. The process of setting a song as a ring tone, however, is much easier than it appears. This tip will show you everything you need to know about changing iPhone ringtone.
Table of Contents
How to Create iPhone Ringtones
1. Prepare your song
Before you start, the song you want to use must be in your iTunes library on your computer. It cannot be from Apple Music, as you cannot convert Apple Music tracks to AAC.
So if you don’t have something suitable in your iTunes library, you will need to import at least one MP3 or AAC file into iTunes.
The file doesn’t have to be a song. You could use the Voice Memos app on your iPhone to record real-world sounds or people’s voices to turn into ringtones.
Just make sure you have the latest version (go to the Mac App Store, or the Microsoft Store on Windows 10), then launch iTunes by double-clicking its shortcut or by finding it in the Start menu.
From the Library, click on the album which contains the song, then right-click on the song you want to use and select Song Info as shown in the image above.
2. Choose timings
In the separate window that opens, click on the Options tab and then tick the Start and Stop boxes. Type in the times at which you want the ringtone to start and stop. If the song needs to start from the very beginning, there’s no need to tick the Start box.
To know which times to enter into these boxes, you will need to listen to the track first and note down the time you want it to start. The stop time must be within 30 seconds, as that’s the maximum length for a ringtone.
Top tip: If you want to be really precise about when you ringtone starts, use a decimal point. For example, if the section of music starts between 44 and 45 seconds, try entering 0:44.5 in the Start Time box. You can even specify the start and stop time in thousandths of a second, so you could type 0:44.652
When you’ve set the start and stop times, click OK to dismiss the window.
3. Create AAC version
Now, select the song again by clicking once on it. Then go to the File menu, choose Convert, then Create AAC version. (If you see ‘Create MP3 version’ or something else, the fix is in the next step.)
What will happen is that iTunes will save just the section of the song between the start and stop times you chose as a new track in your Library.
If your song is tagged with album and artist information, the new, short track will appear as a duplicate track in the same album. You can identify it based on its duration, shown to the right-hand side. If the album, artist and song info isn’t present, it will appear as a new album in your Library with a single song in it.
3a. AAC Encoder
If you didn’t see an option to Create AAC version in step 3, it’s because your CD rip settings aren’t set correctly. To change this, click the Edit menu and choose Preferences…
Now click Import Settings… next to ‘When you insert a CD’ and choose AAC Encoder from the drop-down menu next to ‘Import using:’.
4. Reset start & stop times
As a matter of housekeeping, click on the original album containing the song and right-click on it. Click Song info and then click the Options tab.
Now untick the start and stop times to return them to their original times then click OK.
Otherwise, when that track is played in future, it will only play the section between your start and stop times. You probably don’t want that to happen.
5. Find the new AAC file
Navigate to the duplicate track (or duplicate album which contains the newly created track) that you’re going to use as a ringtone.
Right-click on the song in the album and click Show in Windows Explorer. If you’re on a Mac, the option is called Show in Finder.
This is so that you can change the file’s extension (so it becomes a ringtone), which we’ll do in the next step.
6. Change the file extension
The file should now be highlighted in the window which opens up, and it should be called something.m4a (where ‘something’ is the name of your song.
If you can’t see the .m4a part (i.e. you see only ‘Dancing Queen’ and not ‘Dancing Queen.m4a‘), it’s because Windows is set to hide the extensions. Here’s how to show the file extension for editing.
Once you can see the m4a part, right-click on the file and choose Rename. Now change the extension from .m4a to .m4r and press Return, Enter or just click in some white space.
On a Mac, the process is very similar, and on both Windows and macOS, you’ll see a warning asking if you’re sure you want to change the extension. Click Yes on Windows, and click ‘Use .m4r’ on a Mac.
Click Yes when asked if you want to change the extension.
NOTE: As this is a step which trips up a lot of people, please be aware that you cannot simply add .m4r when renaming the file. If the file extensions are hidden in Windows, all you’re doing is changing your file from ‘Dancing Queen.m4a’ to ‘Dancing Queen.m4r.m4a’.
This will not work!
7. Import & sync ringtone
Apple cut the bloat out of iTunes in version 12.7, removing the App Store and various other things including Tones, which was where you could you easily see all your ringtones.
However, you can still sync your new ringtones to your iPhone in the latest version of iTunes.
To do it, connect your phone to your computer with its USB cable. If using Windows 10, tap ‘Trust this computer’ when it pops up on your iPhone screen. You may need to unplug and re-plug the USB cable if this message doesn’t show up, unless you’ve done this step previously. Enter your phone’s passcode as part of the ‘trusting’ process and wait until your phone icon appears in iTunes. Sometimes this can take a couple of minutes.
You might see a message in iTunes asking ‘Do you want to allow this computer to access information on “Xxxx’s iPhone”?’ so click the Continue button to allow this access.
Look for your phone in the left-hand column under Devices. Click on it and the list should expand so you can see a Tones section. Click on that and you’ll see any custom tones appear on the right (if you don’t have any, that list will be blank).
Switch to your File Explorer Window – or Finder on a Mac – where your ringtone should still be highlighted (or refer to the Find the File step earlier). If it’s not selected, click on it to do so.
Press Ctrl+C on your keyboard or Command+C on a Mac to copy the file.
Go back to iTunes, click on Tones if this section isn’t already selected and hit Ctrl+V (Command+V on Mac) to paste the tone.
What should happen is that the tone will appear in the list of tones and automatically sync to your iPhone in a few seconds.
Note: you can no longer drag and drop tones from an Explorer window to iTunes.
Mac users: Sometimes ringtones simply won’t show up in the Tones section. There are two things to try here:
1- Delete the ringtone ‘song’ entry in your iTunes Music library (don’t delete the actual file on your hard drive – choose to keep it when prompted). Then double-click on the .m4r file in Finder and it should show up in Tones.
2- If that doesn’t work, try moving the .m4r file outside of your iTunes folder on your hard drive (such as to the desktop). Then double-click on it.
8. Remove ringtone from library
More housekeeping!
You don’t need to delete the new AAC version of the song you just created from your iTunes music library, but you should.
That’s because it gets messy if you make lots of ringtones. It’s also confusing to have single-track albums which won’t play (because you changed the extension) and aren’t the full song anyway.
9. Set your new ringtone
Now that the new tone is on your phone, all you need to do set it as your ringtone.
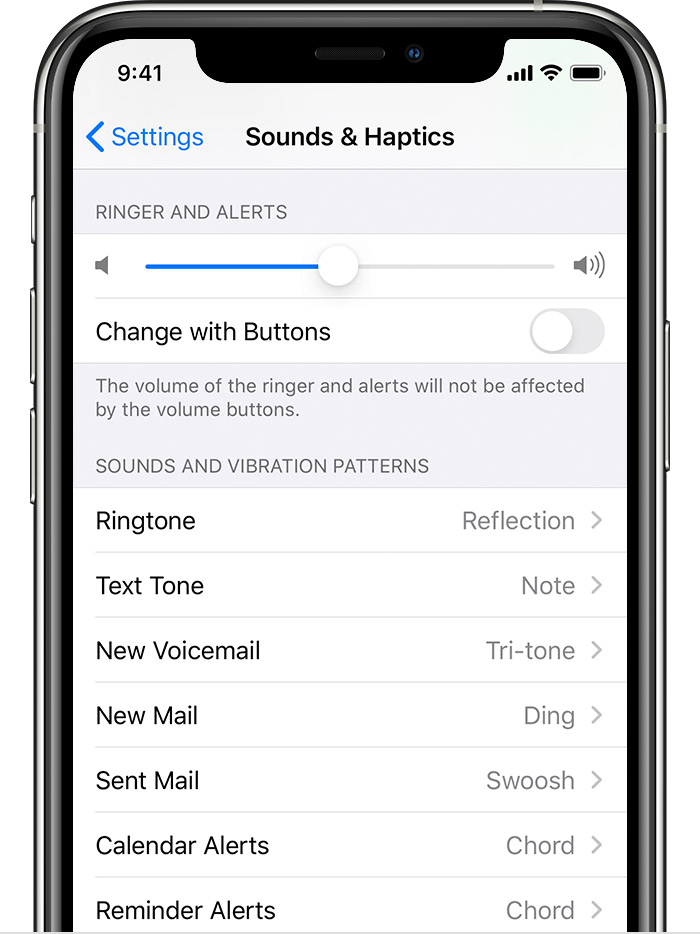
To do this, open the Settings app on your iPhone, then tap Sounds (also called Sounds & Haptics), then Ringtone.
Your custom tones will appear at the top of the list, above the default Ringtones. Just tap on one to make it your ringtone.
The fun doesn’t stop there, as you can use your custom tones for other things such as text message alerts – or anything else…
10. Custom alert tones
If you want have a custom tone for text messages, tweets, Facebook posts, new voicemails, reminder alerts or anything else, it’s exactly the same process as for a ringtone.
The only difference is that you’ll need to select the appropriate section under ‘Sounds & Haptics’ on your iPhone.
Just tap on the type you want, Text Tone for example, and you’ll see the Alert Tones list.
Scroll down past these, and you will see your Ringtones list. Your custom tones will again be at the top of this section.
It’s not a great idea to use a 30-second song as a text message alert, though. And, in case you’re wondering, there’s no difference between a ‘song’ and a sound effect in iTunes, so you don’t have to use part of a song from your music library as your custom alert tone.
All you need is a sound effect in a format iTunes can import (usually MP3), and it will be treated it just like any other song. Then, repeat the same process as for a ringtone to create and sync the sound effect to your iPhone, then select it as we’ve shown.
How to create a ringtone using GarageBand
You may prefer to make your ringtone in Apple’s GarageBand app by either snipping a portion of a song you like or by creating your own. You can create a ringtone on your Mac using GarageBand and share it to your iCloud Drive so you can open it in GarageBand on your iPhone. To share songs from your Mac to GarageBand for iOS, you need to enable iCloud Drive, so begin by setting up iCloud Drive on your Mac and your iPhone. Once it’s on your iPhone, export the song as a ringtone from GarageBand, or just create the ringtone directly on your iPhone.
Use GarageBand for iOS


This is easiest if you have the GarageBand iOS app and the music track you want to use on your iPhone already.
- Launch the GarageBand app and find the song you want to use. Note that if you haven’t shortened it to 30 seconds already, GarageBand can do that automatically, though it may not be the 30 seconds you intend.
- Touch and hold the song, then choose Share > Ringtone.
- Name the ringtone and tap Export.
- Tap Use sound as and pick Standard Ringtone, Standard Text Tone, or Assign to Contact.
From a track on your Mac
PreviousNext


Here is one method you can use with an existing tune running MacOS Big Sur and GarageBand 10.3.5 — both the newest versions available.
- Open GarageBand on your Mac, click Empty Project, and then click Choose.
- Select the Audio microphone icon and click Create.
- Click View > Show Media Browser to reveal your resident tunes.
- Choose a tune you want and drag your selection from the media browser into the workspace.
- Move your cursor to the bottom left or right corner of the track, and you will see an icon you can use to click and drag to shorten or lengthen the track to the specific portion you want to use for your ringtone.
- After you’ve selected a 30-second audio clip, right-click and find the Split at Playhead option. Right-click again and choose Delete to remove the remainder of the tune so that only the 30-second interval remains.
- Click Share. You can either export the song to iTunes or Music on the desktop or as a GarageBand for iOS file from the Share menu.
- If you choose the former, follow Step 7 from the computer section above. If your iPhone has the GarageBand app downloaded, you can keep the file as a GarageBand file and import it to your phone. From there, you can follow the instructions above to set it as a ringtone.
Conclusion
If you own an iPhone or iPad, chances are you want to learn how to set a song as a ringtone on iPhone 11. There’s no shortage of methods, but this is the fastest and simplest way. All you need is an internet connection, iTunes, and a little bit of time.