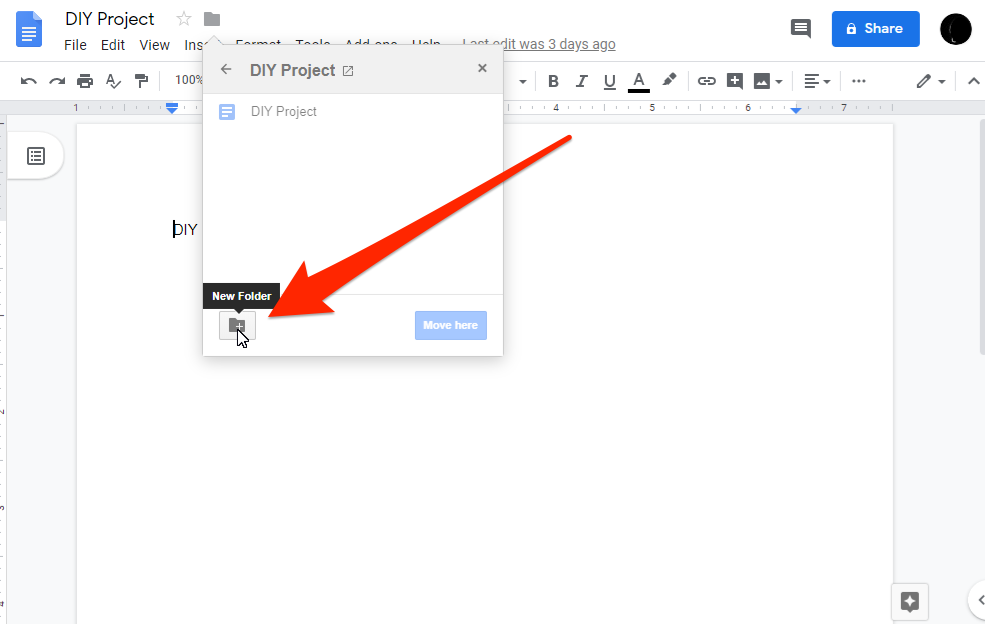
Creating folders in Gmail is one of the simplest things you can do online. Even though creating folders in Google Docs is simple there are some features that are missing that are found in Gmail. Hopefully this short guide on how to create folders in Google Docs will help you out.
So you’ve finally had enough of frantically searching for one of your 500 poorly-labeled files and are ready to organize your Google Docs. It’s pretty silly and weirdly inconvenient, but you can’t actually do a lot of file management in Google Docs. You can create new documents; open existing documents; and sort all your documents by title, and when they were last modified or opened. There’s also switching the thumbnail view into a list view and filtering visible documents by ownership… but that doesn’t help much with tidying up your screen.
So, here’s the thing: to organize your documents, you’ll need to get your Google Drive account involved. Don’t worry if you can’t remember making it; you automatically get one the moment you create a Google Account.
Using Docs or Drive, you can start creating folders and putting your files into them. Folders are pretty much the primary way to keep your files organized in G Suite (now known as Google Workspace as of October 2020).
Table of Contents
Create folders from Google Docs
You can create folders straight from Google Docs after opening up the document.
When you’re in the document, look up to the file icon next to the title. (It might take a second or two to load.)
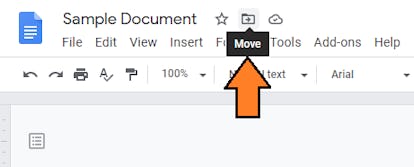
Then, select ‘New Folder.’ If you don’t need to create a new folder, select an existing folder and click the blue ‘Move’ button to confirm.
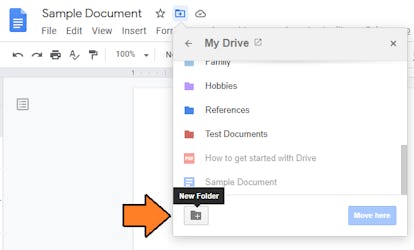
You’ll get a notification at the top of the screen that says you’ve successfully moved your document into a folder. However, you won’t see the folder when you pop onto the Google Docs main page. You’ll see all the docs you created or worked on, but not the folders they belong to.
This can spell trouble if you’re looking for a specific document and it’s been buried by all the other files on the homepage. To open a doc that’s already in a folder from the main page, click the folder button on the right-hand side.
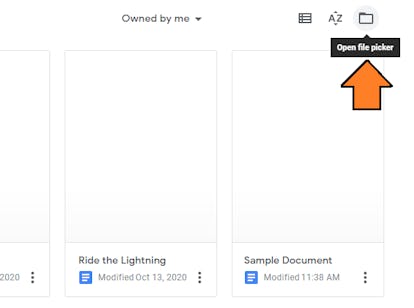
This opens up the file picker, where you can browse through your folders to find the file you’re looking for. Double-click the folder and then the document to open it up for edits.
Create folders from Google Drive
The “proper” way to organize files into folders is through Google Drive. When you hop onto the main page for Drive, you’ll be able to get into your folders immediately without needing to open up another menu.
To make a new folder, click on the “+ New” button at the upper-left corner and hit “Folder”. Note the option to create new documents and other files in the menu as well. Google has set it up so you can access the tools you need right from this page.
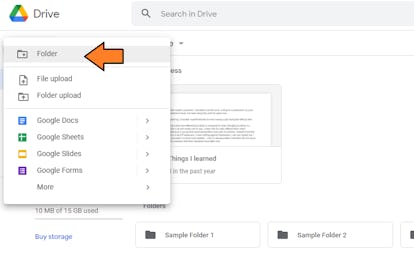
Go ahead and name your new folder. Hit the blue “Create” button to confirm, and the folder should pop up on the main screen within a second.
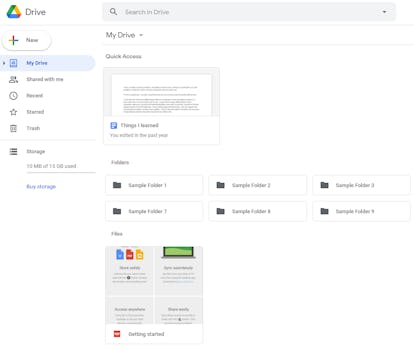
The “Quick Access” section at the top will only show a row of your most recently opened documents or the files you open most frequently. Any unsorted files will end up below the folders in the “Files” section. Click and drag any file and drop them into whichever folder you want.
The folders look a bit plain on the home screen. You can fix that by adding a splash of color to better distinguish the folders from each other.
Start by right-clicking on a folder. When a menu shows up, hover over the “Change color” option to pop up a palette of colors. Choose whichever one you’d like.
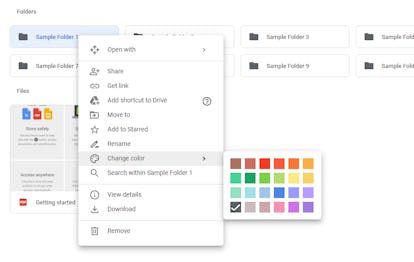
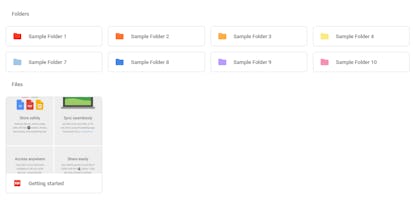
This will make a lovely rainbow of folders on your screen.
Deleting files
Sometimes the best way to clean up your documents is by removing them completely. You can delete the documents you created by going into the folders and right-clicking on the file.
Select “Remove” to banish the document for good. As of October 13, any files dumped in the trash will automatically delete in 30 days.
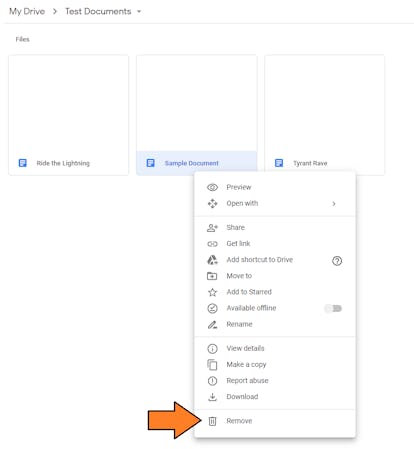
You can do the same thing for documents that were shared with you by going into Google Drive and selecting “Shared with me” on the left-hand column.
You’ll see all your shared documents cluttering up the screen. Right-click and remove them to stop seeing them again. If you want to make a copy of the shared doc for yourself, just right-click the file and select “Make a copy.”
It’ll show up in “My Drive” under the “Files” section as an unsorted file. Click and drag it into a folder to organize it.
Searching for files
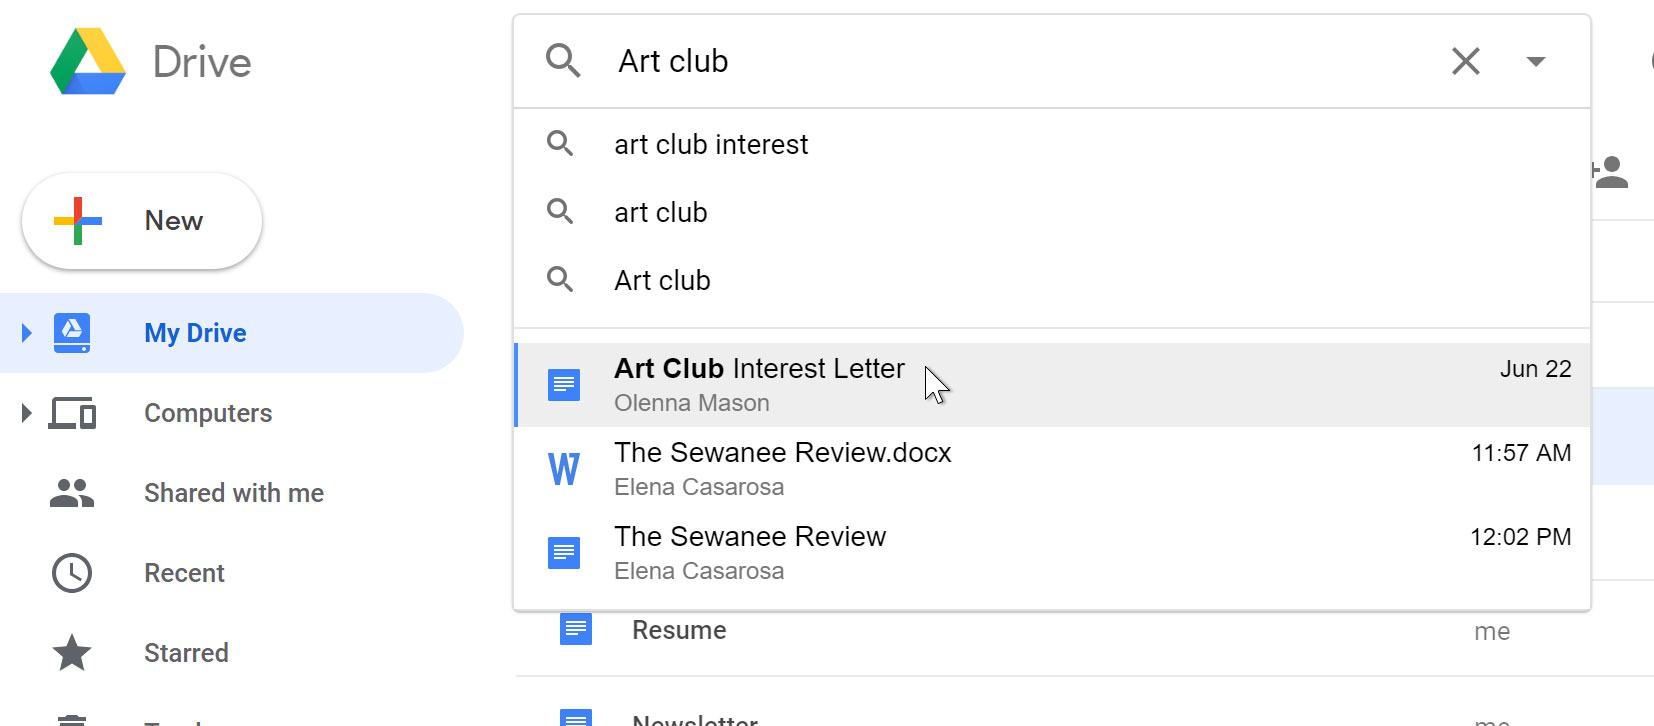
Searching lets you look for specific files using words contained within the file or file name. To do this, locate the search bar, then enter the word or file name you’re looking for. A list of suggested searches and files will appear as you type. Simply click a file to open it directly from the search results. You can also press the Enter key to see a full list of search results.
Sorting files
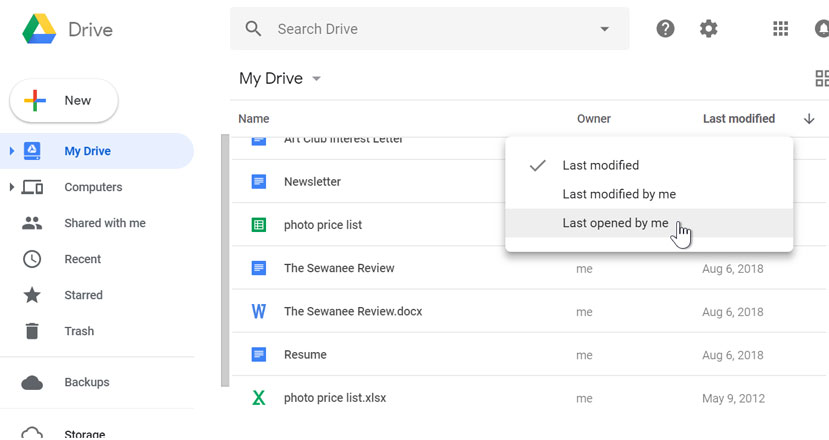
By default, your files are already sorted from newest to oldest. However, you can apply other sorts to put your files in a different order. To sort by name, click the Name button just above the list of files. To sort by date, click the Last modified button, then choose the desired sort option.
To apply a filter:
Filters let you hide unimportant files and focus only on the ones you’re interested in. For example, if you were looking for a presentation, you could use a filter to narrow down your visible files so you would only see presentations.
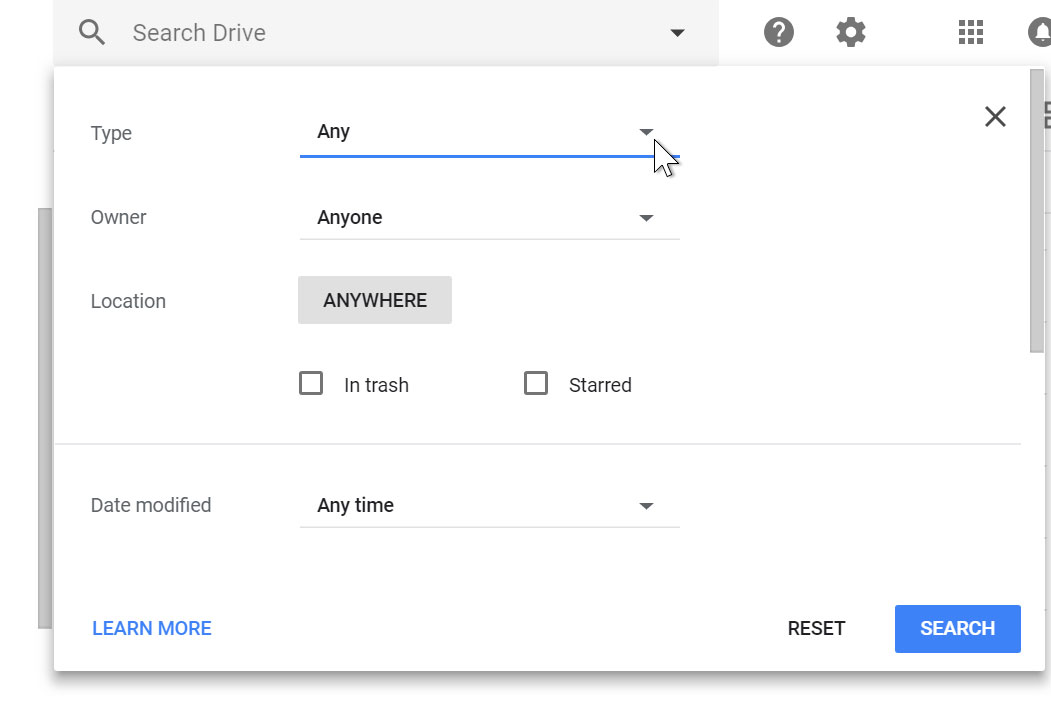
- Locate and select the Search options arrow in the search bar.
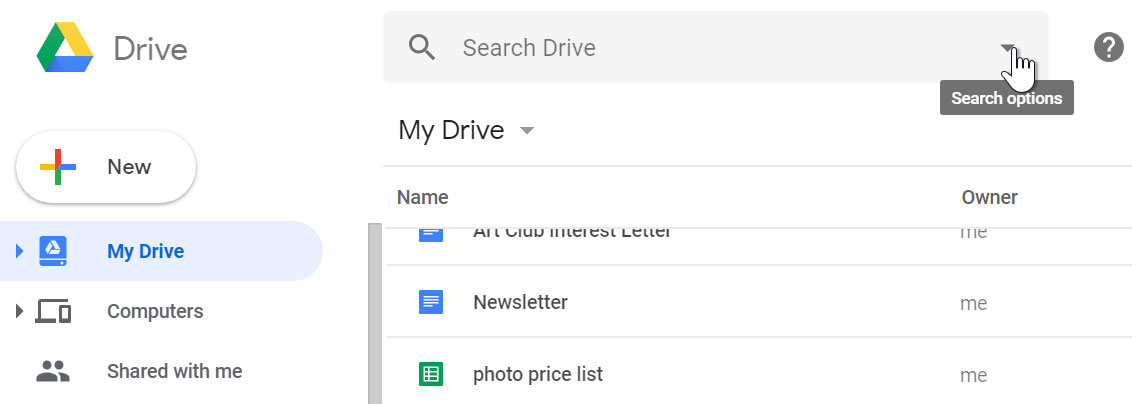
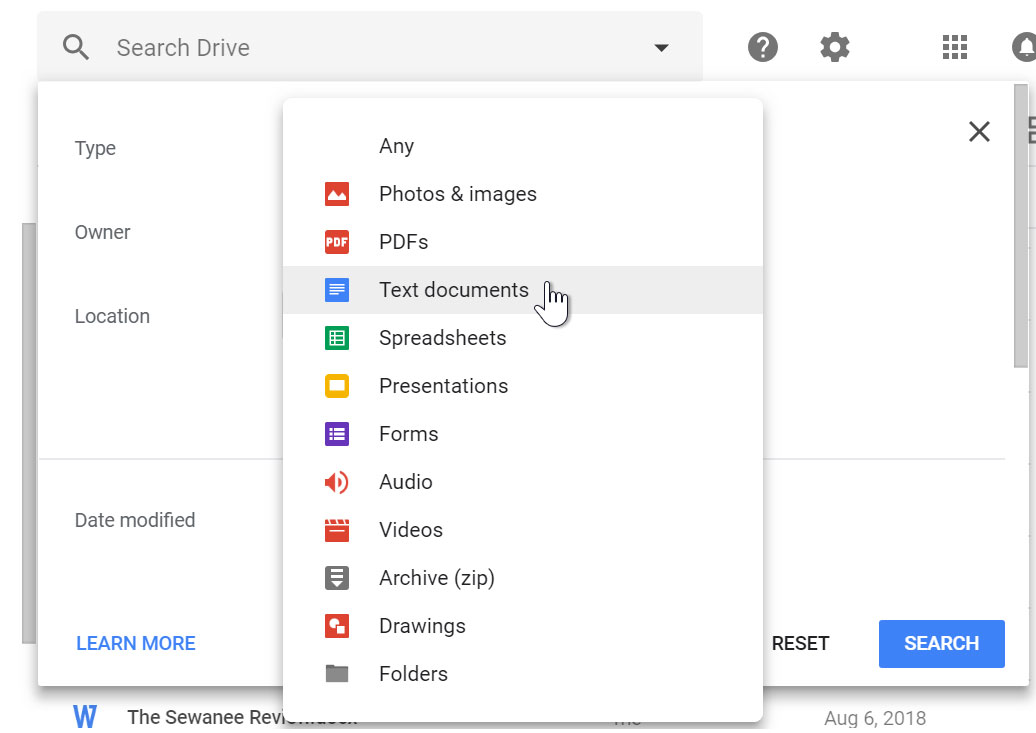
- Choose the filter you want to use. In our example, we’ll set a filter for file type.
- Choose the desired filter. In our example, we’ll select Text documents.
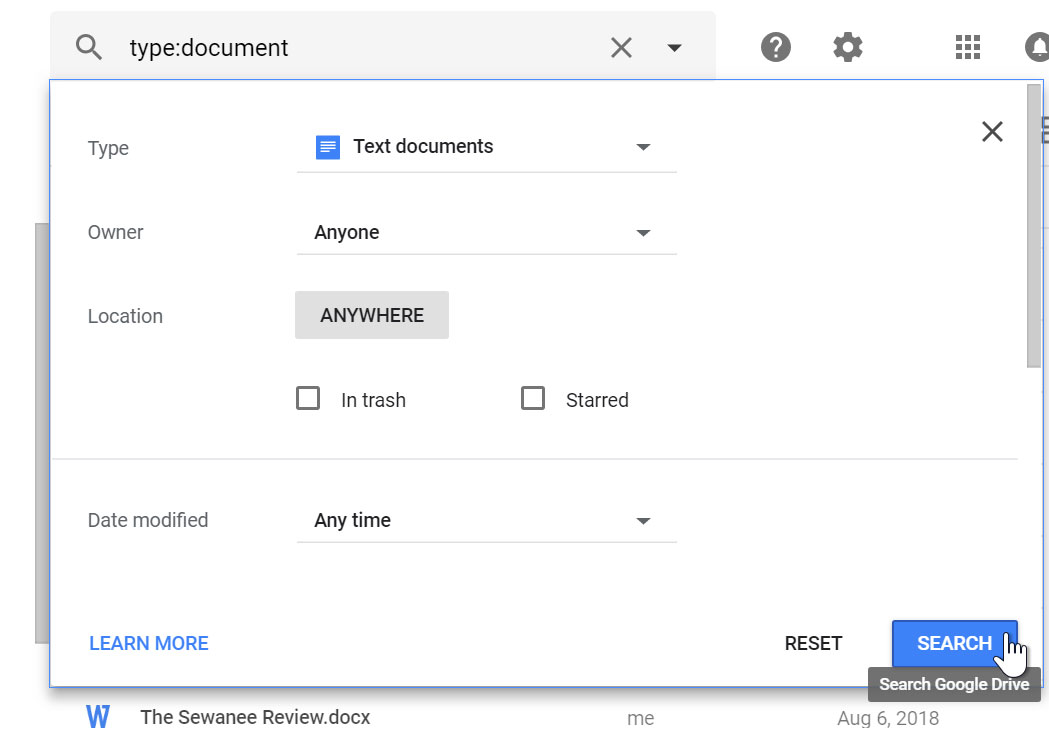
- Click the Search button or press the Enter key to apply the filter.
- Only files that match the filter will appear.
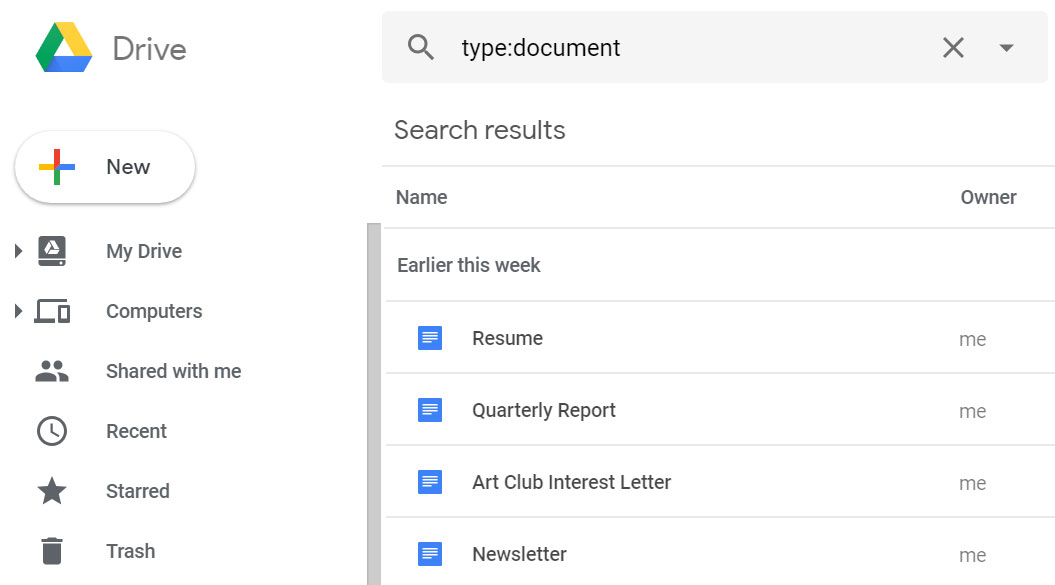
To clear a filter, select the text in search bar, then press the Backspace or Delete key.
Conclusion
Folder is one of the most important object in any document. It makes find-ability better and secure our files. Google Drive application has an inbuilt feature to create folders in Docs, Sheets, Slides and Drawings. This feature is very similar to that found in Microsoft Office.
