How to Create CSV File- Are you having trouble creating csv file? Or, do you need to download csv file? Are csv or CSV clear to you? If not, don’t worry. The following article will help you learn about how to create csv file online. The main thing is if you take the time to learn the topic, then there is no reason that you shouldn’t be able to create or download your own csv file.
You want to learn about how to create a CSV file. That’s a good question. So, in this post, I’m going to write about how you really can create a CSV file in just a few simple steps. Or, perhaps you wish you could create a csv file online? No problem! What if you wanted to download an actual csv file from somewhere? In that case, I’ll help you find it! In addition, don’t forget about all of the special characters when it comes to creating a CSV file…
Table of Contents
Creating CSV File With Excel
If you have Microsoft Office installed, you can easily import or export CSV files from Excel using the method described by Microsoft. To create one, you convert Excel to CSV (comma delimited) format, so you start by populating your spreadsheet in the way you ordinarily would. The only limitations ultimately come from the program that opens the file because some of the formatting options and features of Excel aren’t supported by basic text editing programs.
After you create the spreadsheet, go to “File” and choose “Save As.” Click the drop-down menu labeled “Save as type” in the window that appears and choose “CSV (comma delimited)” from the list. Give your file a name, browse to the correct location, and click “Save” to finish the process. You’ll see a couple of pop-ups, with the first warning that only the currently active sheet will be saved and the other reminding you about compatibility issues, but after this, the file is created.
If you’re importing a text (.txt) file, Excel automatically opens the Import Text Wizard that leads you through the process of separating the existing data into a spreadsheet format.
Using OpenOffice or Google Sheets
As explained by ComputerHope, the process for creating a CSV file is basically the same as in Excel on both OpenOffice Calc and Google Sheets. Create your spreadsheet, adding information as you ordinarily would, and go to “File.” On OpenOffice Calc, you choose “Save As” and then edit the “Save as type” field in the same way as on Excel, only this time you choose “Text CSV” from the options that appear.
On Google Sheets, the saving process is automatic, but you can download the sheet in a specific format. Choose “Download as” and select “CSV (current sheet)” from the options that appear. Again, this serves as a reminder that only the currently active sheet will be downloaded in this way since CSV files don’t include multiple sheets by default. If you need to download more than one sheet, you need to do it separately in the same way.
Using Notepad
Because of the simplicity of the CSV format, you can make a CSV file even if you don’t have dedicated spreadsheet software but you want to share one with someone who does, using the method described by Adam the Automator. The two main rules you need to remember are that columns are separated by commas and rows are separated by new lines. So, for example, if you want to create a file that has two columns – one for the type of product and one for total sales – you would type:
Product, Total Sales
Staplers, $55.98
Toner, $358.20
Paper, $183.34
And so on. The only difficulty comes when you have something like an address that contains commas in a single field. In this case, you enclose the whole contents of the field in double quotation marks (“Street, Town”) and any commas within them will be read as actual commas and not as instructions to separate the field into multiple entries. You can do this on Notepad or any simple text editor.
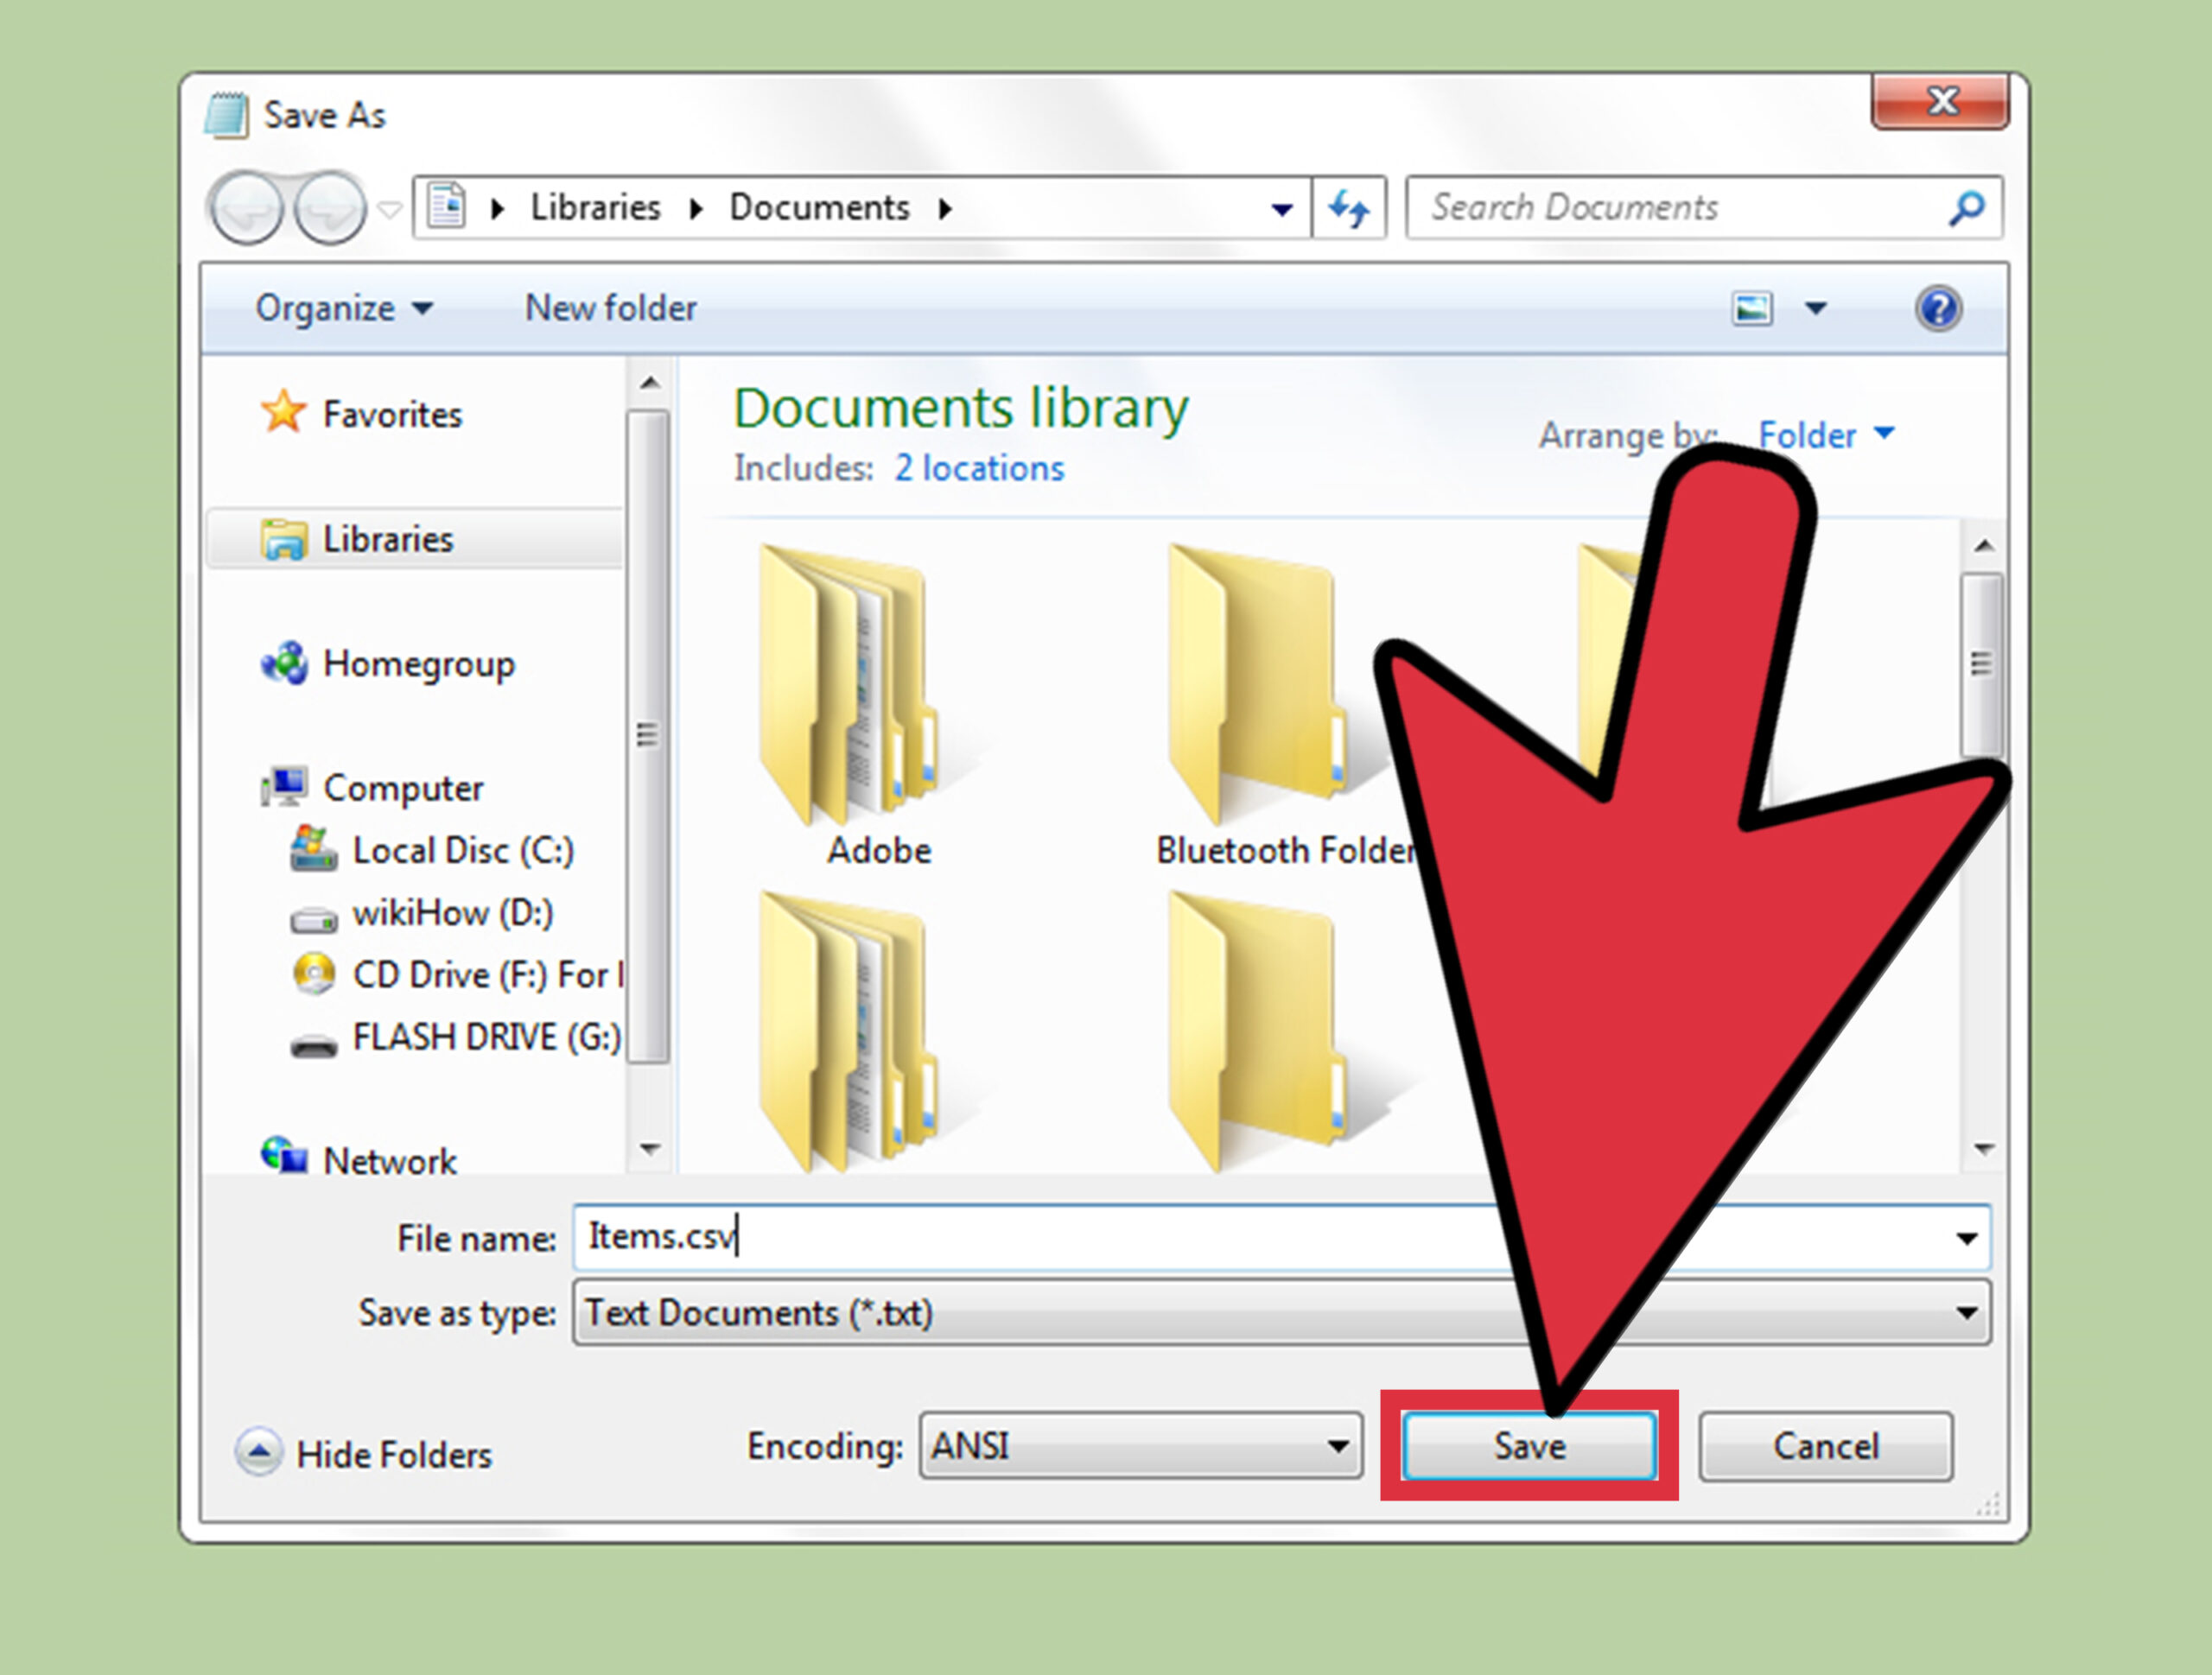
When you save the file, select “Save as type,” but then choose “All Files” and type “.csv” at the end of the file name. This tells your computer how to read the file and avoids Notepad automatically saving it as a .txt file.
import2
In a spreadsheet program, like Excel, Numbers or Google Sheets.
If you’re working on data in tabular form, like a spreadsheet, you may wish to save as CSV (read about why programs use CSV here!). In this case, you don’t need to do anything with the data itself. Instead, simply use the “Save as” and the “.CSV” option (just as you would if you want to save to “.XLS” or “.TXT” and so on). This will save your file in CSV format. Similarly, you can also use the “Export to” or “Download” and “.CSV” option to do the same, to save a copy of the file to your computer in CSV format.
Because the data is already tabular, by picking the “CSV” option, you’re telling the program to separate the data columns by commas, and it does so automatically. Voila!
Using a text editor program (like Notepad or Text Edit, etc.)
While not as common, you may be working with a small amount of data and prefer to keep it organized in a text editing program. This boils down to two steps:
- Ensure you are using commas to structure your data inside the text editor (each comma will represent a new “column” of data, if you visualize it in tabular form

- Again use the “Save as” to select “CSV” from the list of options. Depending on the program you are using, you may have to type in the actual extension in your file name, such as “File.CSV”, or simply save as a “plain text file”. When you open this plain text in a spreadsheet program, you will see it in tabular form like this

For those creating CSVs from apps
This is probably the simplest of all the methods. It’s also the most common if you’re using CSV files to move data in/out of apps. If you wish to download a CSV from an app you use, it is highly likely that this is already the default method to download data – otherwise, you should have the option to select it from a list of choices.
If you’re saddled with an app or program that does not give you the option to save and/or export to CSV, you may be stuck with some additional steps or third-party tools to convert the file type to CSV instead. More on that in the following section!
Save an Excel spreadsheet as a CSV file
If have more than 40,000 contacts, or you’re running into errors while trying to import your contact list into Constant Contact, it can help to check the formatting and then save your Excel spreadsheet (XLS, XLSX) as a Comma Separated Value file (CSV) instead. CSV files are just like Excel spreadsheets, except they strip out the excess formatting that causes some import errors.
| Did you know? When importing into Constant Contact, CSV files can accommodate up to a million rows of contacts or up to 100 MB of data if your account is enabled. Excel spreadsheets and TXT files can accommodate up to 40,000 rows of contacts, or up to 2MB of data. |
- In your Excel spreadsheet, click File.
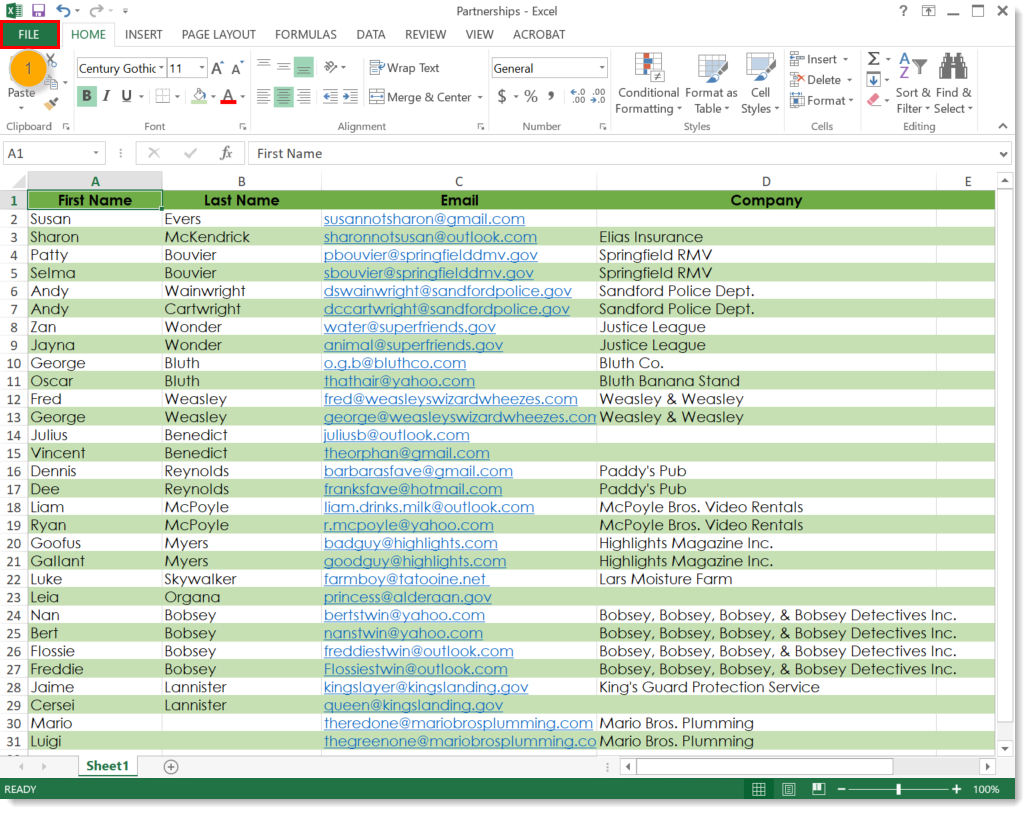
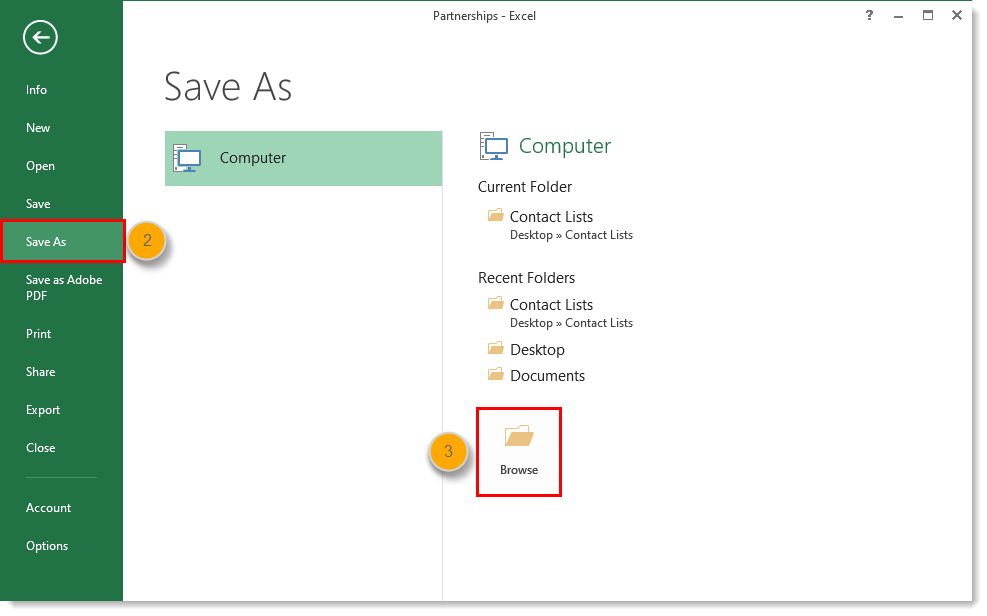
- Click Save As.
- Click Browse to choose where you want to save your file.
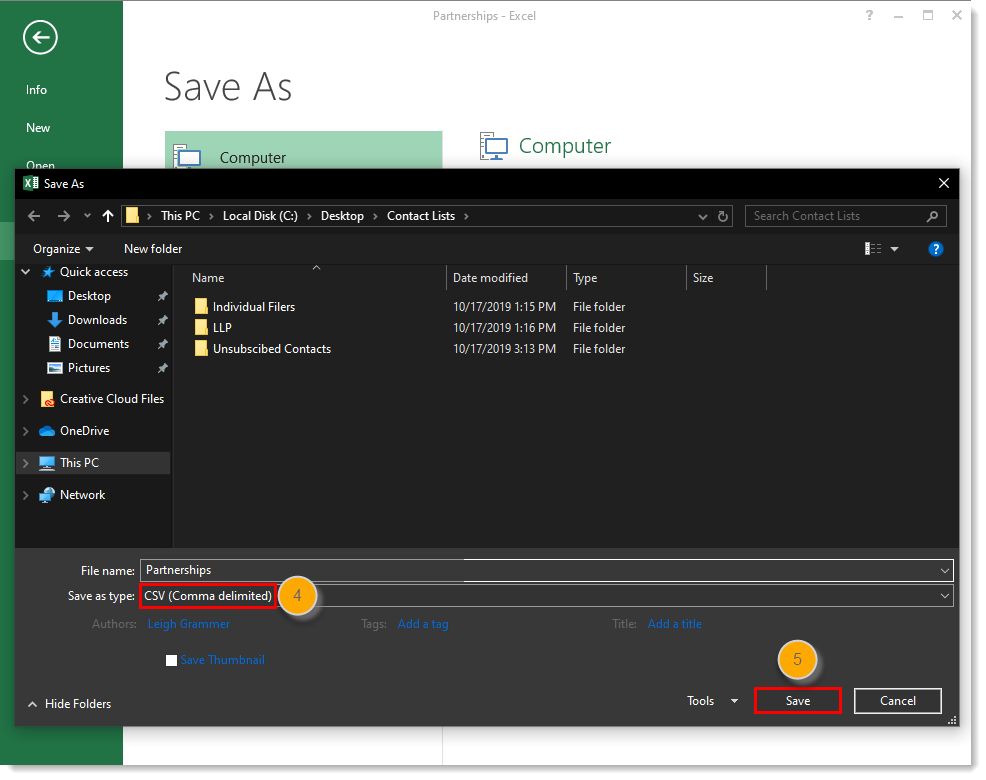
- Select “CSV” from the “Save as type” drop-down menu.
- Click Save.
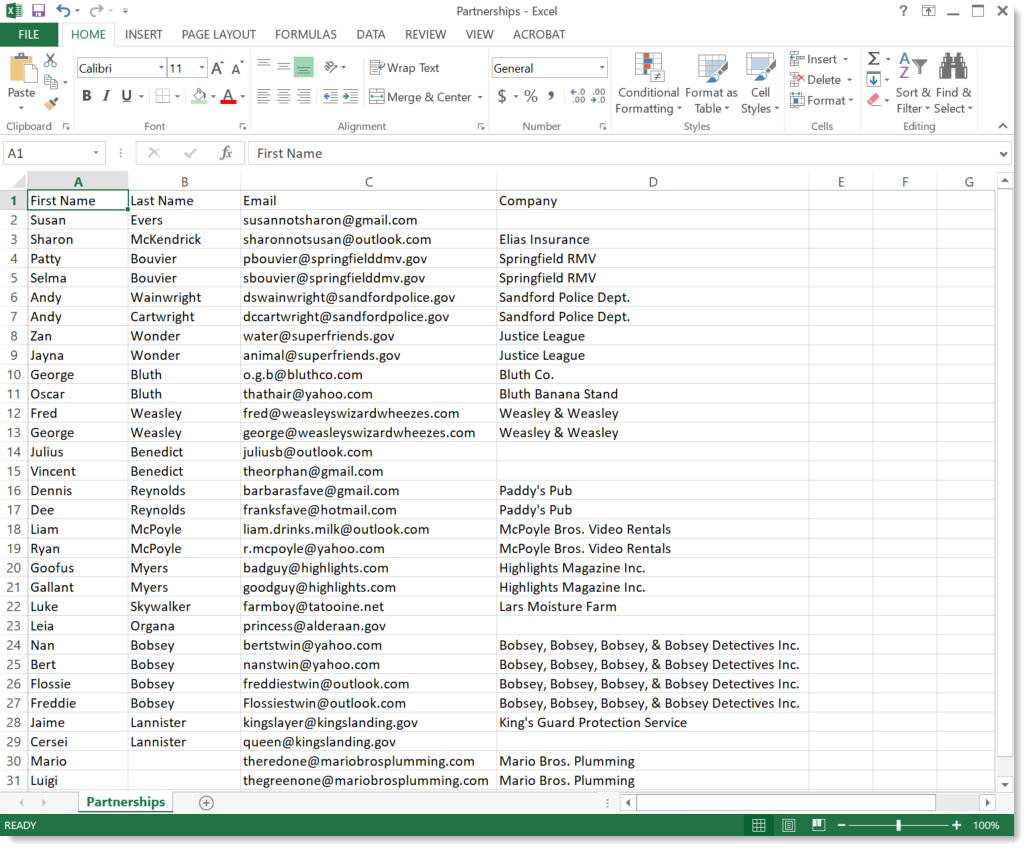
When you open your CSV file, it will look just like the Excel spreadsheet, except any excess formatting will be removed. Now that you’ve saved your Excel file as a CSV, import your contact list into Constant Contact. For help with older versions of Excel, please see Microsoft Office Support.
Conclusion:
CSV stands for comma separated values. It is a way of saving data that is formatted into rows and columns. Many spreadsheets are written in CSV format, which makes it easy to import the data into almost any kind of application.
