How to create a Gmail account? Sign up is very simple without providing too many requirements. Some persons ask me about creating gmail account. In the Google Gmail account is very popular. It’s nice to create a Gmail account for your self.
Creating a Gmail account is an easy task. Still, there are some people who find it hard to create a Gmail account and get access to new Google Mail. This article will help you get rid of your troubles and let you know how to create a new Gmail account and sign in Gmail account.
Table of Contents
Method 1 On Desktop
- Open the Gmail account creation website. Go to https://www.google.com/gmail/about/# in your computer’s web browser. This will open a page with information regarding Gmail.
- Click CREATE AN ACCOUNT. It’s a red button in the top-right corner of the window. Doing so takes you to the first page in the account creation section.
- Enter your first and last name. Type your first name into the “First name” text box near the top of the page, then enter your last name in the “Last name” box next to it.
- Create a Gmail username. In the “Username” text box, type in the username you want to use for your email address. This is the name which appears before the “@gmail.com” section of the address.
- If your selected username is already taken, you’ll be asked to choose a different one upon clicking a different text box on the page.
- Enter a password twice. Type your preferred password into the “Password” text box near the bottom of the page, then type the same password into the “Confirm password” box to the right of the first password box.
- These passwords must match before you can proceed.
- Click NEXT. It’s a blue button at the bottom of the page.
- Enter account recovery options. While not mandatory, you can add up to two types of account recovery options to your Gmail profile:
- Phone number — Type your phone number into the “Phone number” text box near the top of the page.
- Recovery email address — Type any other email address into the “Recovery email address” text box near the top of the page.
- Add your date of birth. Click the “Month” drop-down box and select the month of your birthday, then type the day and year into the “Day” and “Year” text boxes, respectively.
- Select a gender. Click the “Gender” drop-down box, then select one of the gender options in the resulting drop-down menu.
- Click NEXT. It’s a blue button at the bottom of the page.
- Verify your phone number. If you added a phone number as an account recovery option, you can verify it now by doing the following:
- Click SEND when prompted.
- Open your phone’s text messages.
- Open the message from Google (usually a 5-digit number) and review the 6-digit number in the message.
- Enter the 6-digit number into the text box on the Gmail page.
- Click VERIFY
- You can also click the Not now link to skip verifying the account recovery options for now.
- Scroll down and click I AGREE. It’s at the bottom of the terms of service list on the left side of the page. Doing so will accept the terms of service and sign you into your Gmail account.
Method 2 On Mobile
- Download the Gmail app. If you haven’t yet downloaded the Gmail app, open your phone’s App Store (iPhone) or Google Play Store (Android), then do the following:
- iPhone — Tap Search, tap the search bar near the top of the screen, type in gmail, tap gmail in the drop-down menu, tap GET to the right of “Gmail – Email by Google”, and enter your Apple ID password or Touch ID.
- Android — Tap the search bar at the top of the screen, type in gmail, tap Gmail in the drop-down menu, tap INSTALL, and tap ACCEPT.
- Skip this step if you already have the Gmail app on your phone.
- Open Gmail. Tap OPEN in your phone’s app store, or tap the red-and-white Gmail app icon. This will open the blank sign-in page if there are no accounts signed into Gmail on your phone.
- If an account is signed into Gmail on your phone, tap ☰ in the top-left corner, tap your current email address, tap Manage accounts, tap Add account, tap Google, and then skip the next two steps.
- Tap SIGN IN. It’s at the bottom of the screen.
- If you are already signed in with a different account, tap ☰ in the top-left corner, then tap the profile image of the account. Then tap + Add account and tap the Google option at the top.
- 4 Tap More options. This link is on the left side of the screen. A menu will appear.
- If you have any inactive accounts saved on your phone, you’ll first have to tap Use another account on this page.
- 5 Tap Create account. It should be the only item in the menu.
- If you were already signed into Gmail, this option will be near the middle of the page instead of in a menu.
- 6 Enter your first and last name. Tap the “First name” text field and type in your first name, then do the same with your last name in the “Last name” text field.
- 7 Tap NEXT. It’s a blue button on the right side of the page.
- 8 Add your birthday and gender. Select the month of your birthday, type in the day and year of your birthday, and then select a gender preference from the Gender drop-down menu.
- 9 Tap NEXT.
- 10 Create a username. Type your preferred Gmail username, which is the name what will appear before “@gmail.com” in your email address, into the “Username” field.
- This must be a username that no one else has used yet. If the username is already taken, you’ll be prompted to choose another one.
- 11 Tap NEXT.
- 12 Create a password. Type a password into the “Create password” text field, then repeat the password in the “Confirm password” text field.
- 13 Tap NEXT.
- 14 Enter your phone number. Type your phone number into the “Phone number” text field. This must be a number at which you can receive text messages.
- You may see a Skip link on the left side of the page. If so, you can tap it to skip the phone number entry process.
- 15 Verify your phone number. When prompted, tap VERIFY, then open the text message from Google, review the six-digit code in the message, type the code into the “Enter code” text field, and tap NEXT.
- Skip this step if you tapped Skip in the previous step.
- 16 Scroll down and tap I AGREE. It’s at the very bottom of the page on the right side of the screen.
- 17 Tap NEXT. This will open your new Gmail inbox. You can now proceed with adding contacts, organizing mail, and more.
- Your Gmail account can also be used to sign into services like YouTube, Google Drive, and Google Docs.
Signing in to your account
When you first create your account, you will be automatically signed in. Most of the time, however, you’ll need to sign in to your account and sign out when you’re done with it. Signing out is especially important if you’re using a shared computer (for example, at a library or office) because it prevents others from viewing your emails.
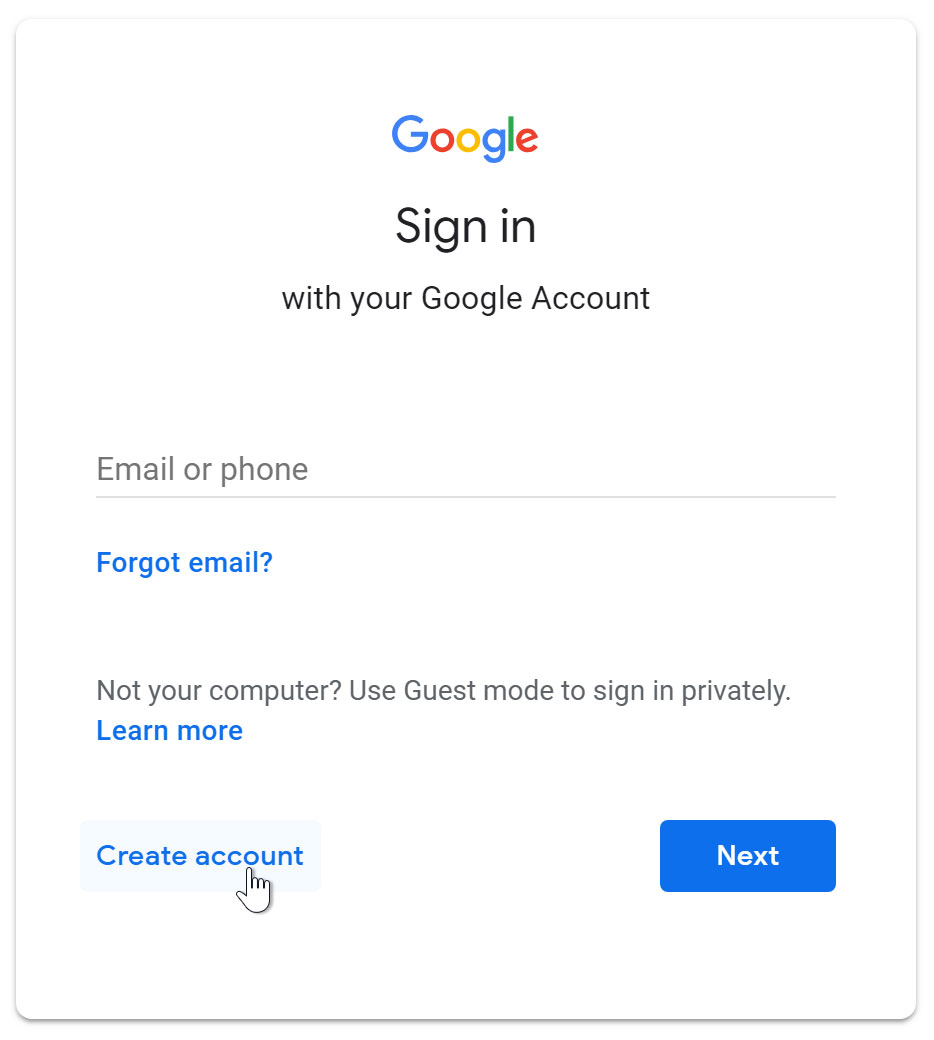
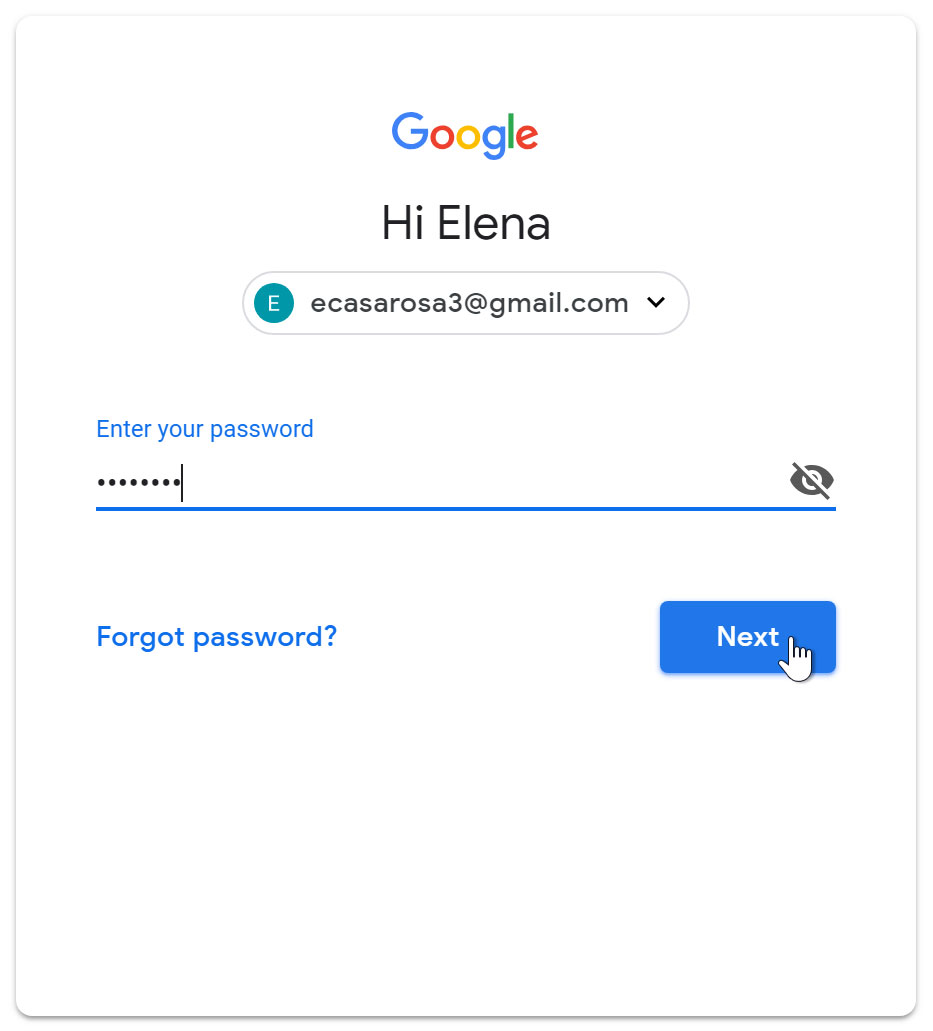
To sign in:
- Go to www.gmail.com.
- Type your user name (your email address) and password, then click Next.
To sign out:
In the top-right corner of the page, locate the circle that has your first initial (if you’ve already selected an avatar image, it will show the image instead). To sign out, click the circle and select Sign out.

Mail settings
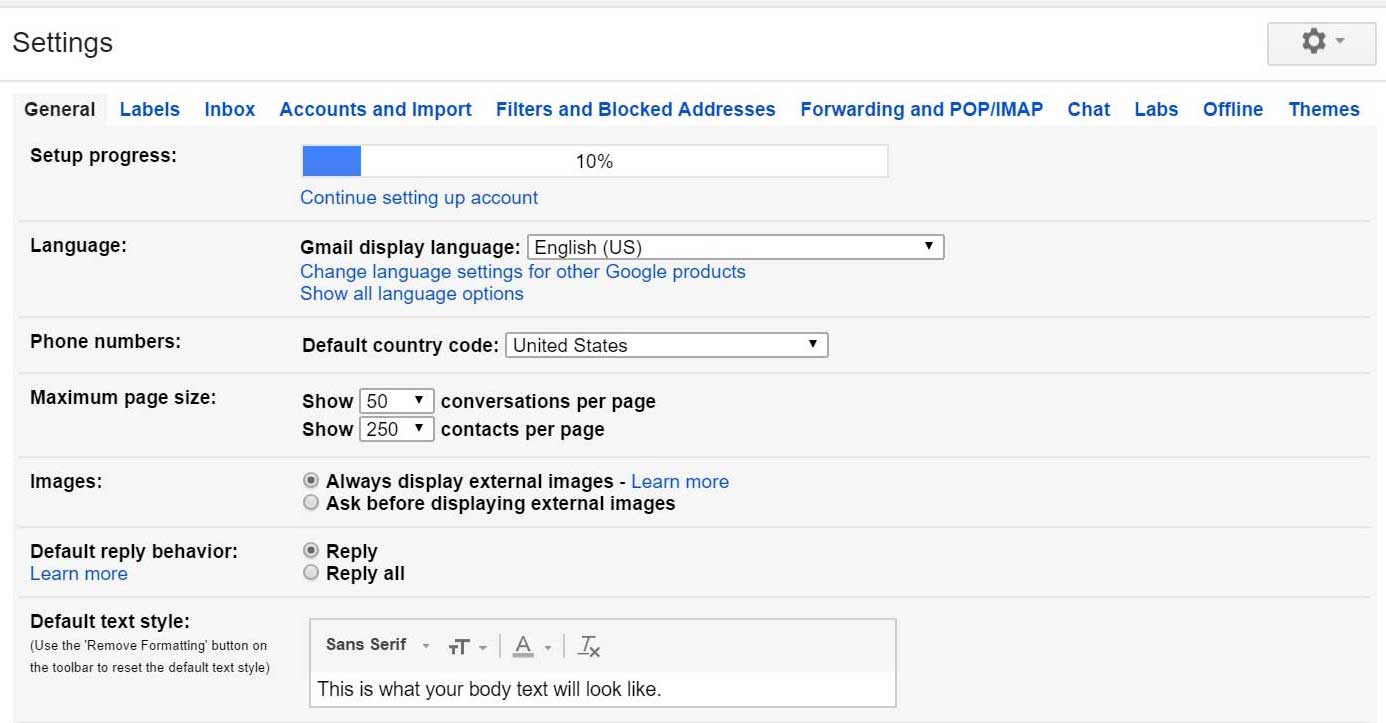
Occasionally, you may want to make adjustments to Gmail’s appearance or behavior. For example, you could create a signature or vacation reply, edit your labels, or change the theme. These adjustments can be made from your mail settings.
To access your mail settings:
- Click the gear icon in the top-right corner of the page, then select Settings.
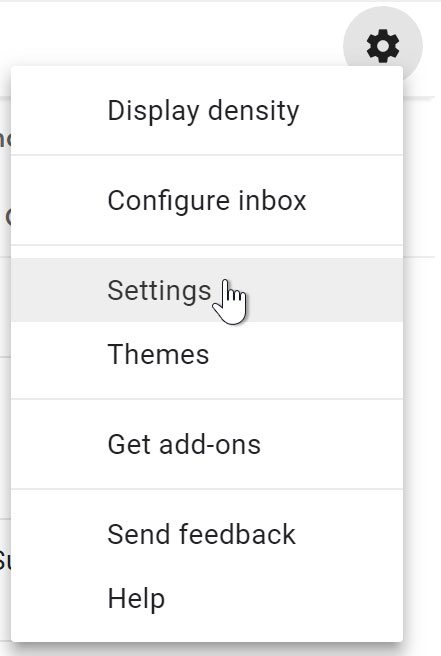
- From here, you can click any of the categories at the top to edit the desired settings.
Adding contacts
Like all major email providers, Gmail lets you keep an address book of contacts so you don’t have to memorize everyone’s email addresses. You can also add other contact information, like phone numbers, birthdays, and physical addresses.
To add a contact:
- Click the Google apps button.
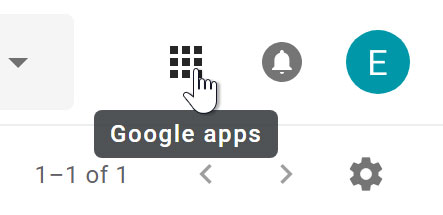
- Click the Contacts button in the drop-down menu.

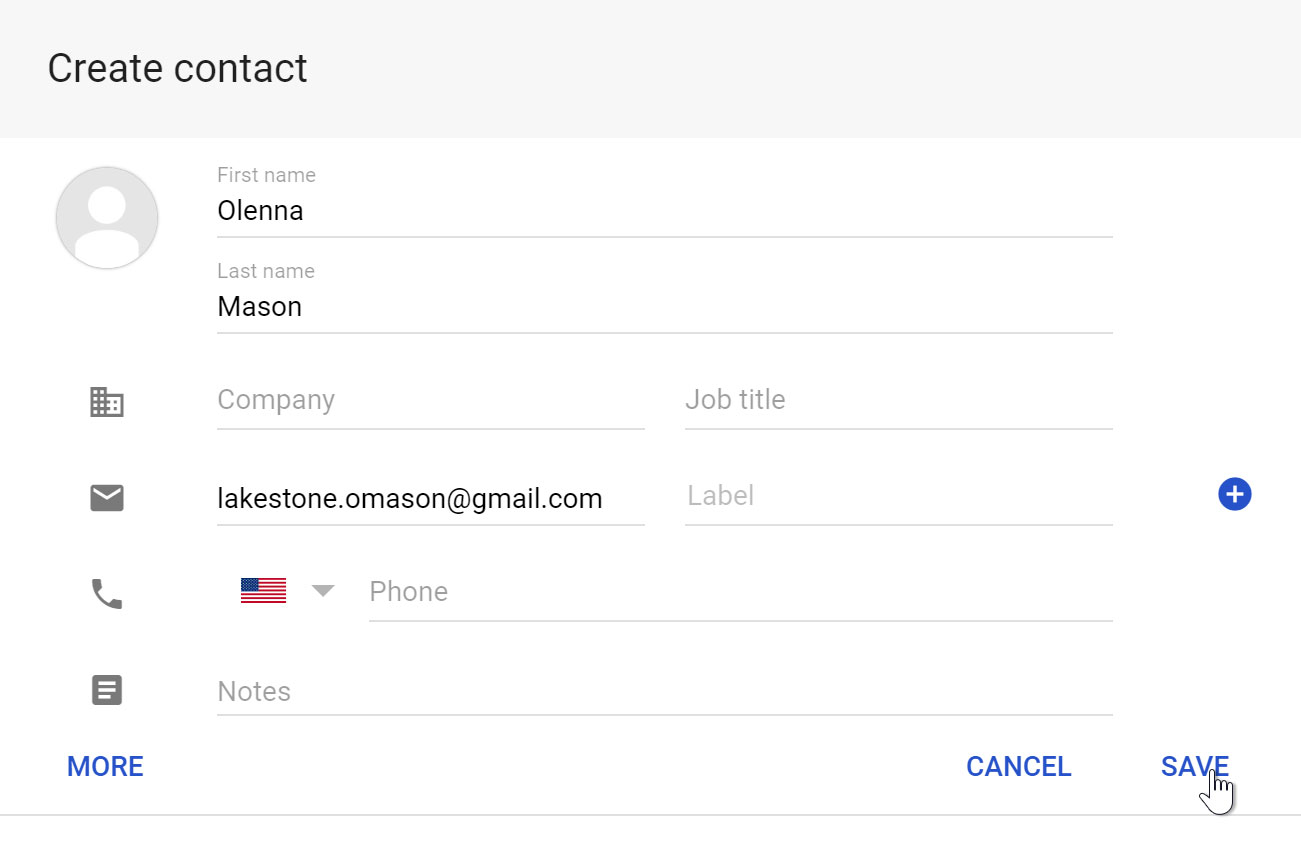
- Your contacts screen will appear. Click the Add new contact button in the lower-right corner.
- Enter the contact information, then click Save.
To edit a contact:
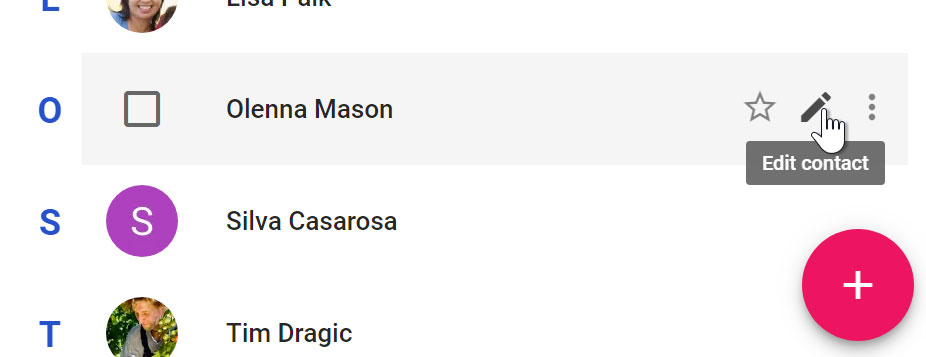
- In the Google apps drop-down menu, select Contacts.
- Locate the contact you want to edit, then click Edit Contact.
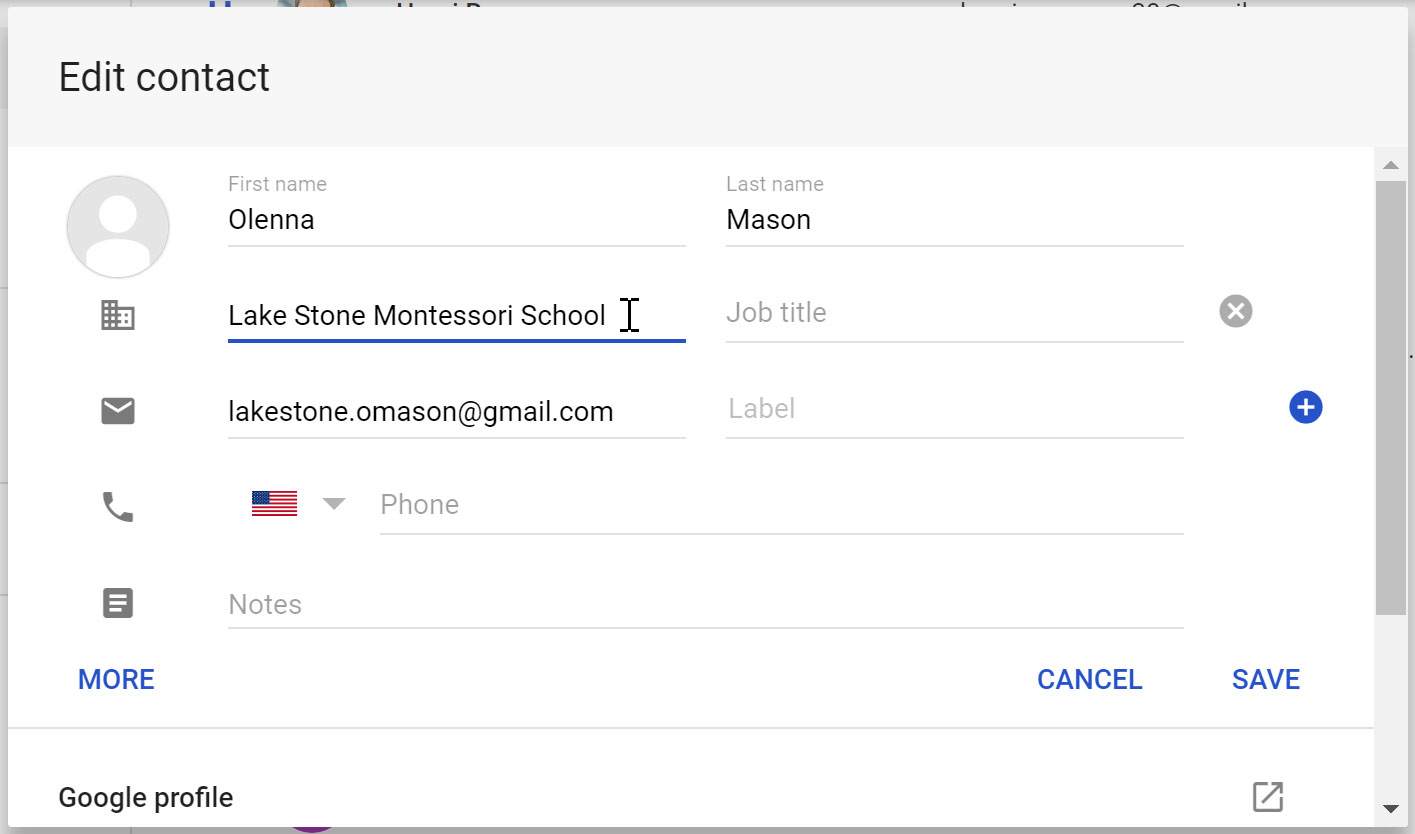
- You can now make any changes you want to the contact.
By default, when you send an email to a new address, Gmail adds the address to your contacts. You can then go to your contacts to edit the person’s information as needed.
Importing mail and contacts
You may already have a contact list from another email address, and it would be a lot of work to re-enter all of this information manually. Gmail allows you to import your contacts from another email account, and you can even import all of your email messages from that account. Several email providers are supported, including Yahoo!, Hotmail, and AOL.
To add other accounts:
- Click the gear icon in the top-right corner of the page, then select Settings.
- Go to Accounts and click Add a mail account. You can then follow the instructions on the screen to import your mail.

Conclusion
Gmail is one of the most used email service providers. Millions of users choose Gmail for its simplicity and easy to use the service. And the best part about Gmail is that it doesn’t have any complex requirements to sign up for this service. Everyone can easily create an account on Gmail with just an email address. If you have yet to start using Gmail, you are missing out on a lot of useful features.