How to Remove Stickers Properly – Every time you use stickers, if they are not removed correctly, they will leave behind adhesive residue which becomes harder and harder to remove as it ages. Stickers may seem like a good idea at first but over time it becomes hard to remove the stickers. There are ways you can remove stickers without damaging vehicles that are detailed in this article.
Removing stickers properly is not just about making the sticker look gone. It also involves proper cleanup of adhesive or leftover residue so you don’t see the residue on the surface. Whether it is on glass, mirrors, metal, wood, plastic, etc., most of them can be removed with no problem at all. But doing so the right way will remove most of the adhesive safely without damaging the surface you’re removing them on. Keep reading for an illustrated guide on how to remove stickers properly.
Table of Contents
What Can You Use to Remove Stickers?
No matter what you purchase, you’re likely going to have some kind of sticker on the item. If you’re ready to remove those annoying adhesives, head to your kitchen cabinet. These basic household products can be used to get rid of stickers!
- Peanut Butter
- Hair Dryer
- Pencil Eraser
- Rubbing Alcohol
- Baking Soda & Coconut Oil
- Mayonnaise
- Razor Blade
- WD-40
- White Vinegar
- Washing Soda
Peanut Butter
While it’s great for sandwiches, peanut butter is also extremely effective at removing sticker residue. Smear it over the sticker and let it sit for about an hour. From there, wipe off the peanut butter and the sticker should peel right off!
Hair Dryer
Hold it close to the spot with the sticker for about 30 seconds. With the pressurized heat, the sticker will fall apart, leaving behind no sticky residue. Note: This isn’t a recommended method for plastic products.
Pencil Eraser
This is a more time consuming method, but you can scrape a pencil eraser across the sticker. The friction from the rubber will drag the adhesive away from the surface, making it easier to scrape off.
Rubbing Alcohol
Cheap vodka, rubbing alcohol, or nail polish remover are good items for removing stickers. Soak a paper towel in the product and wrap it around the sticker. Soak for 30 minutes and then wipe it away.
Baking Soda & Coconut Oil
Mix baking soda and coconut oil together for stubborn stickers. This creates a paste that saturates the paper and loosens it up. Smear the mixture across the sticker, let it sit for an hour, and then scrub.
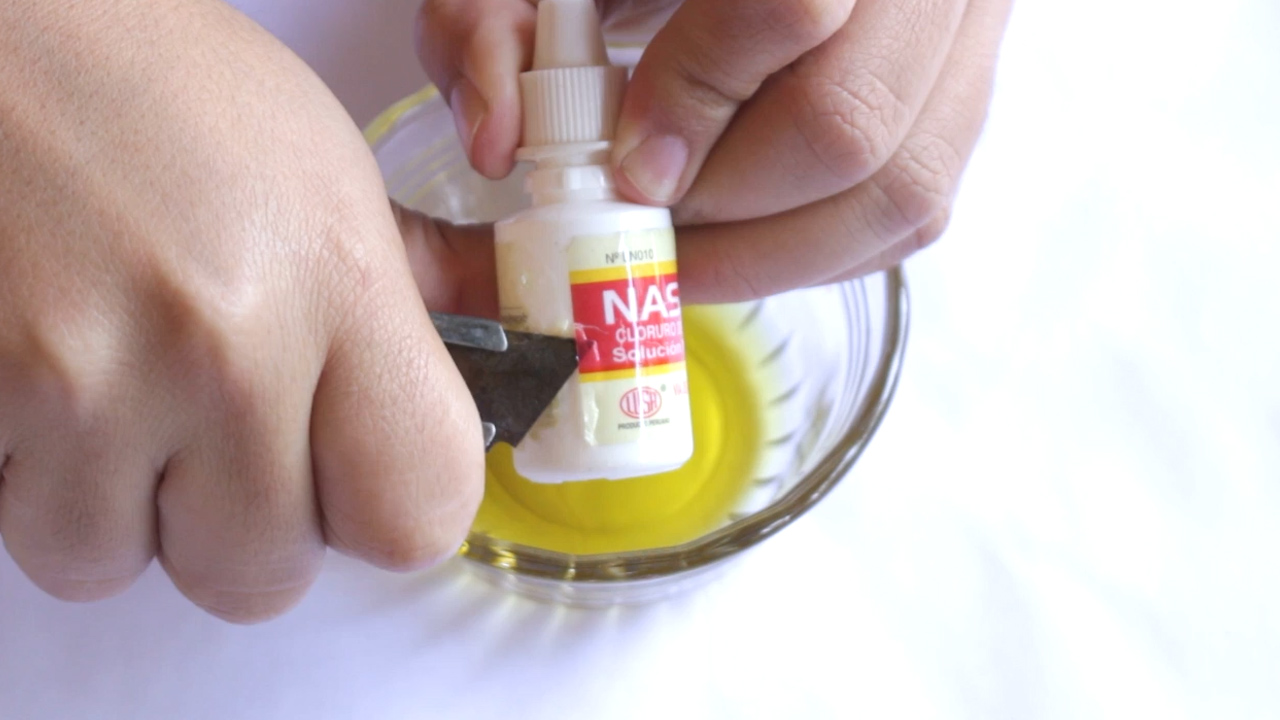
Razor Blade
Carefully use a razor blade to remove adhesives. Hold it at an angle and gently push it along under the edge of the sticker. A credit card or plastic scraper are also very effective.
WD-40
This cleaning solution is fantastic for a variety of sticky situations. Spray it directly on the sticker and let it soak for close to an hour. The sticker will come off your item with ease.
White Vinegar
Soak a washcloth in white vinegar and wrap it around the area with the sticker. After about 30 minutes, remove the washcloth and the sticker should slide off easily.
Washing Soda
This sodium carbonate cleaning solution is commonly used for laundry, but it’s also handy for removing stickers. Simply soak the item for about an hour and the residue will disappear.
Mayonnaise
This is another sandwich staple that works wonders for removing stickers. Leave the spread on your sticker for 30 minutes and then wipe it away.
How to Remove Stickers Properly
Method 1: Scraping off the Sticker
- Pry up the corner of the sticker with a thin utensil. If you’re not worried about scarring the surface, a razor blade or putty knife will give you the best results. Otherwise, get your hands on a softer plastic scraper. Work on the outer edge of the sticker until you have enough loose material to grab.
- Razor blades and other sharp scrapers are best suited for use on glass, smooth, hard metals, and similar materials that aren’t easily damaged.
- If you’re in a bind without a lot of options, a credit card or similar object can also do the trick.
- Lift the loose corner of the sticker. Pull the flap up and away from the sticking surface, being careful not to force it too much. Hold it in place with one hand and ready your scraping tool with the other.
- Do your scraping with your dominant hand to maximize your efficiency and precision.
- Run the scraper under the sticker using small movements. Push the flat edge of the scraper against the bottom of the sticker where it meets the sticking surface. This little bit of pressure should be enough to break the hold of the adhesive little by little.
- Getting impatient or scraping too aggressively may cause the sticker to tear, forcing you to start the process over again and possibly leaving behind a layer of difficult residue.
- Avoid digging the scraper too hard into the underlying surface. If you’re not careful, it could leave behind unsightly scratches.
- Continue pulling and scraping until the sticker comes free. After a few passes with the scraper, readjust your grip on the loose edge so that it’s pulled taut. Then, go to work with the scraper some more. Keep at it until you reach the far end.
- If the adhesive is putting up some resistance, try moistening it with warm water (assuming it’s been applied to a waterproof surface).[5]
- This method is useful for getting rid of slightly older stickers that are too stubborn to peel off by hand, but can’t or don’t need to be treated with heat, oil, or moisture.
Method 2: Heating the Sticker with a Hair Dryer
- 1Set the hair dryer to a high heat setting. Turn the hair dryer on and give it a few seconds to start warming up. The heat from hair dryer will soften the adhesive of old dried-up stickers that have become cemented in place.
- There’s a chance that direct heat could damage the sticking surface if it’s made from a material like plastic, vinyl, or leather. In this case, it may be better to go with an alternative method of removal.
- Hold the hair dryer over the sticker for 30 seconds. Position the nozzle about 1⁄2 foot (15 cm) away from the sticker. Wave the hot air back and forth from one end to the other. Continue blasting the sticker for up to a full minute.
- You may notice the sticker material beginning to curl or wrinkle—this is a sign that it’s working.
- Peel off the sticker by hand. Turn off the hair dryer and set it aside. Loosen one edge of the sticker with your fingernail, then pull it slowly until it comes away clean. Use a soft scraper tool to dislodge any residue that’s left behind.
- Continue heating in 30 second intervals. If the sticker is still putting up a fight, you may need to blast it again to get it. Repeat the heating process 2-3 more times, giving it a test pull after each pass. It should only take a couple minutes at the longest to see an improvement.[10]
- Peeling or scraping the sticker from underneath may help to get it started if the heat alone isn’t having the desired effect.
Method 3: Soaking the Sticker in Hot Water
- Fill a large container with hot water. Whatever container you choose should be big enough to accommodate the item you’re soaking with a little extra room. Turn on the tap and let it run until it’s warm to the touch, then position the container underneath. Don’t get the water too hot—there’s a chance it could scald you or partially melt the item.
- Leave a few inches of space at the top of the container. You’ll be adding to the overall volume when you insert the item, which could cause it to overflow if you’re not careful.
- This method shouldn’t be attempted to loosen stickers on belongings that are vulnerable to moisture-related damage, like electronics, paper products, or certain types of wood.
- Submerge the item with the sticker on it into the water. Lower the item slowly to avoid splashing. Make sure the sticker is facing down so that it stays completely immersed the entire time. The heat from the water will begin working its magic right away.
- You also have the option of running a stream of hot water over the surface of the item if it’s too big to cram into a separate container.
- Let the item sit for 3-5 minutes. This is the minimum amount of time needed to soften up the sticker enough to remove it by hand. The longer you leave it, though, the better the results will be. If you’re dealing with multiple stickers, you might need to give the item a few extra minutes to soak.[13]
- Turn items with lots of stickers every so often so that they all spend an equal amount of time underwater.
- Watch for the sticker to fade or wrinkle as the hot water breaks down the adhesive.
- Peel or scrape away the sticker. Lift the item out of the bath and shake off the excess water. Set it on a stable surface and pull off the sticker in one piece. If it’s still holding on in spots, use a soft scraper tool to coax the adhesive away from the sticking surface. It shouldn’t take much force to get it to let go.
- The scrubbing side of a dish sponge is perfectly suited for lifting away soggy sticker residue after a long soak, while the soft side can offer a gentler touch for more delicate items.
Method 4: Dissolving with Chemical Solutions
- Find a chemical solution safe enough to use on your belongings. When milder methods won’t do, you may need to try a special adhesive remover product like Klean-Strip or Goo Gone. If you’d rather not bother with a shopping trip, search your cabinets and equip yourself with some rubbing alcohol, hand sanitizer, WD-40, or a bottle of clear liquor. Any of these items will be potent enough to leave most surfaces squeaky clean.
- A strong chemical solution will disintegrate the adhesive little by little until it loses its grippiness.
- Alcohol-based products are especially useful for drying out adhesives that have become fused in place.
- Spread the solution over the sticker. Absorb a small amount of the product into a clean cloth and wipe down the sticker using a circular motion. If you’re using a spray cleaner, cover the sticker with a light mist and allow the liquid to settle. Be sure to hit the surrounding area, as well.
- Make sure the solution doesn’t drip down into the smaller openings of electronics and mechanical items.
- Spot test the item in an out-of-the-way area so you can see how it will react to the product you’re using before you slather it on.
- Let the solution sit for 5 minutes. As it sits, it will begin to slowly seep under the edges of the sticker and go to work directly on the adhesive. When time’s up, pat the area dry with a paper towel to remove the excess cleaner.
- Wipe away the sticker. Drag a damp cloth or sponge over the surface to dislodge what’s left of the sticker. It should come away in one big piece. Use the product remaining on your scrubber to buff out faint streaks of adhesive or paper left behind.
- If there are any heavy patches of adhesive residue clinging to the surface, apply a little fresh solution and go over it with a little elbow grease.
- Be sure to wash your hands thoroughly after working with harsh chemical cleaners.
Method 5: Loosening the Sticker with Oil
- Grab a product with a high oil content. Chances are, you’ve got plenty of items sitting around on the shelves of your pantry just waiting to be put to use. A bottle of ordinary cooking oil like olive or canola oil, for example, will bust up even the most difficult stickers. You could even use peanut butter or mayonnaise to achieve the same effect![18]
- A tablespoon of baking soda can up the unsticking power of oil-based products.
- These types of substances tend to work best on smooth, hard surfaces that aren’t at risk of becoming darkened or discoloured by oils.
- Smear the oil onto the sticker. Use a clean cloth to soak up a quarter-sized amount of oil and rub it over the entire surface. If the product is especially thick, it may help to pick up a flexible utensil like a rubber spatula or brush that will allow you to spread it around exactly where you need it.
- Avoid pouring thinner oils directly onto the surface. It can be easy to oversaturate it this way.
- Leave the oil in place for 10-20 minutes. Little by little, it will coat the bonds between the adhesive and the sticking surface and the sticker will begin to slip. The longer you allow it to take effect, the better the outcome will be. Wipe the excess oil away with a paper towel when time is up.
- Newer stickers may even come unfastened before you ever touch them.
- If you used a thicker oily substance, such as peanut butter, you may need to use a heavier towel or washcloth to expose the sticker underneath.
- Pull or scrub the sticker away. Scrape up the outer edge with your fingernail, peeling it back gradually until it’s free. A soft kitchen sponge may come in handy for breaking up the last few bits of adhesive. By this point, it will likely have been reduced to a papery goop, so you shouldn’t have too much trouble. Wipe the area clean with a towel and enjoy your new sticker-free surface!
- Eliminate any remaining patches of residue by blotting the spot with the corner of a towel soaked in oil.
- A light dusting of cornstarch or baby powder can absorb leftover oil coating the sticker surface.
How to Get Residue Off Any Surface
Does the idea of using peanut butter on your glass award make you feel queasy? Don’t worry, there are plenty of effective ways to remove stickers from various surfaces.
Each material requires a different treatment, but they’re all fairly simple to perform. Take a look to get a full breakdown of how you can remove stickers from any surface.
How to Remove Stickers from Glass
Have you ever gotten a parking notice on your car window? If so, you know how painful it can be to remove stickers from glass. Luckily, there are a few methods that make it easy.
- Method One:
- Fill your kitchen sink with hot water.
- Pour in a cup of washing soda.
- Submerge the glass in the sink and leave it to soak.
- Pull the glass out of the water, the sticker should slide right off.
- Rinse off the glass and let dry.
- Method Two:
- Soak a cotton swab with 91% rubbing alcohol, nail polish remover, or vegetable/baby oil.
- Let it sit overnight.
- Peel the sticker off the glass.
- Use a razor blade to scrape away any remaining residue.
Just like that, your glass will look shiny and brand new! Method one works best for small items like drinkware and handheld mirrors. Method two, on the other hand, is recommended for objects you can’t soak in a sink like your car windows, bathroom mirror, or windows.
How to Remove Stickers from Wood
Wood is a very natural material, so it might seem strange to think about it being covered in stickers. However, items like coasters or even your dining room table sometimes come covered with sticky adhesives.
Here’s how to remove stickers from wood:
- Soak a cloth in white vinegar and lay it over the sticker.
- Let it sit for about 5 minutes.
- Gently peel the sticker off the surface using a scraper.
- Repeat each step if it’s tough to remove.
- Wipe down the surface with wood polish.
The process may be a little time-consuming so set aside at least an hour of your time. Crank up the music, take a deep breath, and get ready to work.
How to Remove Stickers from Metal
Known for its industrial strength, it can be tough to remove stickers from metal. There are a couple of methods you can try, depending on the item.
There are two methods you can use. Here’s how to remove stickers from metal:
- Method One:
- Start by gently scratching off the adhesive with a credit card or scraper.
- Apply a small amount of WD-40 onto a cloth.
- Rub the cloth over the sticker until it peels off.
- Mix a few drips of dish soap into a bowl with warm area.
- Wash the warm area and dry.
- Method Two:
- Use a razor blade to remove as much of the sticker as possible.
- Pre-treat the sticker with a damp cloth.
- Mix together a tablespoon of coconut oil and a tablespoon of baking soda.
- Apply the mixture to the remaining adhesive.
- Use the wet cloth again to remove the rest of the sticker.
If your item proves to be tough, try using the method you didn’t use. Some of these processes require you to repeat the steps, so never give up on removing those stickers!
How to Remove Stickers from Plastic
Over 322 million tons of plastic are produced every year around the world. Many of these items are bound to be covered in pesky price tags or other stickers.
Here’s how to remove stickers from plastic:
- Fill a bowl with warm, soapy water.
- Soak a cotton swab with cooking oil and saturate the sticker.
- Let sit for about 5 minutes.
- Rinse in the bowl of water.
- Peel the sticker off the plastic.
If your item is too big to put in a bowl, don’t worry! You can still soak a washcloth in warm, soapy water, rub it across the sticker, and follow the rest of the steps in order!
How to Remove Stickers from Fabric
Did you just buy a cool new t-shirt? Before you rock that new look, make sure you remove any clingy stickers with this simple-to-follow process:
- Rub a high-quality detergent directly on the area. You can also use an adhesive stain remover.
- Wash the garment according to the tag.
- If some of the residue persists, start the process over again.
- Try using rubbing alcohol on the stain and washing again as normal.
You might be happy to know it doesn’t take a full-blown laundry day to remove that residue. It should easily come off with a little bit of detergent and rubbing alcohol for leftover stains.
How to Remove Stickers from Ceramics
The last thing you want is to get annoyed by residue every time you drink your coffee. Get those stubborn stickers removed with this easy process!
- Heat up white vinegar in the microwave.
- Submerge your item in the warm liquid or soak a cloth in the liquid and drape it over the item.
- Let it soak for 15-30 minutes.
- Remove your item and peel off one corner of the sticker.
- Use a wet sponge to scrub any remaining residue.
Go ahead and sip that coffee in peace! It doesn’t take very much time to remove stickers from your ceramics. In fact, 15 to 30 minutes ought to do the trick!
How to Remove Stickers from Cardboard
Cardboard can be a tricky material when it comes to removing stickers. It’s definitely possible though when you follow these steps!
Here’s how to remove stickers from cardboard:
- Dip cotton balls in rubbing alcohol and place them on the sticker.
- Insert the tip of a razor beneath the corner of the sticker; make sure the sticker and surrounding cardboard is still saturated.
- Carefully lift the corner of the sticker until it’s completely removed.
- Use a marker in a similar color to fill in any tears.
- Apply cardboard colored masking tape over the sticker if it appears damaged.
Let’s say your kids want to build a cardboard fort using reusable boxes. Go ahead and let them decorate the outside with fun stickers in every shape and size. You can get those off in no time!
Conclusion
Stickers are meant to make your life easier. They are used to label containers, left by previous owners on electronics, or even applied to surfaces to promote an event or business. Stickers are handy but they can become a serious pain the neck once they lose their stickiness.