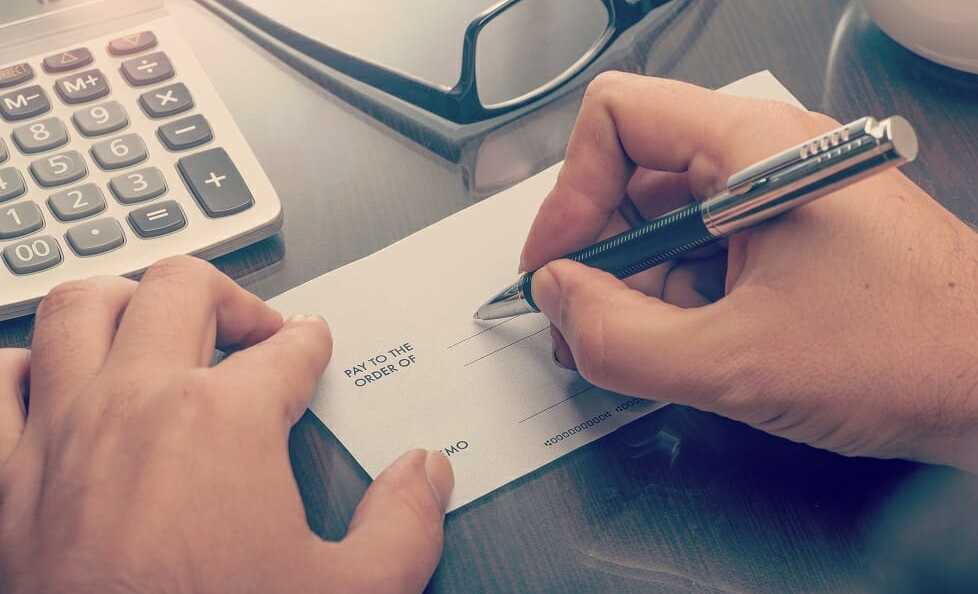
Writing a check is the most common way of making payments. This is done by writing out the amount with the cheque in front of ones self. The cheque should be signed with the signature specified in the account book before being sent to the bank for processing. This is also used by banks when they are sending money to another account.
Even though digital payments are continually gaining more market share, it’s still important to know how to write a check. This guide will show you step-by-step how to fill out a check, with easy to follow diagrams and illustrations. Many businesses, employers, and landlords still rely on checks to make payments.

Table of Contents
Steps on How to Fill Out a Check
Below are the steps you will need to take to properly fill out a check:
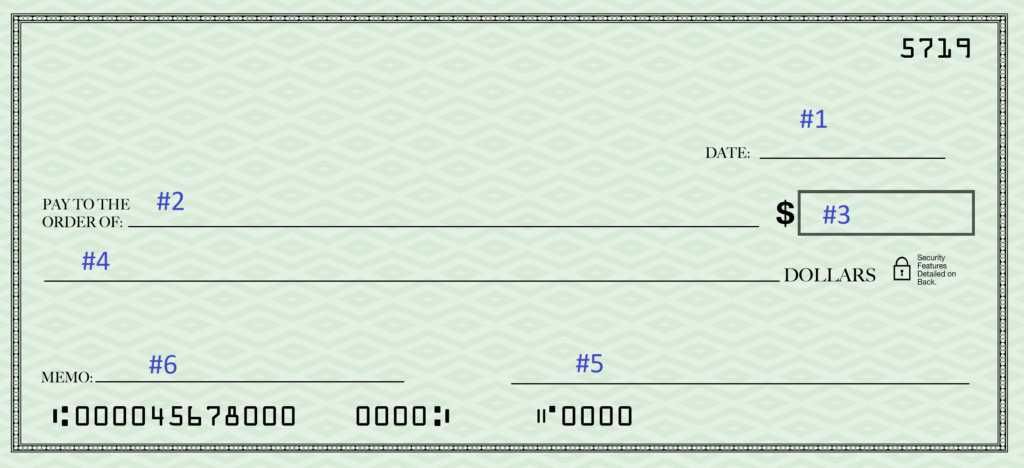
1 – Write the date in the top right corner.
2 – Add the name of the recipient next to “Pay to.”
3 – Write the value to be paid in numbers next to the “$” symbol.
4 – Write out with words (spell it out) the amount of the payment on the long line.
5 – Sign with your signature in the bottom right where it says “Per.”
6 – Optional: Add a note where it says “memo” or “re:” in the bottom left corner.

Detailed Explanation of How to Write a Check
Let’s explore each of the above steps in more detail. By the end of this guide, and after practicing a few times, you should find the process very easy and natural.
#1 Date
The first step is very easy. All checks contain a place to write the date in the top right corner, and it should be today’s date (the date at the time of signing the check). Sometimes people will post-date by writing a future date. However, this has no impact, as the check becomes legal tender as soon as it is signed.
Example: “Jan 1, 2018”
#2 Name
The next logical step is to write the name of the person receiving the payment. The name can be an individual, a business (corporation), a trust, a school, or any entity that has a bank account to deposit funds into. Make sure you spell the name correctly; although, in practice, many banks will provide some leeway on spelling, nicknames, and abbreviations.
Example: “John Doe”
#3 Value (#s)
Next, on the right side of the check will be a place to write the cash value that the recipient will receive. Use numbers and write the full amount in dollars and cents.
Example: “$23,010.52”
#4 Value (in words)
It’s usually easier to write the value in numbers first, and then in words. In this step, look at the value you wrote in numbers and spell it out in words. You usually only have to write out the dollar value – the cents can be written numerically.
Example: “Twenty-three thousand and ten dollars and 52 cents”
Alternately: “Twenty-three thousand and ten and 52/100 dollars”
#5 Signature
As the last step, add your signature after you’re sure everything is correct. Sign just as you always do on any legal document. Most checks have a line to sign on.
Example: “/SIGNATURE/”
#6 Memo
This is an optional component of how to write a check. If you wish to add some additional information such as what the payment is for, you can add it here. There is usually a little amount of extra space on the bottom left corner.
Example: “January Rent Payment”
Record the Payment in your Check Register
:max_bytes(150000):strip_icc():format(webp)/CheckToRegister-5a0c669a89eacc0037fb1ca3.png)
Make a record of every check you write in a check register. Doing so will allow you to:
- Track your spending so you don’t bounce checks.
- Know where your money goes. Your bank statement may only show a check number and amount—with no description of who you wrote the check to.
- Detect fraud and identity theft in your checking account.
You should have received a check register when you got your checkbook. If you don’t have one, It’s easy to make your own using paper or a spreadsheet.
Copy all of the essential information from your check:
- The check number
- The date that you wrote the check
- A description of the transaction or who you wrote the check to
- How much the payment was for
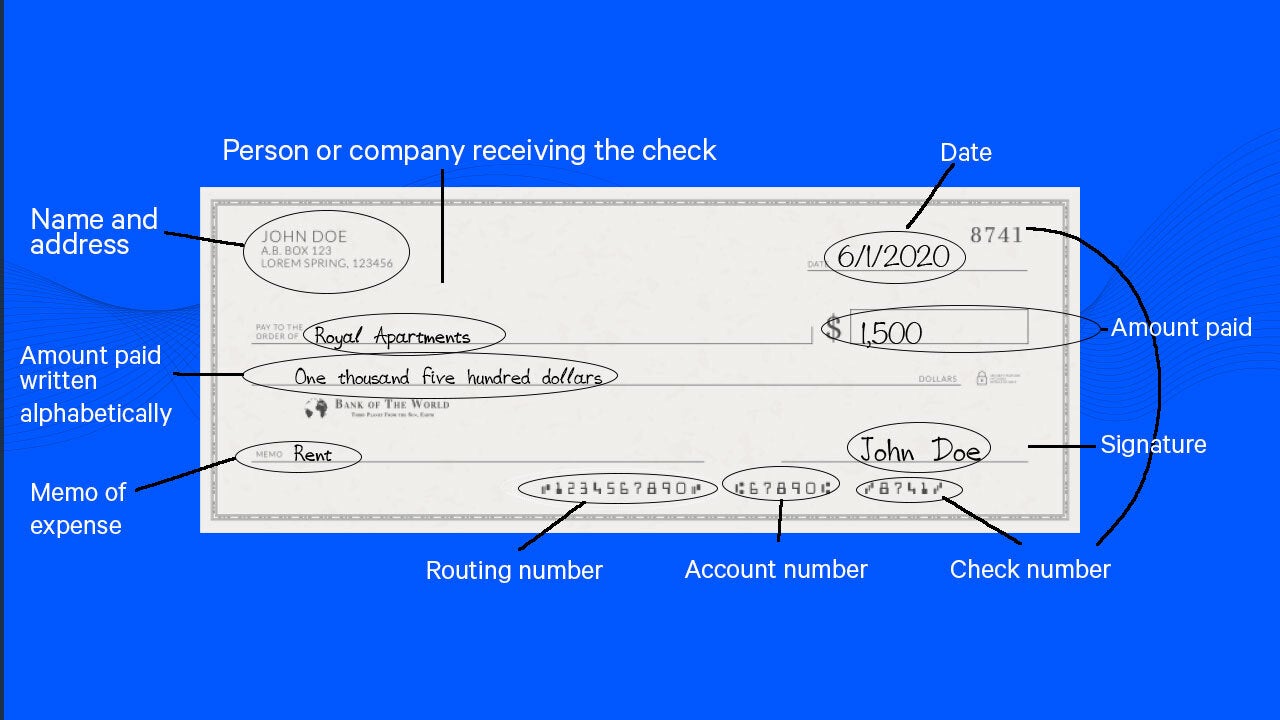
If you need more details on where to find this information, see a diagram showing the different parts of a check.
You can use your register to balance your checking account. This is the practice of double-checking every transaction in your bank account to make sure you and the bank are on the same page. You’ll know if there are mistakes in your account, and if anybody has failed to deposit a check you wrote them (thereby making you believe you have more money to spend).
Your check register can also provide an instant view of how much money you have available. Once you write a check, you should assume that the money is gone—in some cases, the funds are drawn from your account quickly because your check is converted to an electronic check.
Tips for Writing a Check
:max_bytes(150000):strip_icc():format(webp)/AlteredSampleCheck-5a0b768922fa3a0036da74fb.png)
When you write a check, make sure it gets used the way you intended—to pay the amount you expected to the person or organization you intended.
Thieves can alter checks that get lost or stolen. Checks have multiple opportunities to get lost after they leave your hands, so make it difficult for thieves to create headaches for you. Whether or not you lose money permanently, you’ll have to spend time and effort cleaning up messes after fraud.
Security Tips
Develop the habits below to decrease the chances of fraud hitting your account.
- Make it permanent: Use a pen whenever you write a check. If you use a pencil, anybody with an eraser can change the amount of your check and the name of the payee.
- No blank checks: Don’t sign a check until after you’ve filled in the name of the payee and the amount. If you’re not sure who to make the check payable or how much something costs, just bring a pen—it’s much less risky than giving somebody unlimited access to your checking account.
- Keep checks from growing: When you’re filling in the dollar amount, make sure you print the value in a way that prevents scammers from adding to it. Do this by starting at the far left edge of the space, and draw a line after the last digit. For example, if your check is for $8.15, put the “8” as far to the left as possible. Then, draw a line from the right side of the “5” to the end of the space or write the numbers so large that it’s hard to add any numbers. If you leave space, somebody can add digits, and your check might end up being $98.15 or $8,159.
- Carbon copies: If you want a paper record of every check you write, get checkbooks with carbon copies. Those checkbooks feature a thin sheet containing a copy of every check you write. As a result, you can quickly identify where your money went and exactly what you wrote on every check.
- Consistent signature: Many people don’t have a legible signature, and some even sign checks and credit card slips with humorous images. But consistently using the same signature helps you and your bank identify fraud. It’ll be easier for you to prove that you’re not responsible for charges if a signature doesn’t match.
- No “Cash”: Avoid writing a check payable to cash. This is just as risky as carrying around a signed blank check or a wad of cash.3 If you need cash, withdraw from an ATM, buy a stick of gum and get cash back using your debit card, or just get cash from a teller.
- Write fewer checks: Checks aren’t exactly risky, but there are safer ways to pay for things. When you make electronic payments, there’s no paper to get lost or stolen. Most checks get converted to an electronic payment anyway, so you’re not avoiding technology by using checks. Electronic payments are typically easier to track because they’re already in a searchable format with a timestamp and the name of the payee. Use tools like online bill payment for your recurring expenses, and use a credit or debit card for everyday spending.
Conclusion
Writing a check is probably one of the most common things that you will do in your life. I think that everybody has to write at least 4 checks per year if they are working, or really more than that if they rent, buy stuff on credit card etc. The simple reason why writing a cheque is not outdated but still remains in use is because it may be easier for you to write a check yourself, rather than paying online or using your credit card.
