Everyone wants to know how to create a youtube channel. Whether you want to monetize your channel, or just want to share videos with friends and family, youtube provides an awesome tool for doing so.
YouTube, the Google-owned video network, boasts over a billion users — almost one-third of all people on the Internet — and every day people watch hundreds of millions of hours on YouTube and generate billions of views. On mobile alone, YouTube reaches more 18-34 and 18-49 year-olds than any cable network in the U.S.
What’s amazing, though, is that only 9% of small businesses in the U.S. are actively using YouTube, and my hunch is that figure would be pretty accurate worldwide, too.
So why aren’t businesses investing in YouTube as part of our social media strategy?
In short, because video is harder to produce than a blog post or an image.
Or at least that’s the perception many of us have.
In reality, though, video is becoming much easier and cheaper to create. This means there’s a huge opportunity for your business on YouTube.
If you’ve been debating getting started on YouTube or have maybe experimented a little and not yet found your feet, this post is for you. Throughout this post we’ll dive into:
- The basics of getting your account set up
- How to create a YouTube channel
- How to create the perfect channel art
- Top tips for optimizing your channel.
Ready to start? Let’s go.
Table of Contents
How to Create a YouTube Channel Step by Step
Now that you know the basics, it’s time to dive in and start creating your own YouTube channel.
These steps will guide you through the process of bringing your channel to life. By following this guide closely, you’ll finish with a professional YouTube channel that showcases your business or organization in the best possible way.
1. Create Your Account
To get started, visit YouTube.com and log into your Google account. This first step is simple and gets you going on the right path.
To create an account, you need a functioning email address linked directly to your YouTube account. This first presents you with a decision: Is this a business YouTube account or a personal account? Your answer will dictate the type of email address you use.
Before creating your account, you should consider the purpose of your YouTube page. Reflect on the following questions:
- What type of videos do you plan to post?
- Who do you want your subscribers to be?
- How do you want to be presented?
To create a personal YouTube account, you can use your personal email. To create a company YouTube account, use your work email or a generic company email like [email protected].
Once you log in with your email after visiting YouTube.com, you’ll see that your channel is already live. Click the Customize Channel button to open up your channel dashboard and begin personalizing the channel for your business.
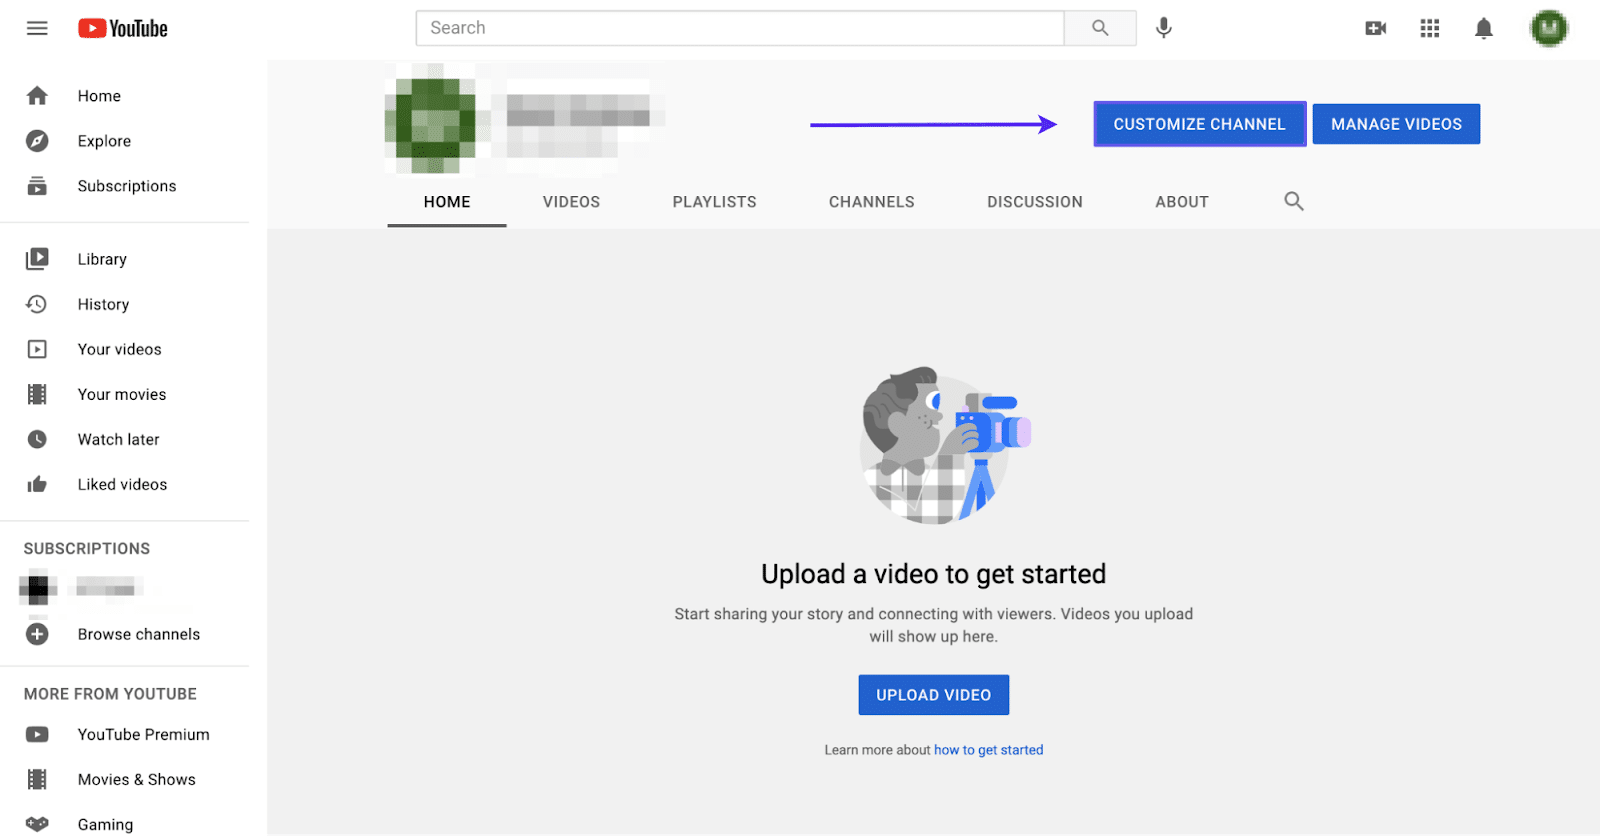
Completing this will prepare you for the next steps, which are focused on building out your channel and ensuring that it’s designed and structured to meet the needs of your account.
The channel page is where you’d go to upload videos, adjust your channel banner, add YouTube tags, and review your YouTube analytics.
2. Update Channel Name and Description
With your account created, it’s time to make your business or your personal account channel.
The first thing you need to do is update the channel name to something that reflects the subject matter of the type of content on the page.
By taking this step, you’ll ensure that the public will be able to find your channel by searching the name of your business or organization.
To start, click Basic Info on the top menu. You can now update your channel name, description, and URL.
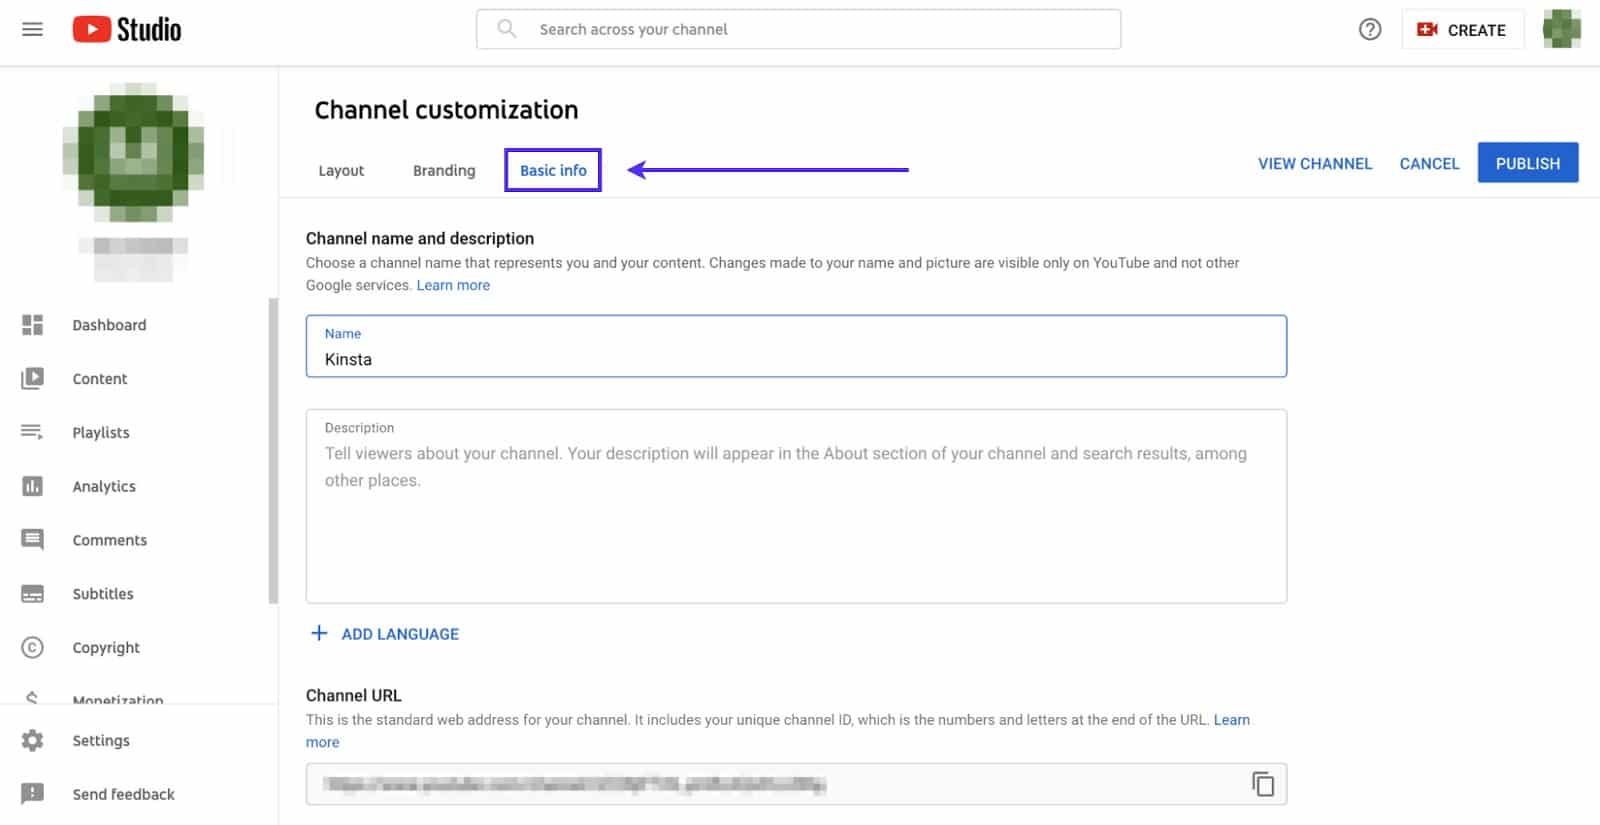
As an example, here’s the basic info we used on Kinsta’s YouTube channel: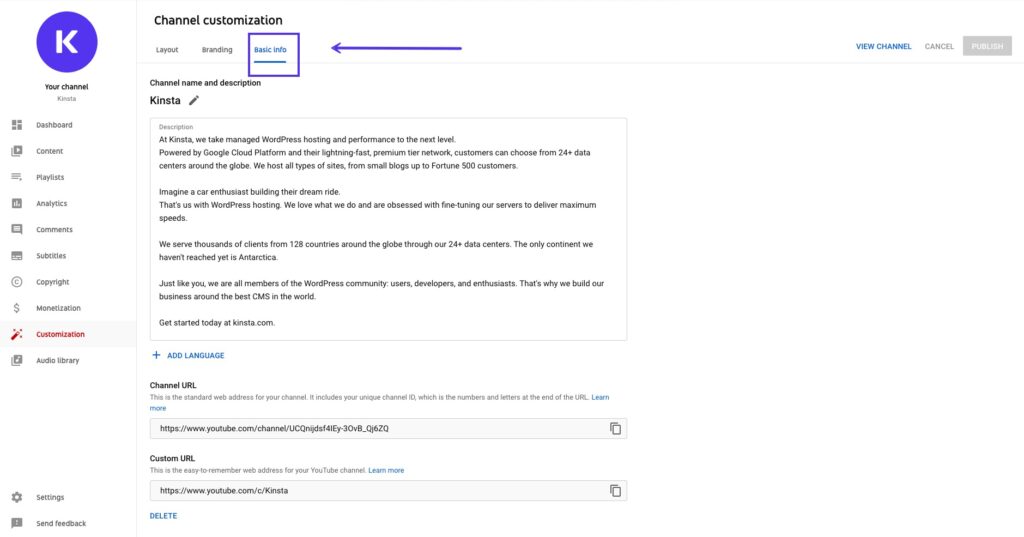
Basic information of Kinsta’s YouTube channel.
Make sure you take advantage of these three options to make your channel truly your own. Adding a title, description, and custom URL is a great way to boost your YouTube SEO.
Use relevant keywords that your audience might be searching for. It’ll help your page pop up earlier in YouTube’s search engine.
With a relevant title and description, your audience will know more about your page.
3. Upload Your Profile Photo and Logo
Next, it’s time to focus on branding your page to depict your company or personal account accurately.
You need to upload three important branding images: picture, banner image, and video watermark.
You’ll want your YouTube page to be an extension of your brand. Thus, this step is critical to ensure that all your digital properties carry a unifying message.
Channels with high-quality images as their picture, banner, and watermark look more inviting and professional for passive viewers. They might be lured in by a memorable profile picture or banner and stay to check out some of your videos.
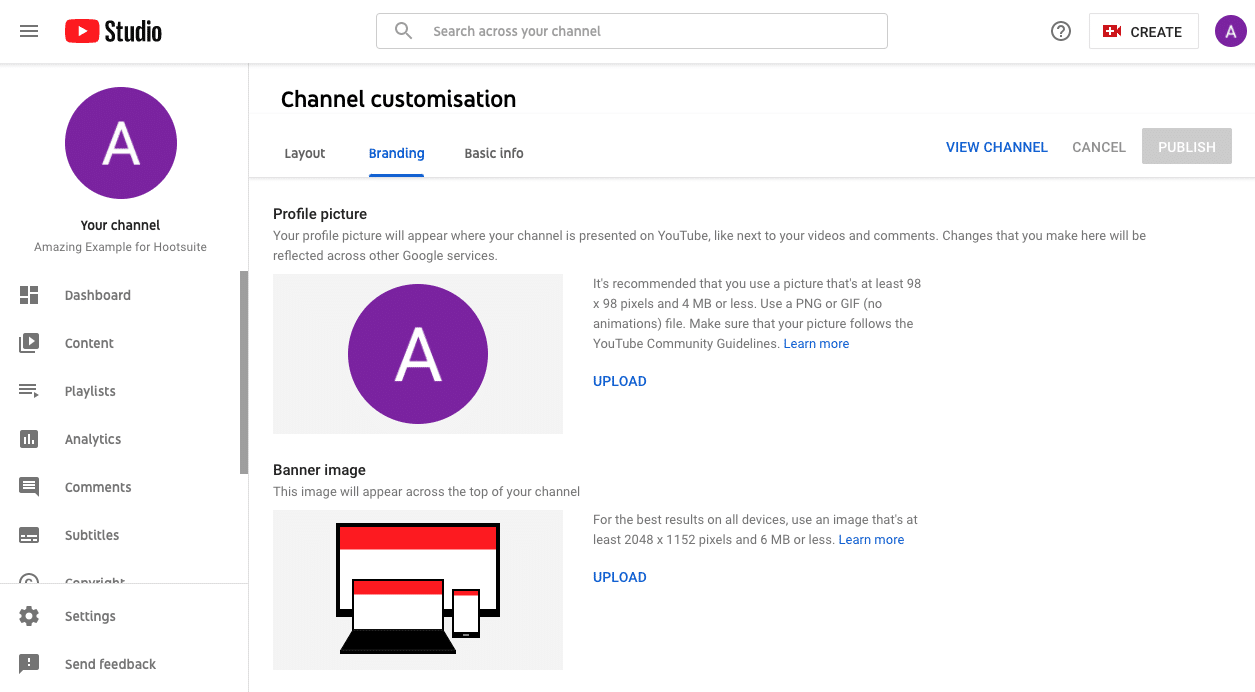
To upload these images, click the Branding tab located in the navigation bar at the top of the page.
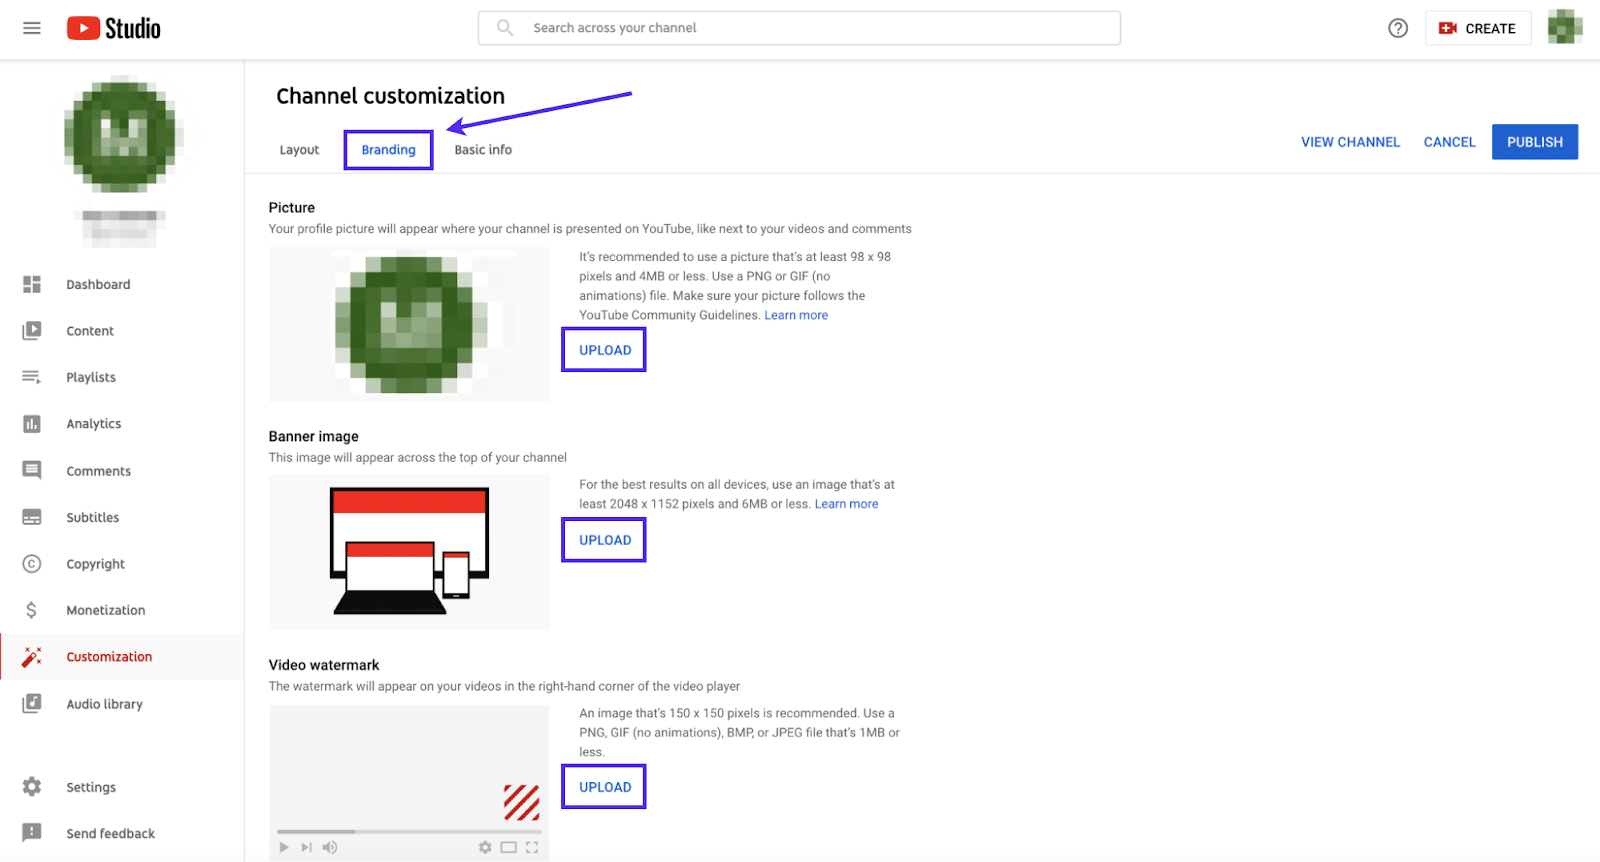
It’d look like something like below after you upload your branding assets: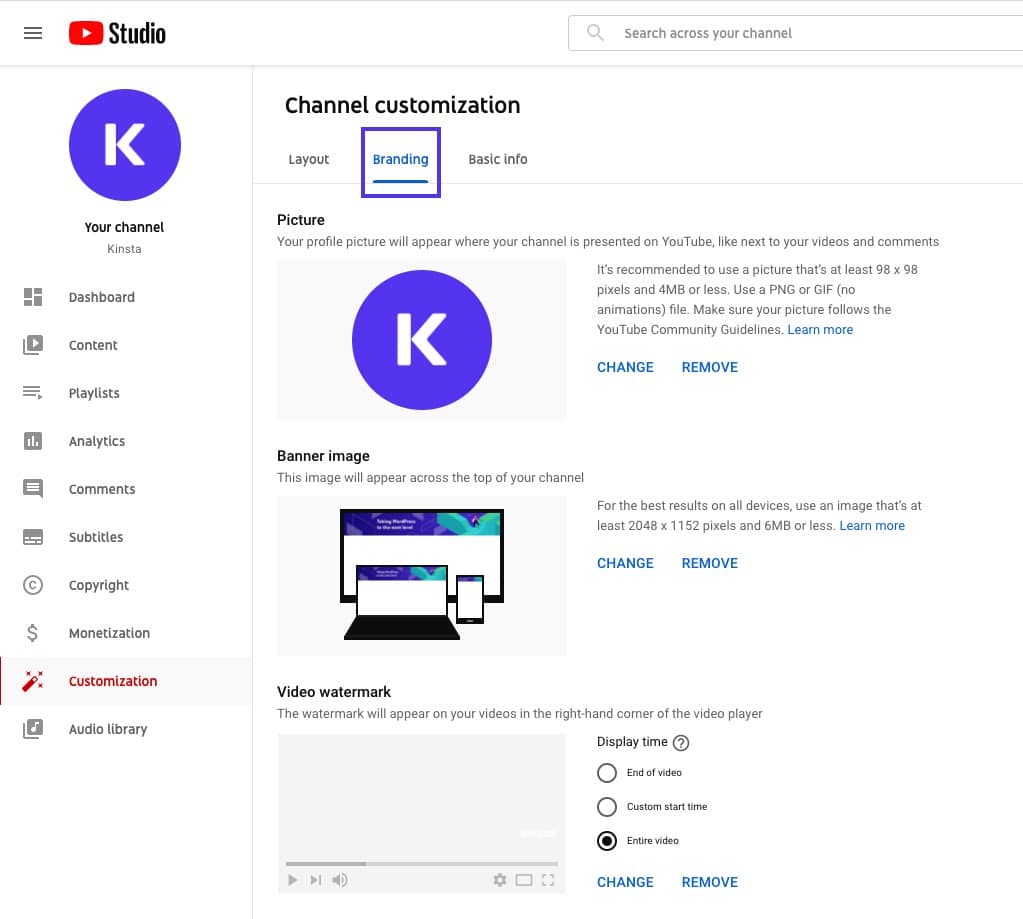
Adding branding assets to a YouTube channel.
You should upload a clear, high-quality logo of at least 98×98 pixels weighing less than 4 MB for your picture. We recommend uploading a PNG image.
How to Create a Logo for Your YouTube Channel
Consider what photo or logo will represent your channel. It’ll appear in numerous places, including every page that hosts your video and the comments you add.
To begin designing, you can use software like Adobe Photoshop or Illustrator. If you aren’t interested in designing independently, you can crowdsource the design using a service like 99designs.
How to Create YouTube Channel Art
Another important element on your YouTube channel is your banner image.
For your banner image, you should consider how you can expand your brand and build on the style of photo you used for your profile picture. You could use a photo or a custom graphic with illustrations that highlight your brand.
This graphic will appear at the top of your page, located behind your profile picture. The graphic should be at least 2048×1152 pixels and less than 6 MB.
How to Create a YouTube Channel Icon
Your icon is an element of your logo that symbolizes your brand.
You should consider what type of icon you want to use for your video watermark. A video watermark will appear in the corner of every one of your videos. Ideally, this would be different from your profile picture, but you could also use the same one.
With a watermark, your audience will be able to identify which videos are uniquely yours quickly. The watermark helps create consistency across multiple videos, tying them back to your account.
These images are critical in ensuring the success of your YouTube account. With branding across your channel, you’ll create a streaming hub that extends your brand or business.
4. Upload Your Videos
Now it’s finally time to upload your first video. It’s the “main event” when it comes to your YouTube page.
After all, your audience will only visit your page if it hosts engaging video content. Thankfully, the steps to upload a video are simple and easy to follow.
First, save your video file to an easily accessible place on your computer. It can be your Documents folder, on your Desktop, or even in your Downloads. All that matters is that you can access it in a few clicks.
Next, go back to your channel and click the Create button in the corner of your screen.
After you’ve hit the Create button, a screen will pop up, inviting you to select the file that you want to upload:
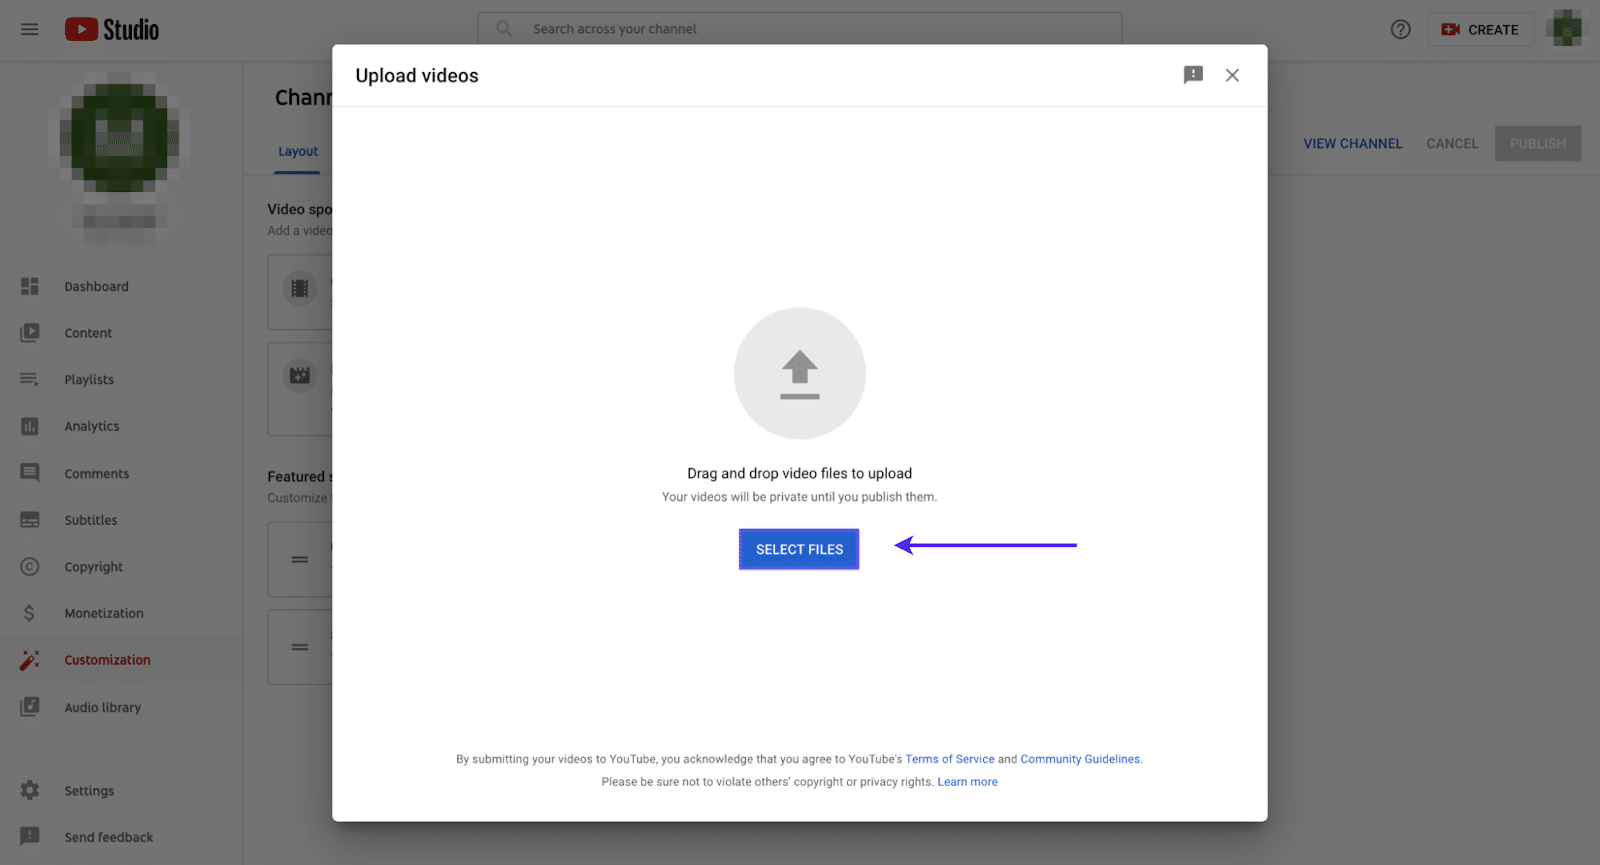
Click Select Files to locate the video file you just saved to your computer. Then YouTube will automatically begin uploading it.
The upload part of the process is simple and only takes a few minutes. However, the steps after the upload (including the optimization) are critical.
5. Optimize Your Videos
What good is it to upload your video if no one can find it?
There are billions of minutes of videos uploaded to YouTube, and you need to ensure that your content stands out and that it’s easily accessible.
Optimizing your videos is a critical step to ensure your videos are properly tagged, so they will surface when someone types a relevant keyword into YouTube’s massive search engine.
Much like how SEO practitioners spend time ranking on Google, you should devote the proper time to ensure that you rank high on YouTube.
Why?
YouTube is the second biggest search engine globally, following Google (they also own YouTube). Hence, you want to make sure you’re using the right keywords in your title, description, and tagging, or you won’t appear early enough in the listings for your target audience to find you.
Without taking this critical step, all your challenging work shooting, editing, and producing the video will be for nothing.
To begin the optimization process, move to the next phase of your upload screen.
As you continue the upload process, you’re greeted with a Details screen, inviting you to fill in the title, description, and thumbnail:
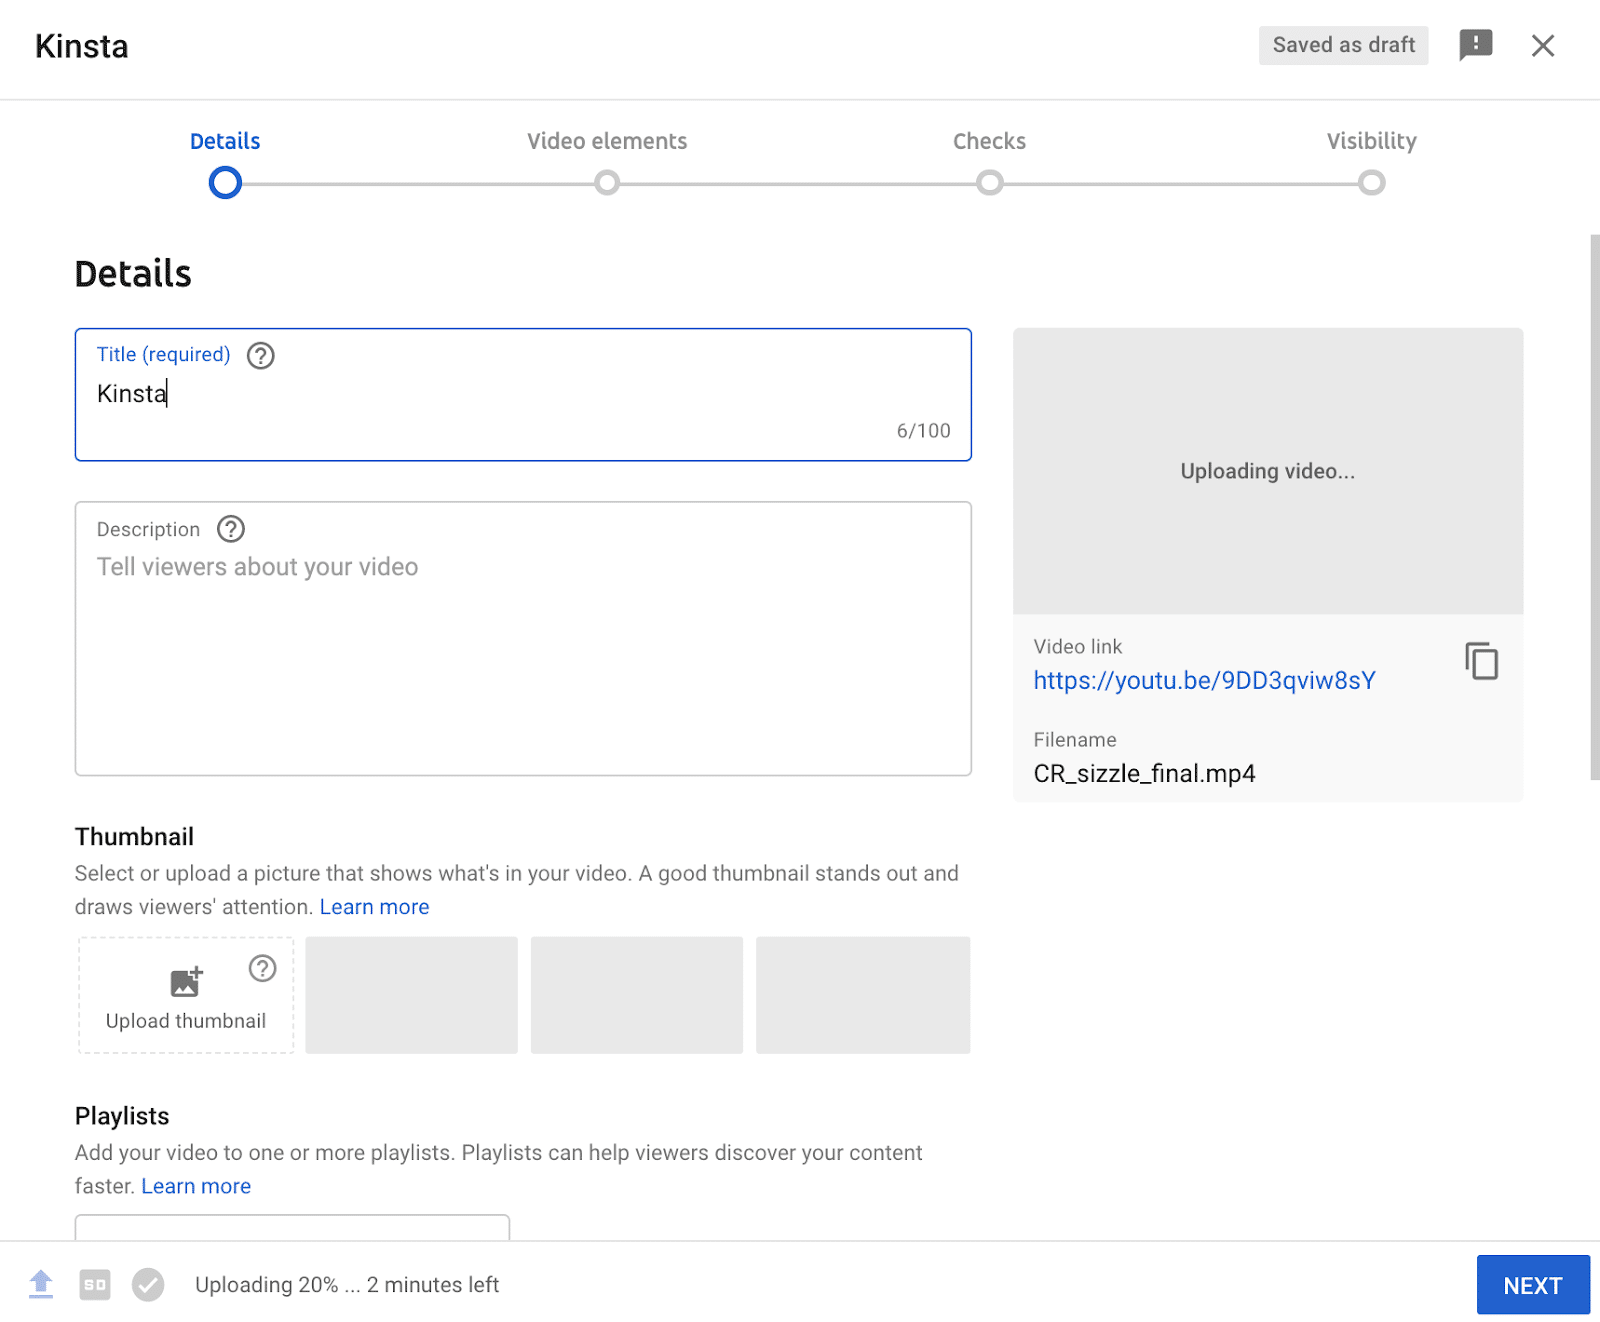
In addition, you can add various video elements, including subtitles, an end screen, and even cards with features like text:
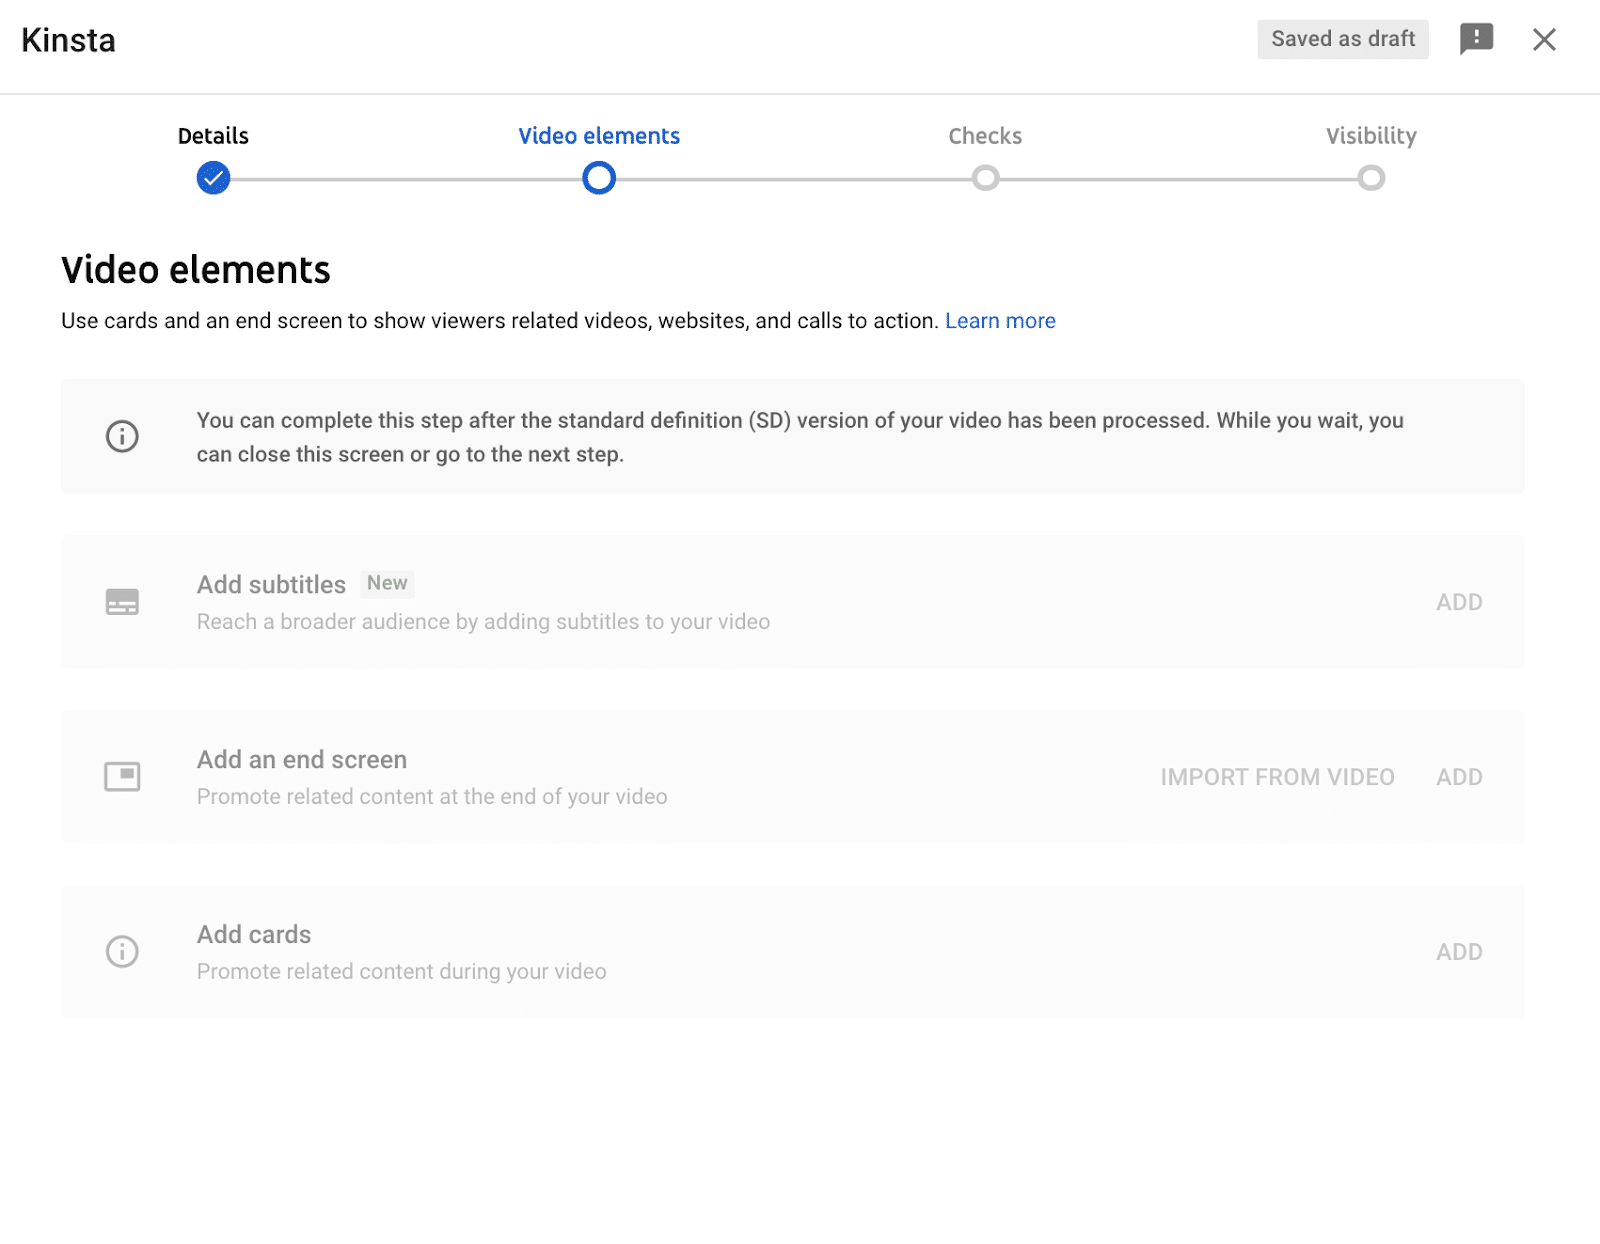
You must add the keywords that you’re targeting to your title and the description. These are the two most valuable places of real estate that you need to focus on.
However, you might be wondering: What are the right keywords to use?
Various software programs specialize in YouTube SEO that you can use. For example, VidIQ and TubeBuddy are two YouTube-focused tools that can help you determine which keywords you should be targeting for your content type. You can also use typical Ahrefs
These tools can also inform your video content strategy. You might find some keywords and tags that are useful to target and use them to inspire your next video.
6. Set Your Channel Layout
Now that you have some videos on your channel, it’s time to customize the look and feel.
You’ll have control over how people move from one video to another. You should pay attention to this because it’s essential to hook your viewers to get them to spend a bit longer on your channel.
Make your channel work for your company by personalizing your channel’s page layout.
Need a hosting solution that gives you a competitive edge? Kinsta’s got you covered with incredible speed, state-of-the-art security, and auto-scaling. Check out our plans
You have many options to customize this experience based on the type of visitor.
To get started, click the Layout tab in the menu at the top navigation bar on the Customize Channel page.
Clicking this tab will show two distinct options: video spotlight and featured sections.
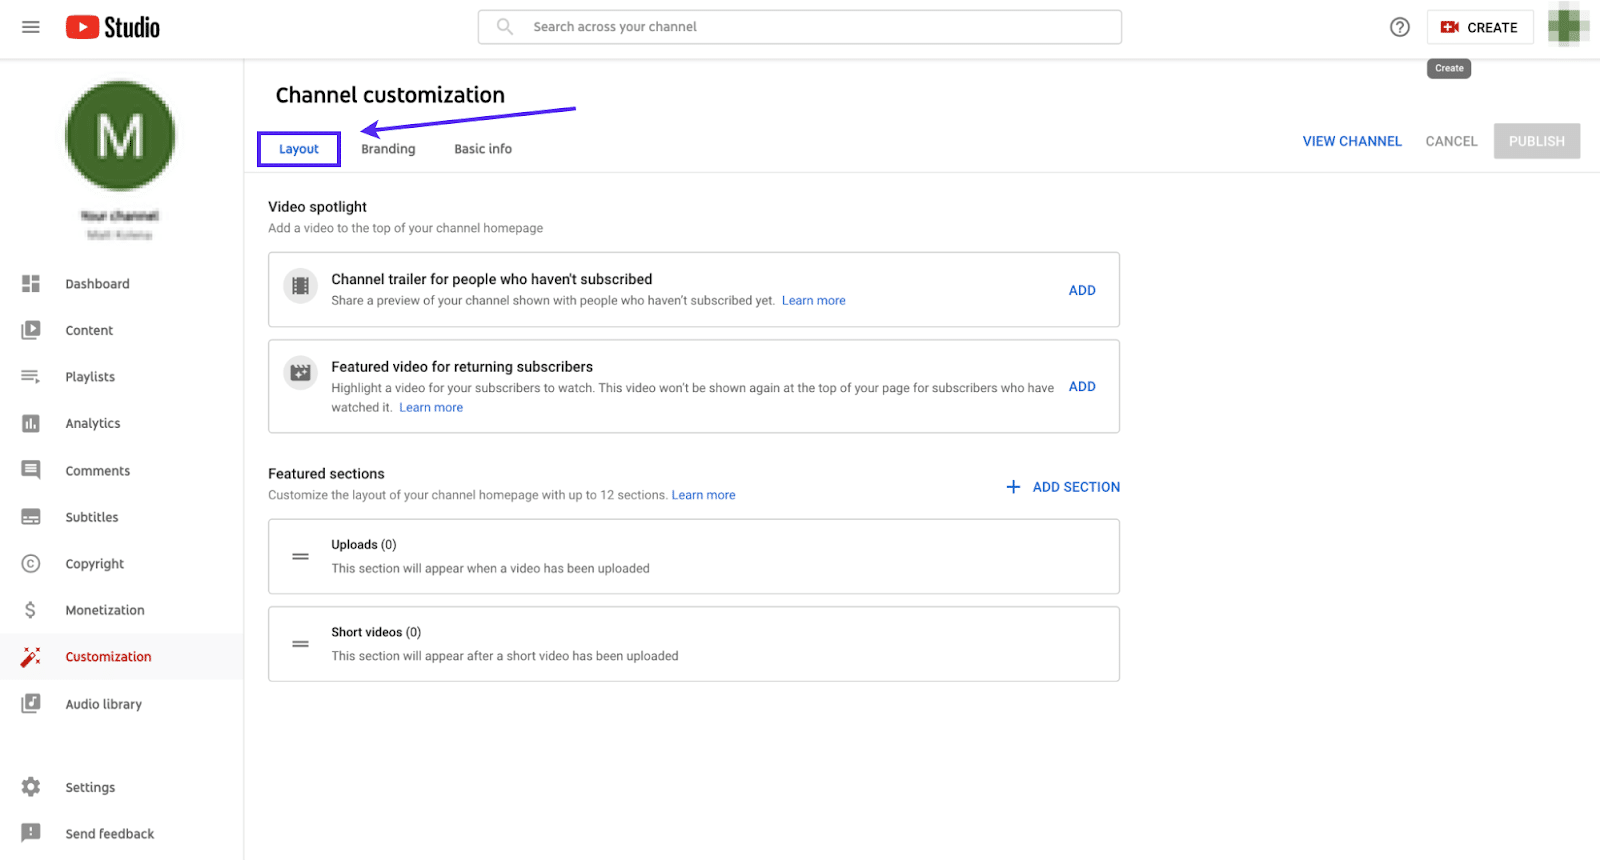
In this section, you’re able to adjust the settings of your channel to show different content based on the viewer’s status as a subscriber.
You have the option to:
- Show a channel trailer to those who haven’t subscribed
- Show a featured video for returning subscribers
Below you can see what we set up for on our YouTube channel, where we have an introductory video about Kinsta vs a video on how to grow your website traffic, which is a “hot topic” among our viewership: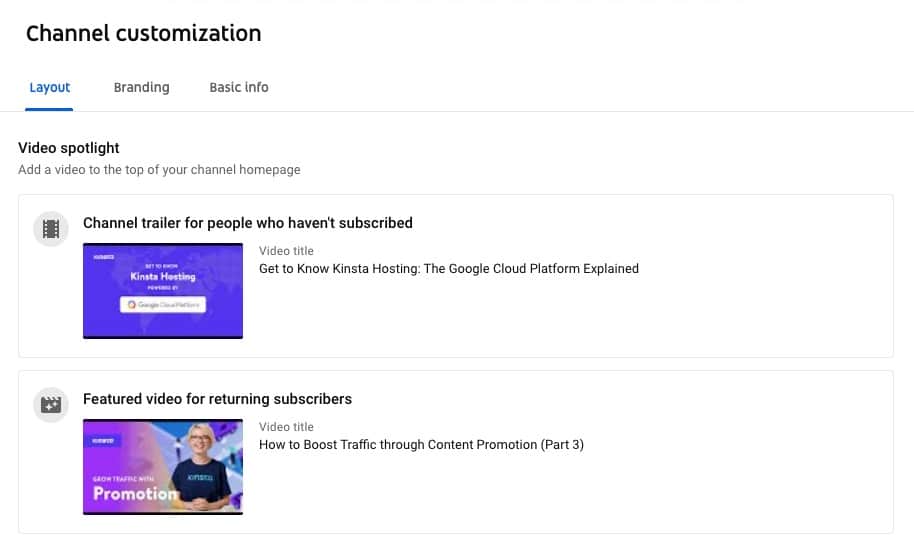
YouTube’s Video Spotlight.
This option is helpful because it lets you present new visitors with a high-level overview video about your channel to try and convince them to subscribe.
A subscriber wouldn’t need to see that since they know what your channel is already about, so you can show these visitors a featured video instead. Which video you pick to feature is up to you; it could be one of your most popular videos or simply your newest one.
Beyond this function, you can also set up featured sections on your channel homepage, as we did: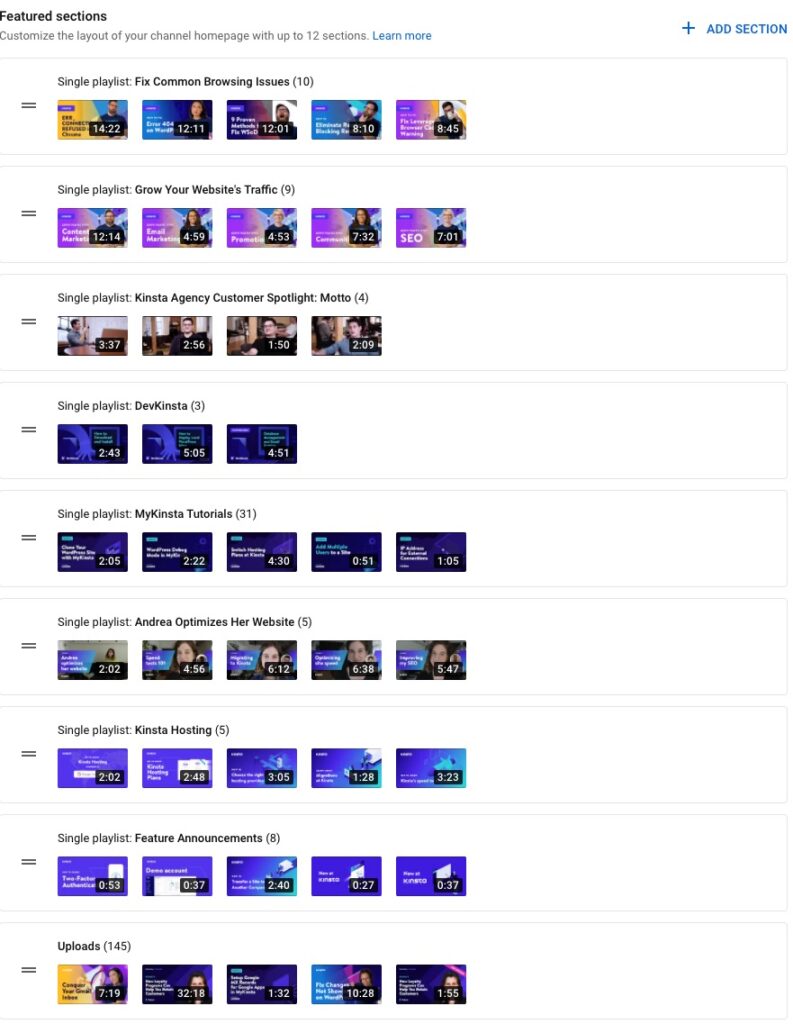
Featured sections in YouTube.
You can have up to twelve of these sections which group similar videos. These featured sections make it easier to increase your views and the watch time of your channel. By curating closely related videos, there’s a high chance your viewers will keep browsing (and watching) around!
The sections can also make it easier for viewers to find videos once they land on your channel. However, this is just grouping them. To facilitate continuous playback, consider creating a playlist.
7. Create a Playlist
A playlist is a great way to compile similar videos and encourage continuous watching from your audience. You can group your playlists by a similar topic and feature them on your channel’s homepage.
Playlists engage your fans and customers on a deeper level, increasing their time on your channel watching your content. If your viewers spend more time on your page, they will develop a deeper understanding of your brand.
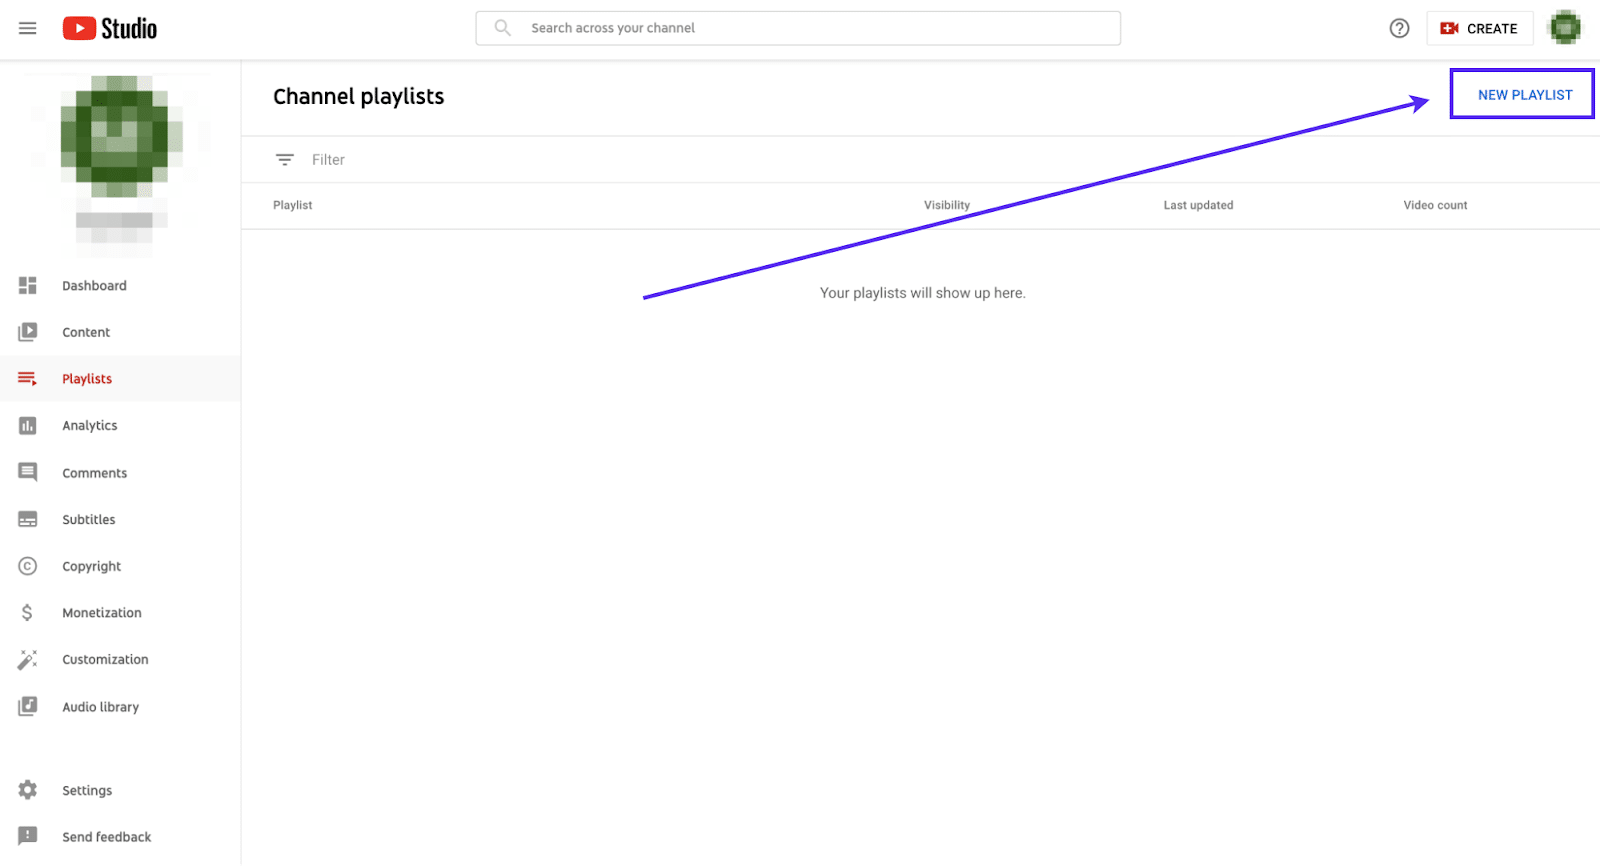
To begin, click the Playlists button in the left-hand menu. In the top-right corner, you’ll now see a New Playlist button.
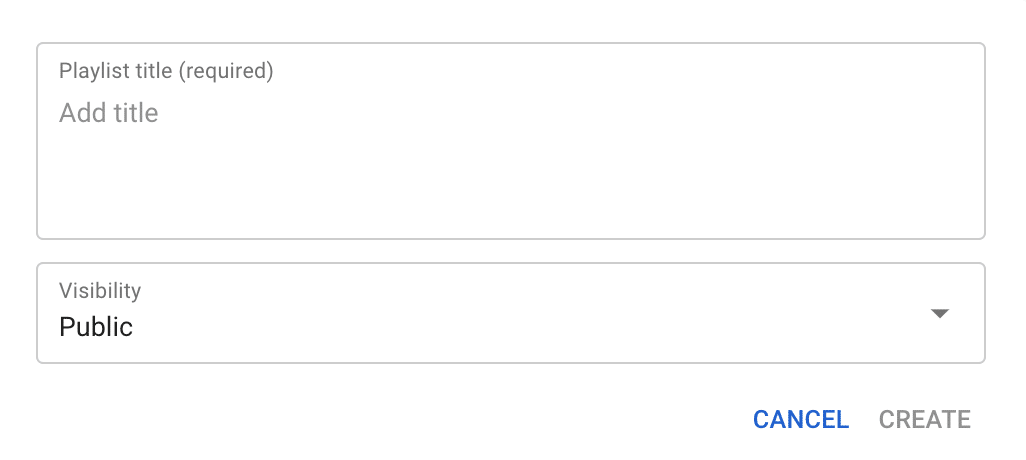
After clicking there, you can name your new playlist and set the visibility level of the playlist:
Now that the playlist is complete, you’re ready to start adding videos to it.
By clicking the Content button on the left-hand side, you’ll be able to select the playlist you just created and add videos directly to it. It’s that simple!
So many people use playlists to find related content that interests them. By building engaging playlists, you’ll make your channel more noteworthy and entice viewers with an array of exciting content.
You could create playlists for topics your viewers are interested in (as I mentioned early). Still, you could also think of creating playlists to group all episodes of your podcast, your latest releases and project updates, tutorials on how to use your product, and so on.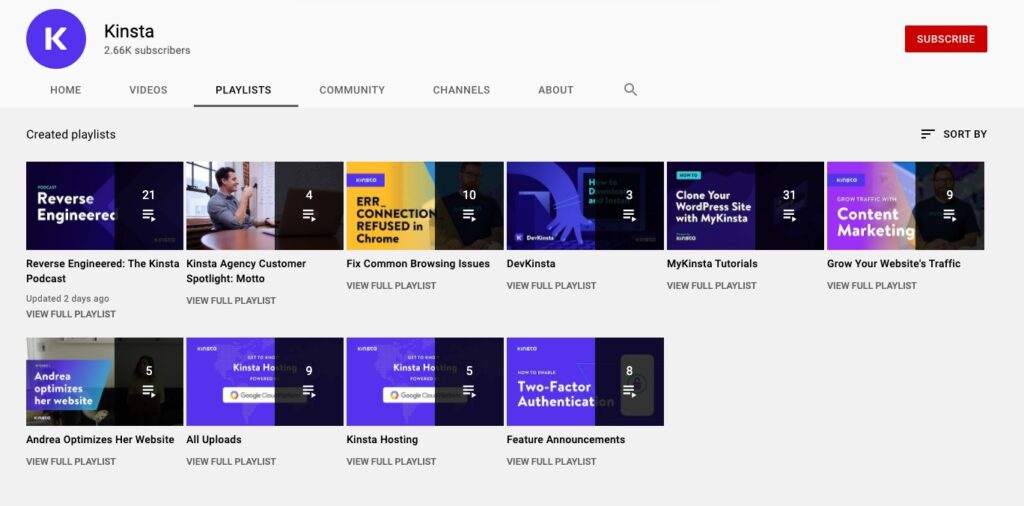
Kinsta’s YouTube playlists.
Playlists might seem tedious, but they allow you complete freedom in creating them. Plus, they offer an additional way to showcase your videos.
Conclusion
Marketers have been using YouTube as a marketing tool for several years now. It is a great platform to build your brand, create awareness and sell products. In this post you will learn how to set up a Youtube channel from scratch – including the best hardware and software to use – as well as how to promote it effectively.
